Breakroom Start Here UI
Overview
Pictured: The Start Here panel.
The Breakroom Start Here UI (sometimes referred to as the Start Here panel) forms an integral part of the Breakroom conference system, and comes pre-equipped in most Breakroom Region templates. Depending on the setup of the Region, you may be able to:
- Teleport to key areas of interest
- Take an animated camera tour of the Region
- Select an avatar from the default avatar collection
- Teleport to a specialized triage location for technical support
In your Inventory, you'll see the Breakroom Start Here UI object represented by this icon: ![]()
In order for this Toolkit object to work, you must have the Breakroom conference core components installed in the same Region. If you have uploaded a custom Region, you will need to install these components manually prior to setting up this object.
Deleting or deactivating the Start Here UI
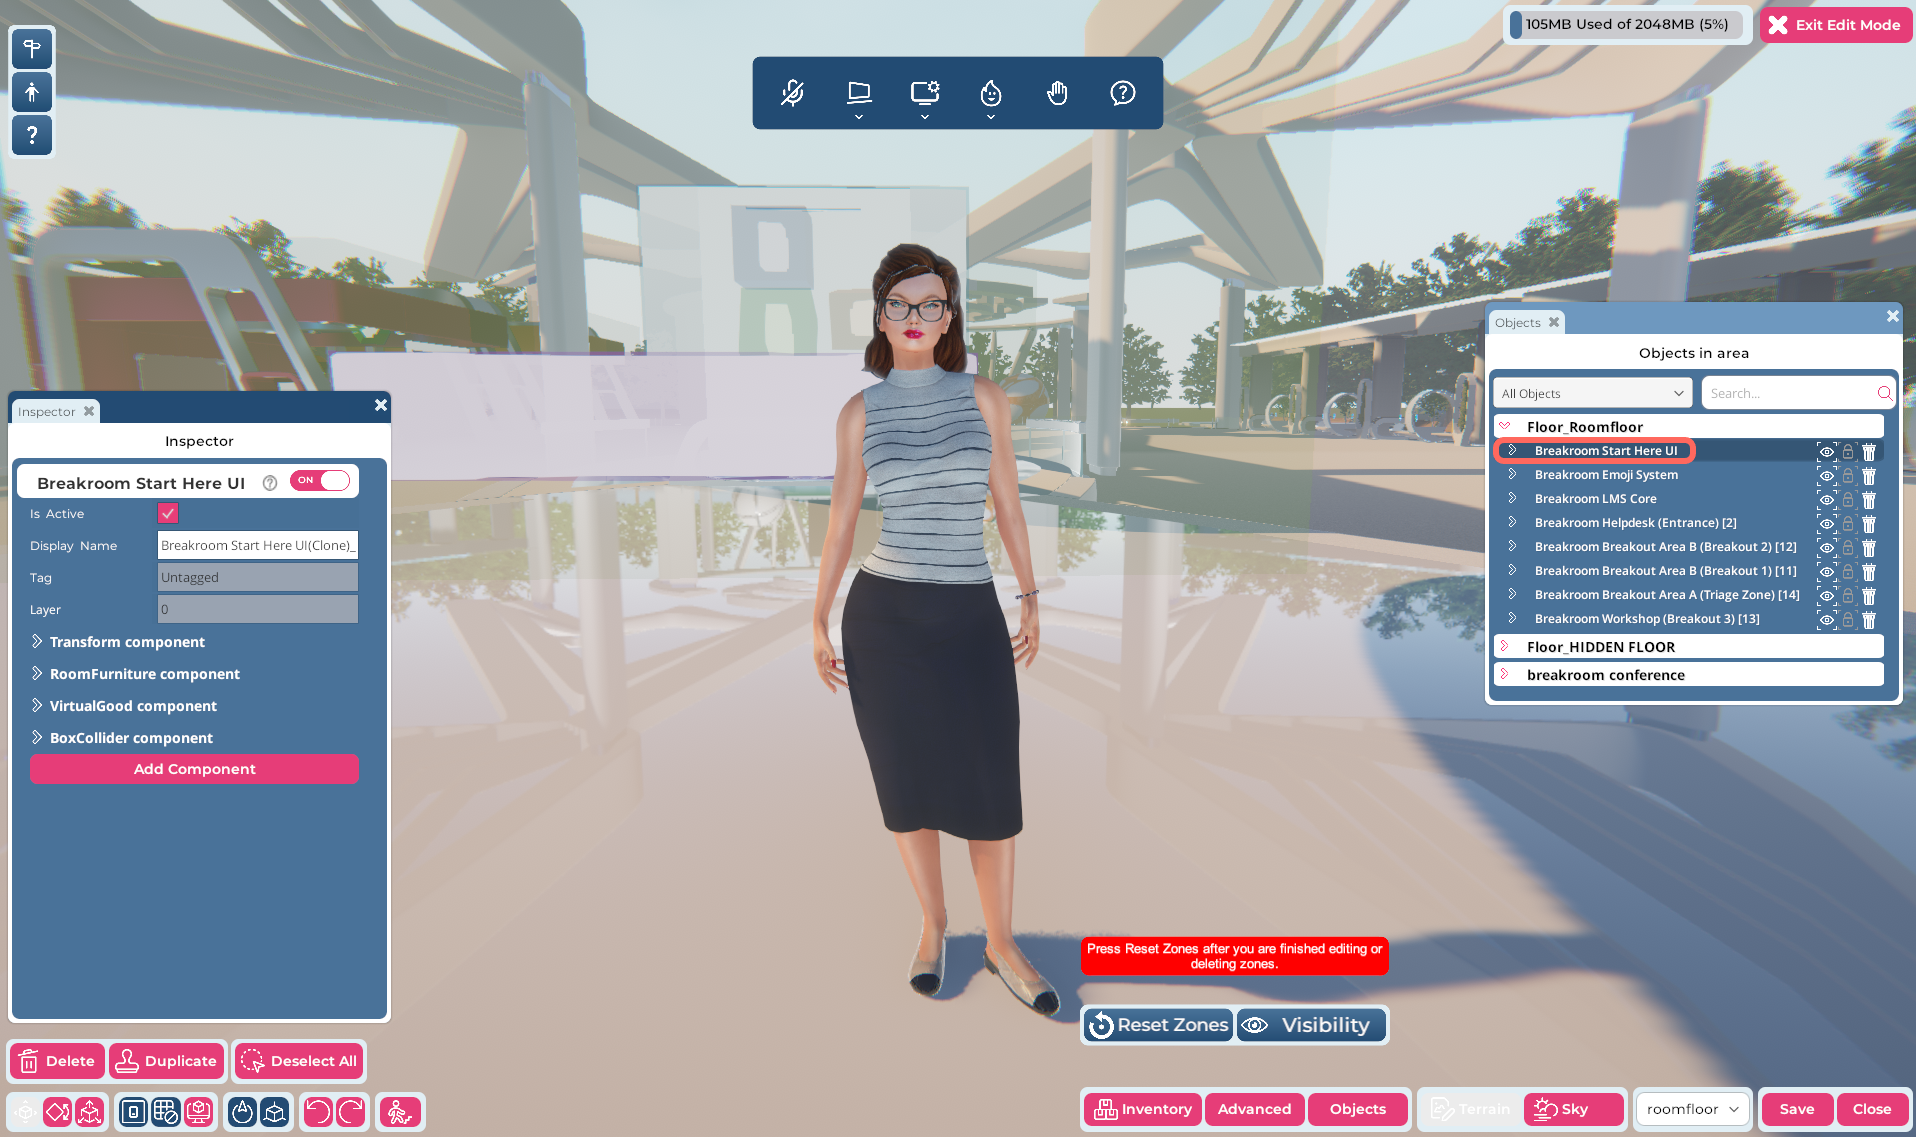
Pictured: The Region Editor, with the location of the Start Here UI highlighted in the Objects window.
When hosting events on Breakroom, there may be occasions when you don't want the Start Here UI to appear (for example, if you're hosting an event for seasoned Breakroom users who won't require access to default avatars). To delete the Start Here UI from a Region that currently contains it, or to temporarily disable the Start Here UI without deleting it, follow these steps.
- Open the Region Editor by clicking the Edit Region button in the top toolbar. Then click the Objects button.
- In the Objects window, expand the room floor by clicking the > arrow located to the left of its name. Locate the Breakroom Start Here UI object. (Alternatively, you can search for "Start Here UI" in the search field.)
- To delete the Start Here UI: To the right of the Breakroom Start Here UI, you'll see a trash can icon. Click this icon to delete the object from the Region.
- To temporarily disable the Start Here UI: To the right of the Breakroom Start Here UI, you'll see an eye icon. Click this icon to temporarily disable or "mute" the panel.
- Click the Save button in the bottom right corner to save your work. Click the Close button to exit the Region Editor.
Installing or reactivating the Start Here UI
To install the Breakroom Start Here UI in a region, or to reactivate it, follow the steps below.
- Open the Region Editor by clicking the Edit Region button in the top toolbar.
- To install the UI panel:
- Open your Inventory by clicking on the Inventory button at the bottom of the screen.
- Within your Inventory, locate the starter pack item called Breakroom Start Here UI. It's represented by this icon:

- Click on the object icon. Then click on a location in your Region to place the Start Here UI down. (Note: This object is invisible—you can place it anywhere. However, we encourage you to locate it at 0,0,0 in your region by manually editing the Transform component.)
- To reactivate a disabled UI panel: In the Objects window, expand the room floor. Locate the Breakroom Start Here UI object. Click the eye icon associated with the object.
- Click the Save button in the bottom right corner to save your work. Click the Close button to exit the Region Editor.
Once these steps are completed, the Breakroom Start Here UI will appear on your screen.