Snapshots
Overview
Breakroom's Snapshot feature is a convenient tool that allows you to take and share virtual photographs. Whether you need to capture a moment for use in your company's marketing materials or want to post a selfie of your avatar on social media, you can do so with a few clicks.
This section is designed to serve as a basic overview of the Snapshot tool. You'll learn how to take, edit, and share photos, as well as how to collect and display your favorite images in your user profile.
World Owners and World Administrators can enable and disable parts of the UI via the Dashboard. You may not have access to the Snapshot feature and other tools described in this section.
Taking photos
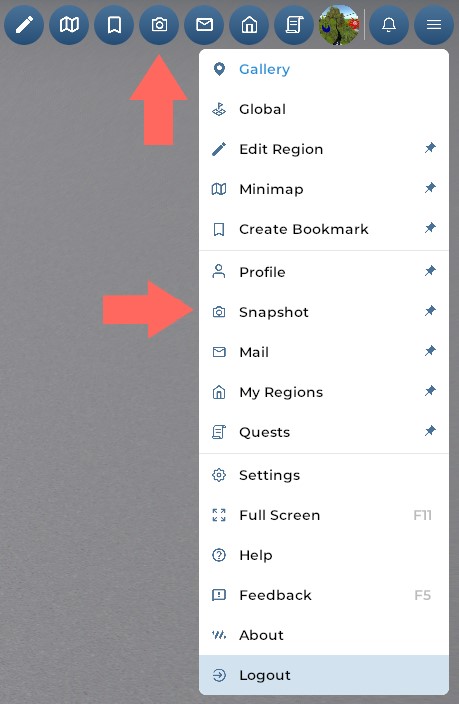
Highlighted: The location of both Snapshot buttons.
You can open the Snapshot feature by clicking the Snapshot button in the top toolbar, or by pressing Ctrl + ` on your Windows keyboard or Ctrl + \ on your Mac keyboard.
When the Snapshot feature is open, it will replace much of the existing UI on your screen. You will see the main Snapshot toolbar centered at the bottom of your screen, and an Exit Photo button appear in the top right corner.
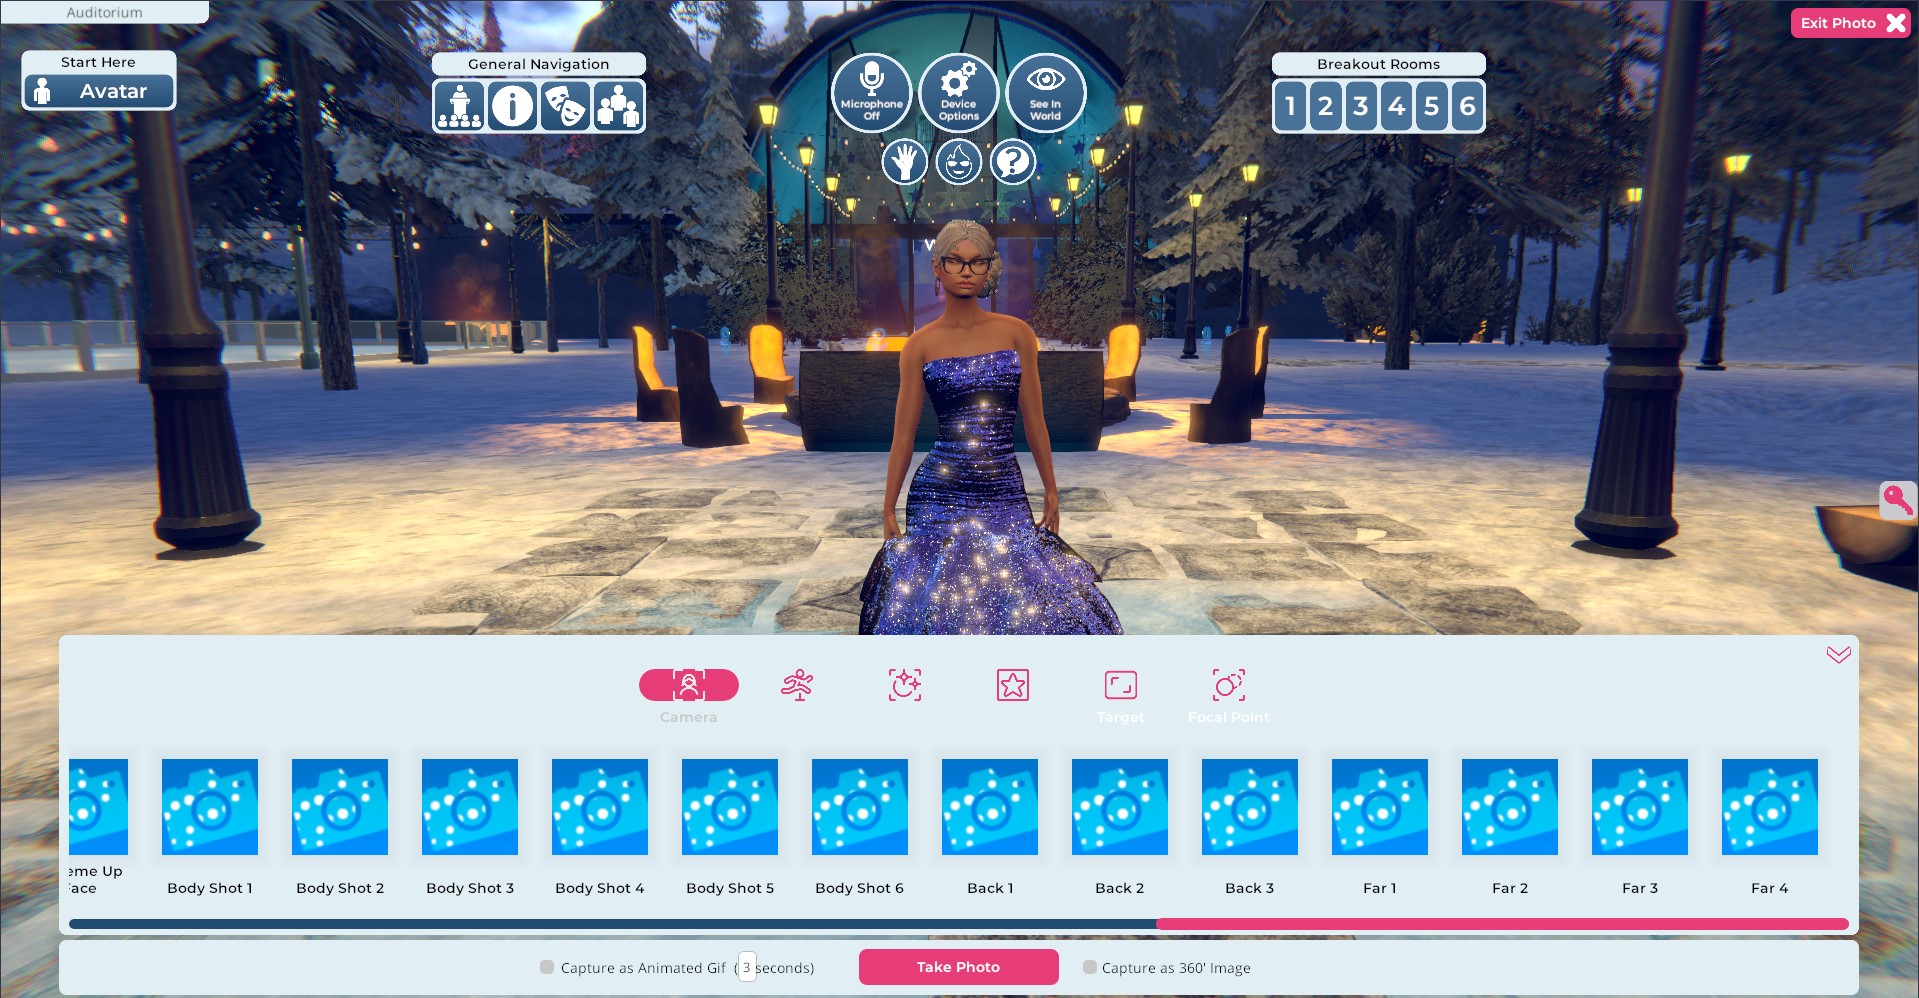
Pictured: An example of the Breakroom UI with the Snapshot feature enabled. Please note that any visible UI elements will not be present in your final shot.
The Snapshot toolbar allows you to focus your camera, pose your avatar, and edit and embellish the photo itself. In the tables below, we'll locate and review each of these functions.
Snapshot UI overview

Pictured: The Snapshot tabs.
The six main tabs located along the top of the Snapshot toolbar point to various options. Most of these buttons will change the contents of the horizontal scrolling menu when clicked.
Be sure to scroll through all of the options to see what's available—as with many things in Breakroom, the best way to learn is through experimentation. You can always undo a staged photo by clicking the Cancel or Exit Photo buttons in the top right corner of the screen.
| Button or Tab | Function |
|---|---|
| Camera | Lets you select from a variety of photo angles. |
| Poses | Opens a menu of static poses that you can use to position your avatar. |
| Filters | Applies a photo filter to your chosen shot. |
| Overlays | Applies a variety of fun foregrounds and backgrounds to your chosen shot. |
| Target | Lets you click on an avatar or specific piece of scenery and zoom in on it. |
| Focal Point | Lets you click on a location to manually change the focal point of your shot. |

Pictured: The options located at the bottom of the Snapshot toolbar.
Meanwhile, the options located at the bottom of the Snapshot toolbar allow you to fine-tune and finalize your perfect shot.
| Button or Check Option | Function |
|---|---|
| Capture as animated GIF | Allows you to save your image as an animated GIF instead of a static photo. Once this option is checked, you can customize the GIF length by entering a number in the Seconds field. |
| Capture as 360° image | Allows you to save your chosen shot as a wide-angle 360° image. |
| Take Photo | Finalizes your shot and takes you to the save menu. |
Saving and sharing your photos
Once you've taken the perfect photo and chosen the format you want to save it in, it's time to decide where you want to save it. After clicking the Take Photo button, you will progress to the final save menu.
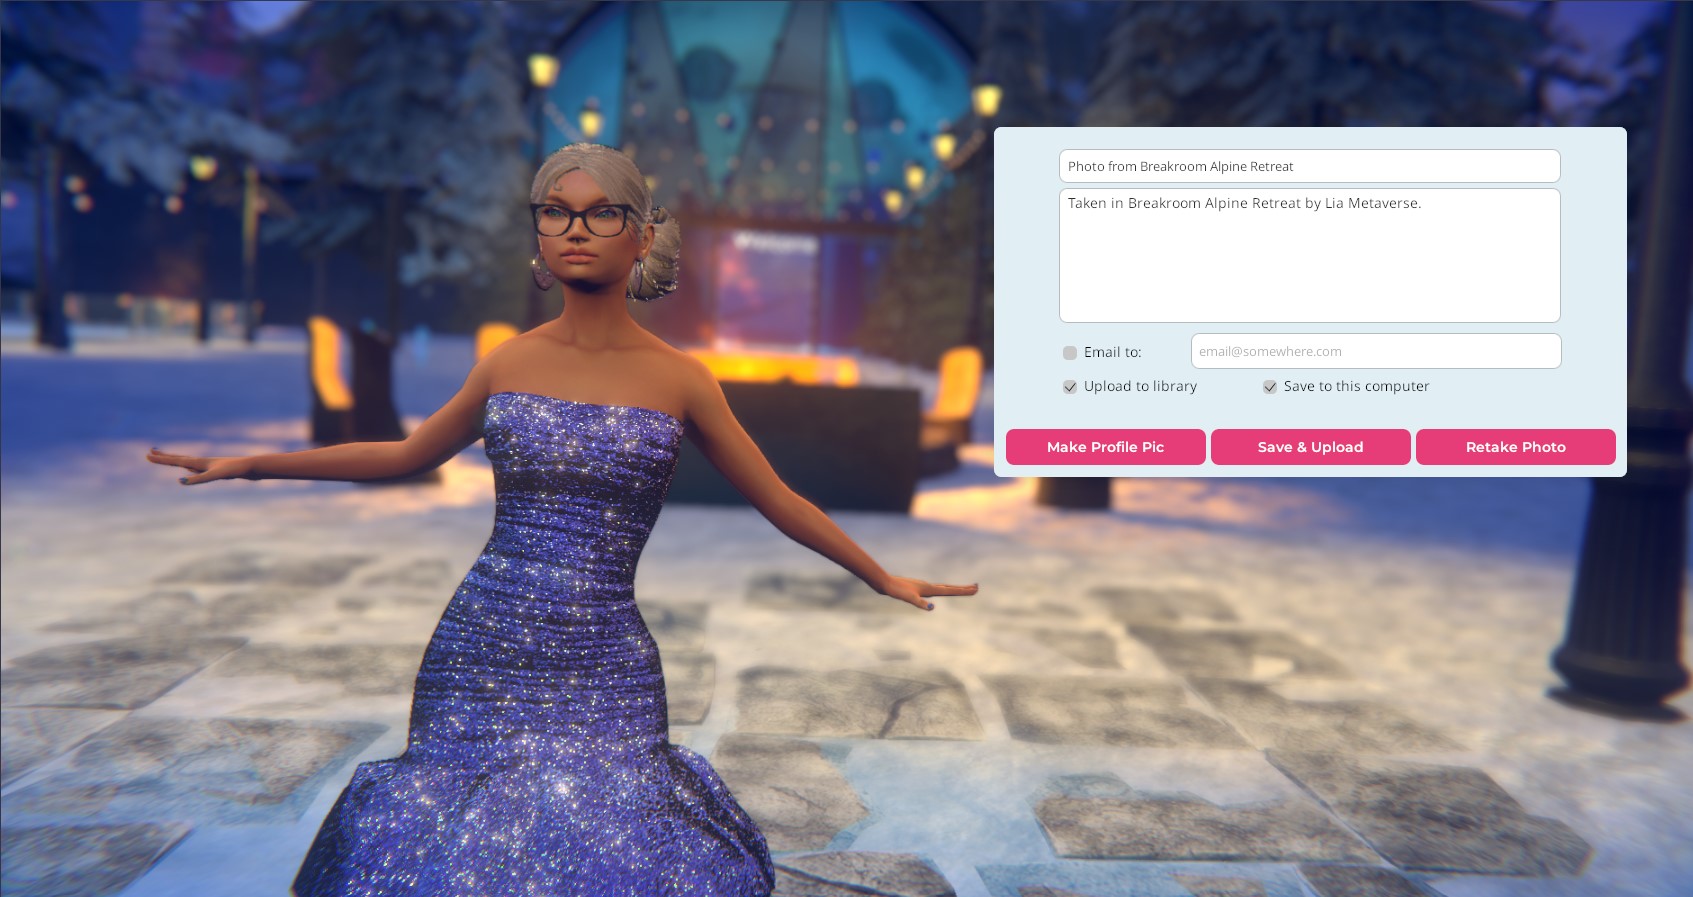
Pictured: A snapshot and the final save menu.
In the final save menu, you can enter a name and description for your photo before deciding how you would like to distribute it. You can select as many options as you like.
- Check the "Email to" box and enter a valid email address to send a copy of the photo to yourself or someone else.
- Check the "Upload to library" box to add the photo to your user profile photo library.
- Check the "Save to this computer" box to save a copy to your local hard drive.
Click the Upload/Save button after you've made your choices. You can also click the Make Profile Pic button, which will showcase your photo in the top header of your user profile. The Retake Photo button lets you exit the save menu and start fresh.
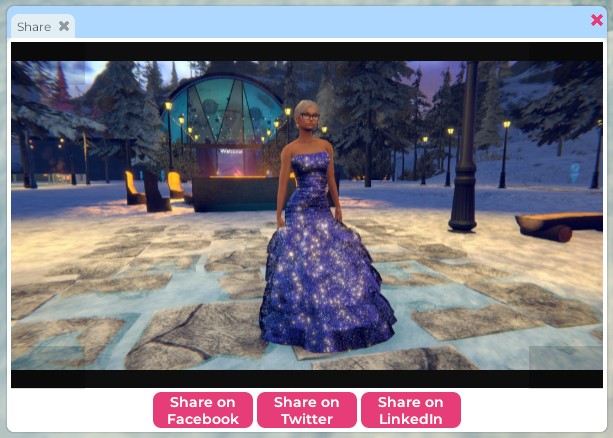
Pictured: The Snapshot social media options.
After you've saved your photo, you'll be given the option to share it on social media. Click on the relevant button to post your photo on Facebook, X, or LinkedIn.
Managing your photo library
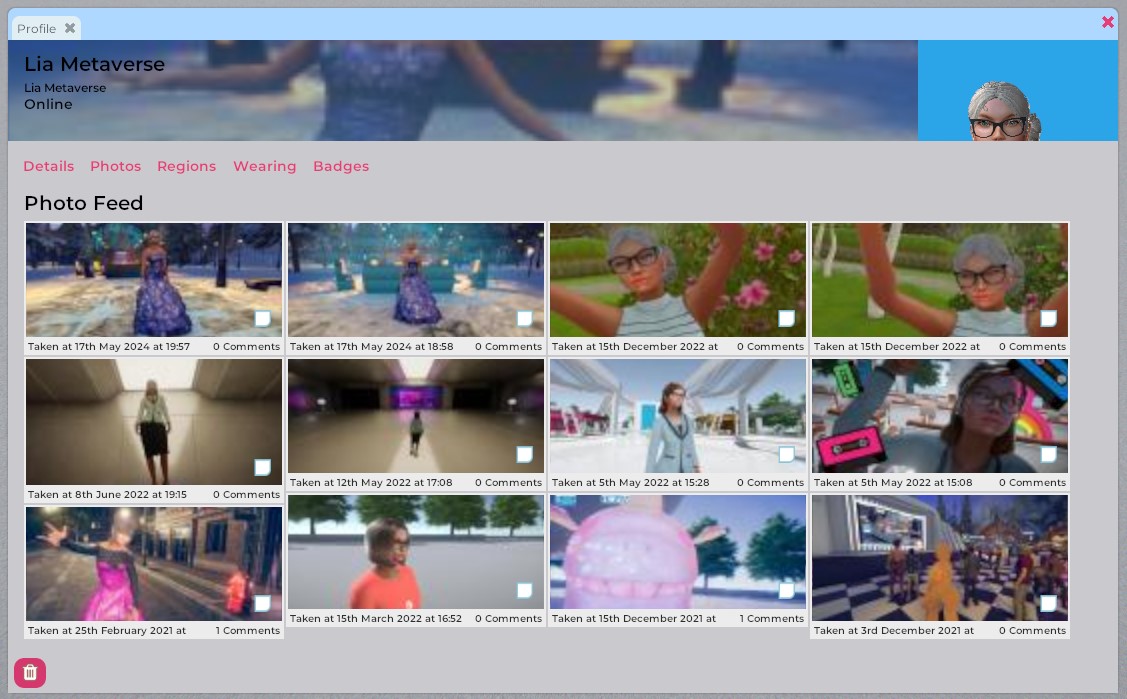
Pictured: An example of a user profile photo library.
If you choose to upload a snapshot to your photo library, it will appear under the Photos tab in your user profile. This tab and any photos posted on it are visible to the general public. Other users can access your profile, click on your photos to access a higher resolution version, and leave comments.
To see and manage your photo comments, follow these steps.
- Click the hamburger menu in the top toolbar and then click Profile. (Or click the on-screen profile icon if you have it pinned.) This will open your own user profile.
- In your user profile, click on the Photos tab. Locate and click on the relevant photo in your gallery.
- Check the Comments box in the bottom right corner of the enlarged photo to display comments.
- Click the trash can icon next to any user comment you want to delete.
- Click the reply button next to any user comment you want to answer.
To delete a photo from your library entirely, click on the photo. Then click the trash can button in the bottom left corner.
If you want to delete multiple photos at once, you can check the box inside each photo in your gallery before clicking the trash can button.
If you need to report an abusive comment, please do so before deleting the comment, as it will help to have a screenshot. You can learn more about filing abuse reports in our Getting Started section.