Purchasing and managing World Credits
Overview
When users log in through your dedicated Breakroom desktop app, there are no additional access fees above the cost of their seat. World Stream access, on the other hand, must be purchased on a per user/per time basis using a digital currency known as World Credits.
World Owners and World Administrators can purchase, track, and manage World Credits using the Dashboard. Unused World Credits never expire, even if your Breakroom subscription lapses.
Only World Owners and World Administrators can access the Dashboard.
Purchasing World Credits
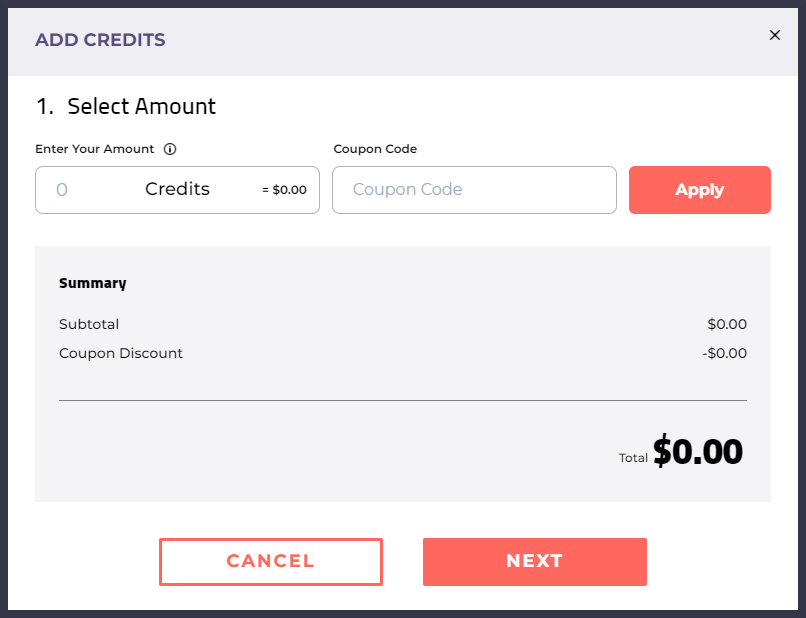
Pictured: The Add Credits panel.
To purchase World Credits, follow these steps.
- Navigate to your Dashboard.
- Click the Add Credits button located in the site header.
- In the pop-up that appears, enter the number of World Credits you would like to purchase. Please note that World Credits must be purchased in increments of 1000 Credits.
- Click the Next button, and complete your payment information.
- When you are satisfied, click the Confirm button to finalize your purchase.
Tracking your World Credits
World Credit Balance widget
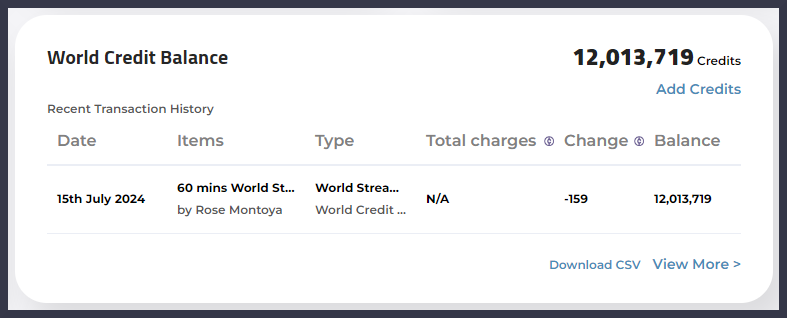
The World Credit Balance widget on the Dashboard landing page allows you to quickly check your World Credit balance and most recent account activity. If you need additional World Credits fast, the Add Credits link is also available.
World Credits tab
Alternatively, you can access a detailed breakdown of your World Credit purchases, refunds, and analytics by clicking the World Credits tab on your Dashboard.
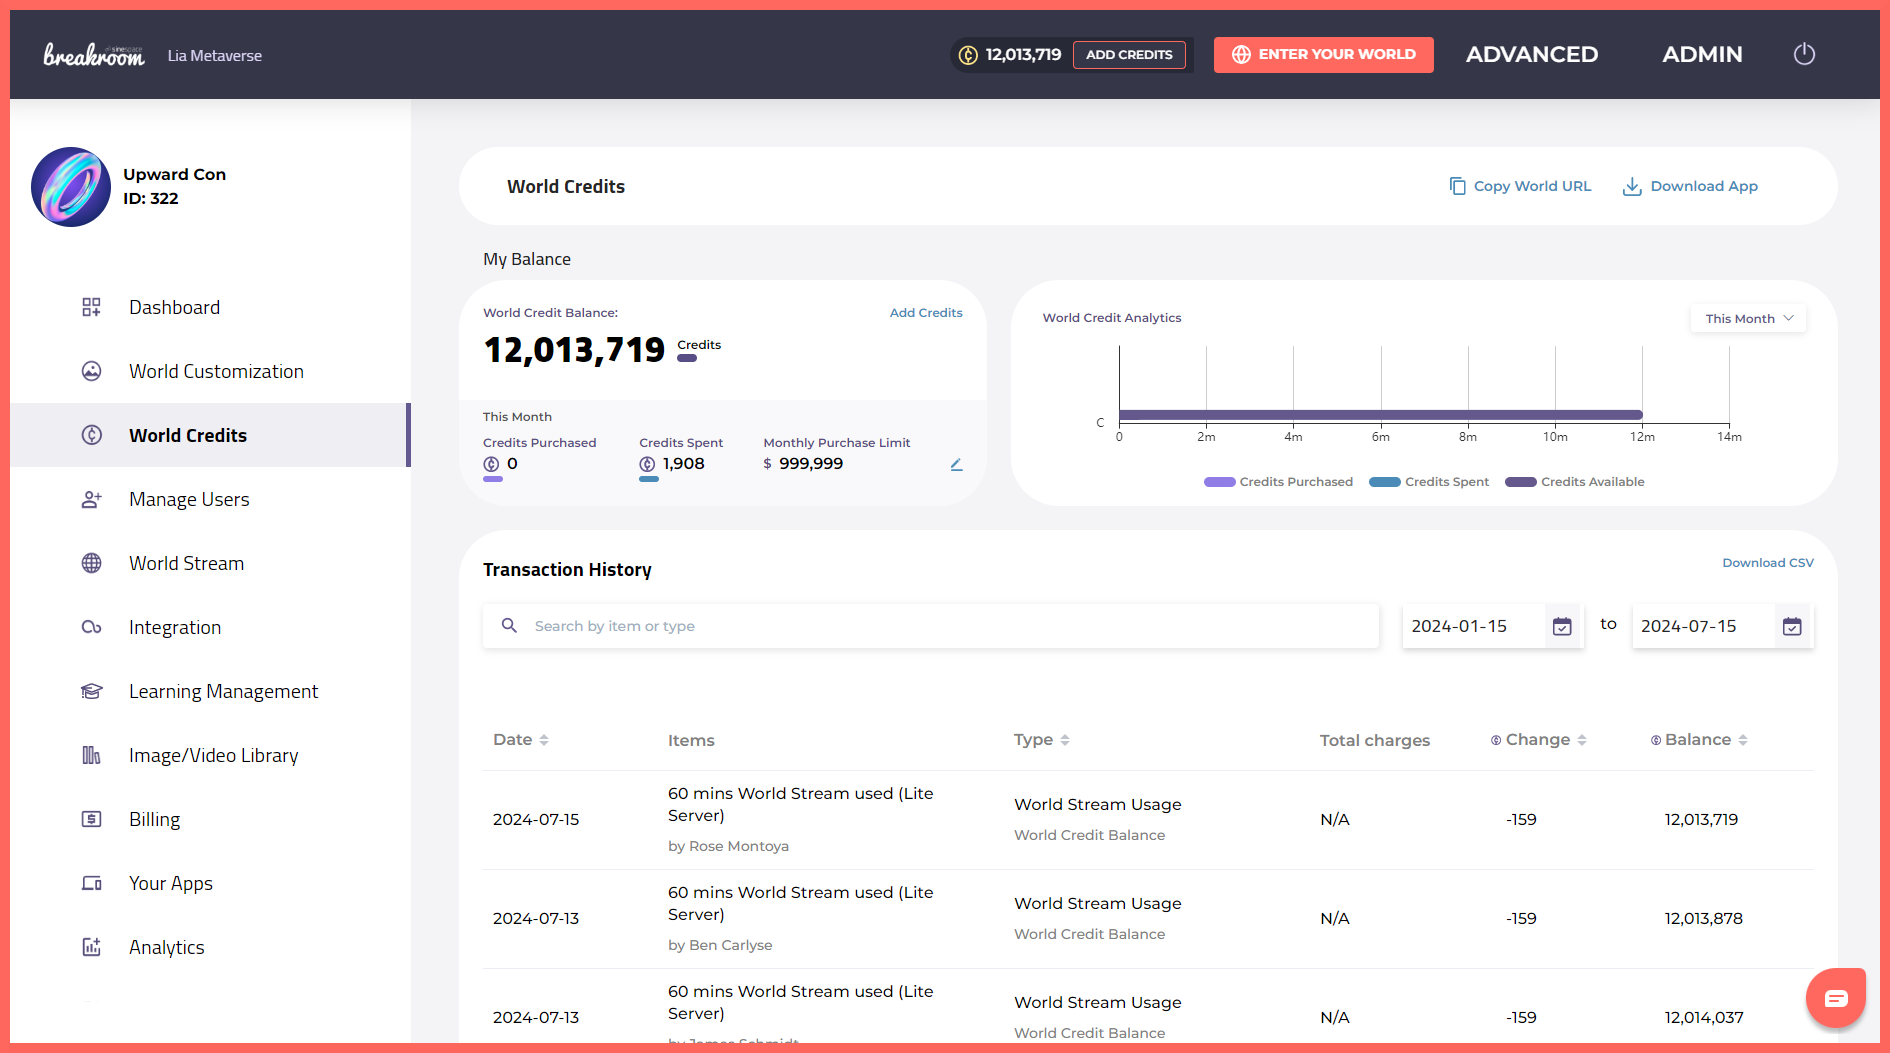
Pictured: An example of how the World Credits tab may appear.
In addition to information about your World Credit transactions, the World Credits tab contains a number of important tools. Here's a brief guide to key parts of the UI.
| Button or link | Function |
|---|---|
| World Credit Balance panel | Displays your current World Credit balance, as well as your current-month purchases and expenditures. |
| Add Credits link / button | Allows you to purchase additional World Credits. |
| World Credit Analytics panel | Generates a quick World Credit purchase, expenditure, and availability breakdown based on your selected timeframe. |
| Transaction History panel | Provides a detailed, itemized list of your World Credit transactions and usage. |
| Transaction History search field | Allows you to search for a particular transaction. |
| Transaction History date pickers | Allows you to narrow the transaction history down to a specific date range. |
| Download CSV | Downloads a CSV file containing all transactions for the date period selected. |
Generating World Credit transaction and usage reports
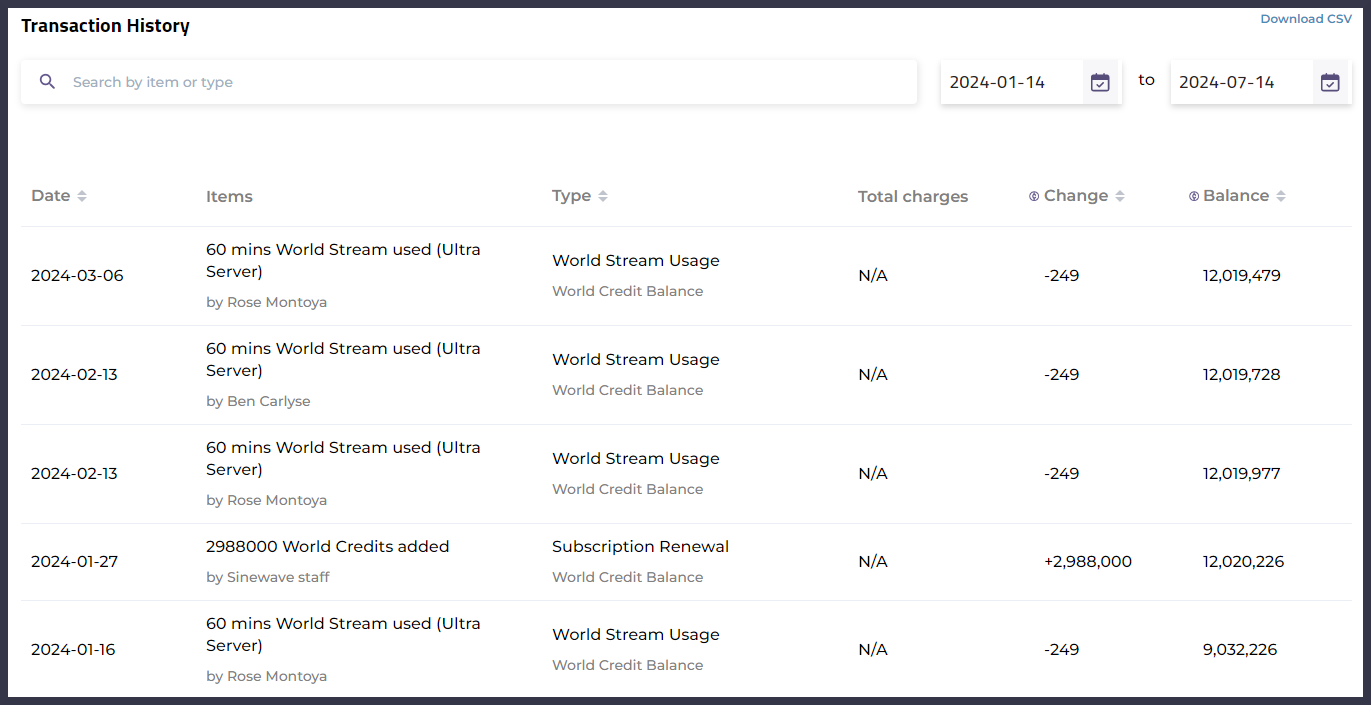
Pictured: An example combined World Credit transaction history and usage report.
Transaction reports
You can download your World Credit transaction history at any time by following these steps.
- Navigate to your Dashboard.
- Click on the World Credits tab.
- Scroll down to the Transaction History panel.
- Use the search field or the date pickers to filter the transactions list, if necessary.
- Click the Download CSV link located above the date pickers to download a spreadsheet containing your selected transaction data.
Usage reports
World Stream access and activity can also be tracked using the Transaction History panel on the World Credits tab.
- Navigate to your Dashboard.
- Click on the World Credits tab.
- Scroll down to the Transaction History panel.
- Enter the term "usage" into the search field, and press the Enter key on your keyboard. Usernames are identified in the Items column.
- Click the Download CSV link located above the date pickers to download a spreadsheet containing your selected transaction data.
If you're looking for more detailed information concerning user session times and Region access, we suggest generating an analytics report.
Managing World Credit usage
Partial hours and World Credit consumption
Due to the way AWS structures its billing, World Stream usage is currently calculated in hourly increments (i.e., multiples of 60 minutes). This hourly calculation policy also extends to pre-allocation campaigns and user session time limits.
This means that users cannot consume partial hours while logged in to World Stream. For example, if a user logs in for 20 minutes, the cost of one hour of access (60 minutes) will be deducted from the World Credits available on the account.
For this reason, Breakroom gives World Owners and World Administrators tools to limit World Stream user session times and World Credit consumption. World Owners can also place a cap on the number of World Credits that can be purchased each month by the administrative team.
Setting World Stream usage limits
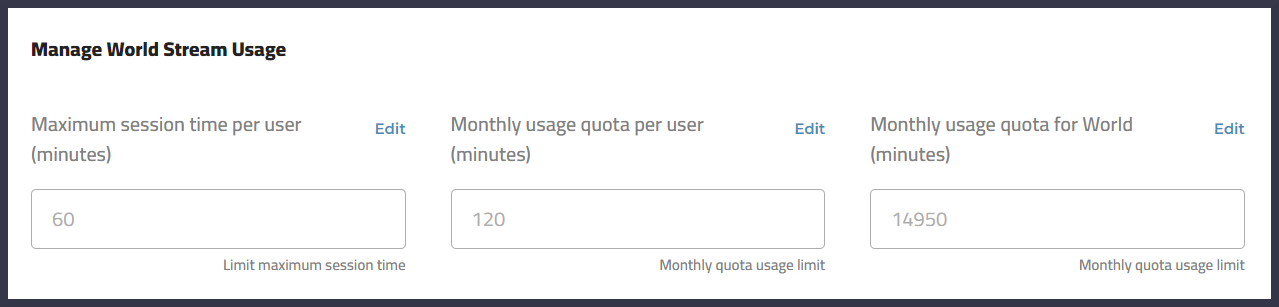
Pictured: The Manage World Stream Usage panel.
To help you get the most out of your World Credits, there are three types of usage limits you can impose:
- Maximum session time per user, which sets a cap on how much time an individual user can spend in a single World Stream session.
- Monthly usage quota per user, which sets a cap on how much time an individual user can spend in World Stream per month.
- Monthly usage quota for World, which limits how many minutes all of your users can collectively spend in World Stream each month.
To enable any of these usage limits, follow the steps below.
- Navigate to your Dashboard.
- Click on the World Stream tab.
- Scroll down to the Manage World Stream Usage panel.
- Locate the usage cap you want to enable. Click the Edit button located to the right of the usage cap name.
- Enter your preferred number of minutes or click the Unlimited button.
- Click the Save button when you are finished.
Important notes about monthly usage quotas:
- The Monthly usage quota per World cap does not discriminate between individual users. This means that a single user could potentially consume the entirety of your monthly usage quota.
- The World Credit partial hours calculation policy also applies to monthly usage quotas. Users who log in for less than 60 minutes will still consume one 60-minute block of time from your monthly usage quota.
Choosing your World Stream server type
-0709c743e8dd851fe79df7553c33d8f7.png)
Another way that World Owners and World Administrators can manage costs is to select an appropriate World Stream server type. An updated list of server type features, prices, and regional availability can be found on the Dashboard, but in general, our Lite Servers offer acceptable performance for smaller events at a reduced cost.
To change your World Stream server type for all users, follow these steps.
- Navigate to your Dashboard.
- Click on the World Stream tab.
- Scroll to the Your World Stream server type panel.
-abe19f80dda4e6870635f697f10ca783.png)
Highlighted: The "Change my World Stream server type" link.
- On the left side of the panel, you will see your current World Stream server type listed. To change it, click the "Change my World Stream server type" link located on the right side.
- A pop-up will appear. Click on the server type you prefer.
Setting World Credit purchase limits
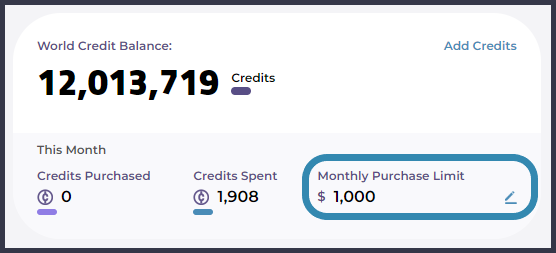
Highlighted: The Monthly Purchase Limit section of the World Credits tab.
To limit the amount of World Credits that can be purchased on your Breakroom account each month, follow these steps.
- Navigate to your Dashboard.
- Click on the World Credits tab.
- Scroll to the My Balance panel. You will see your current Monthly Purchase Limit listed there.
- To change the monthly limit, click the Pencil icon located to the right. A pop-up will appear. Enter the new purchase limit in the field, and click the Save button.