Presentation controls
Overview
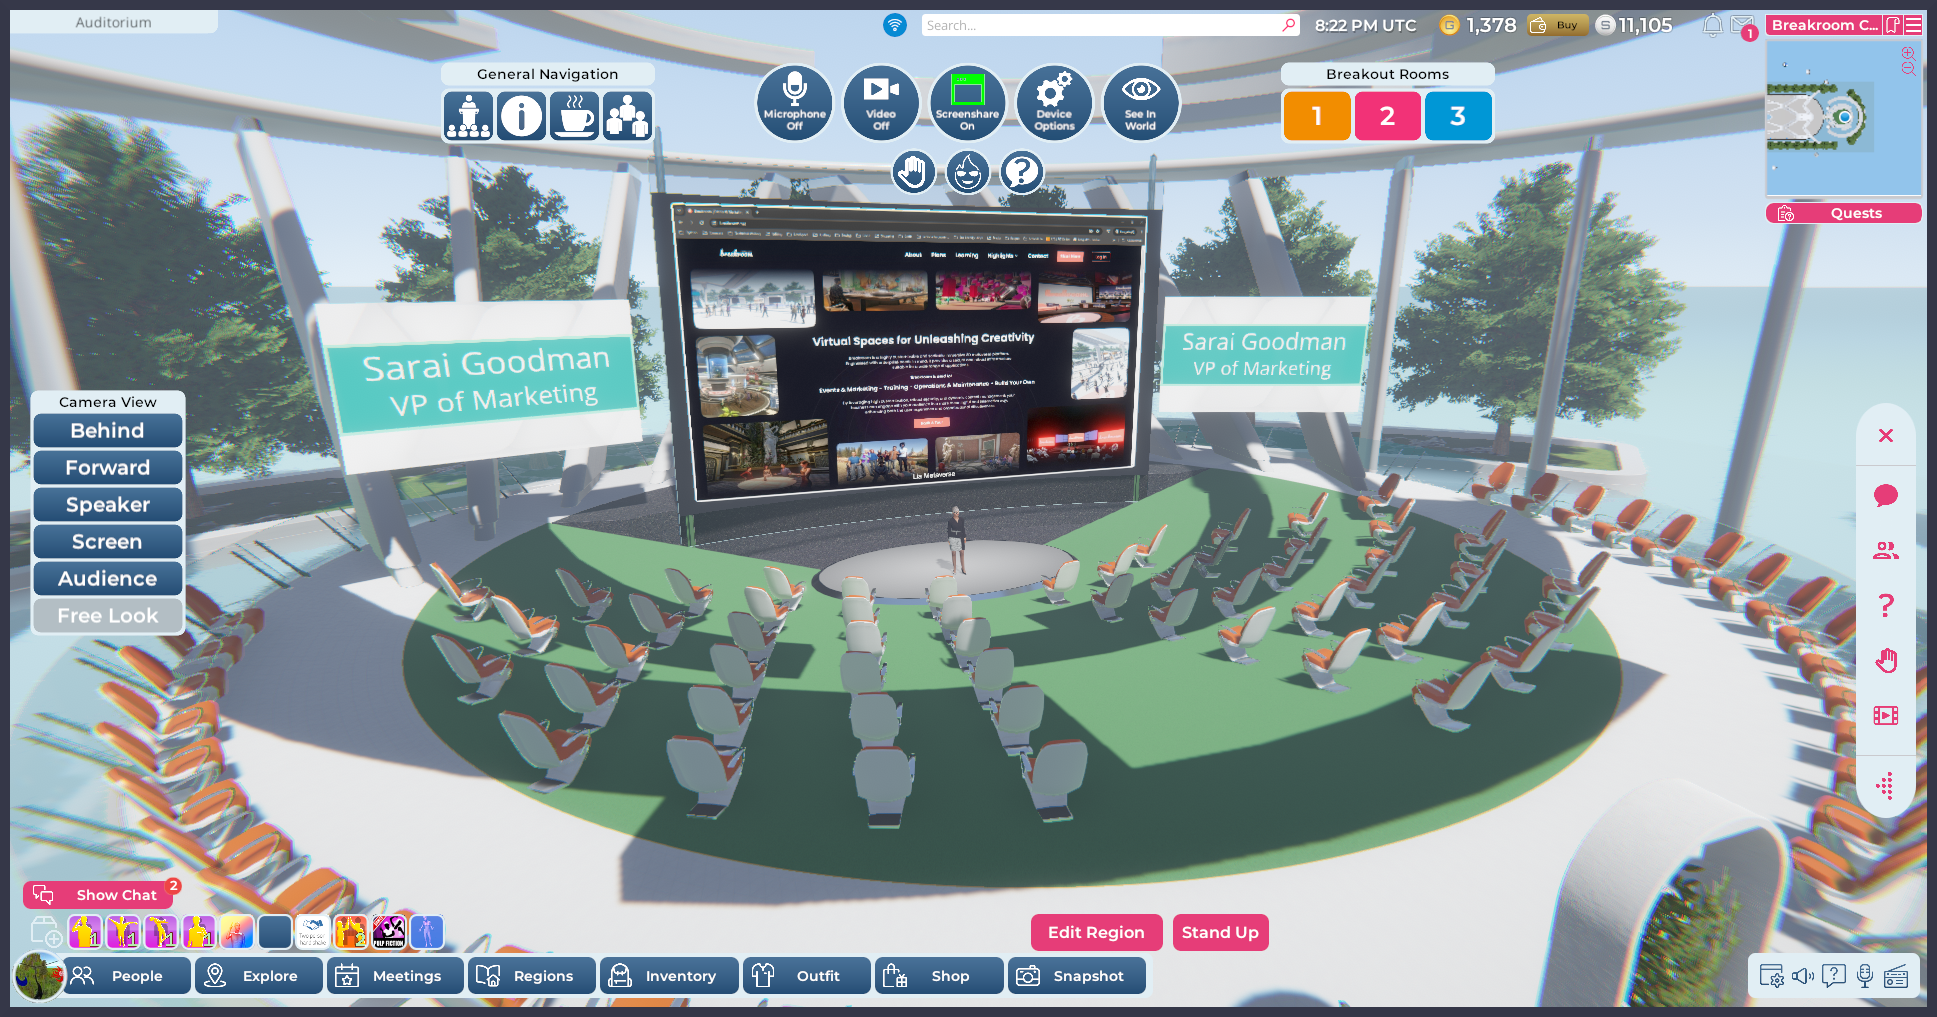
Pictured: A presenter on stage in the Breakroom Conference Region, with identifying signage.
In some Region template presentation zones, such as the 90-seat auditorium that comes standard with the Breakroom Conference and Desert Island Region templates, you have the option of offering additional information in the form of static signs located on either side of the main stage. You can also create a playlist of videos that will be broadcast on a central screen. Both of these media types are controlled through the same interface, giving you the ability to effectively manage virtual presentations in real time.
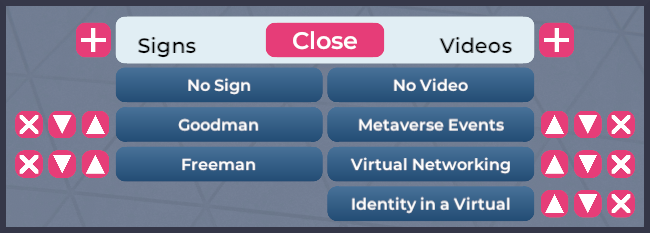
Pictured: An example of how the presentation control panel may appear.
Here you can see how the presentation control panel may appear to Moderators. In this example, there are two signs and three videos available. The media order can be changed to facilitate rapid deployment, and the option to turn off signs or videos entirely is also available.
Signs are useful tools that you can use to:
- Brand your event
- Identify presenters or video content
- Publish session information
- Present static slides while a video plays
- Assist with event transitions and offer scheduling reminders (e.g., "Break in ten minutes")
Adding signs and videos

Highlighted: The location of the Presentation controls button.
To add signs or videos to the presentation control panel, follow the steps below.
- Navigate your avatar to the Region where you want to control or customize a presentation.
- Click the Moderator tools/Key button located on the right side of the screen.
- Click the Presentation controls button (highlighted above).

- The presentation control panel will appear at the top of your screen. You can click the Close button at any time to close the panel. To proceed with a sign or video upload, click the + button located on the relevant side.
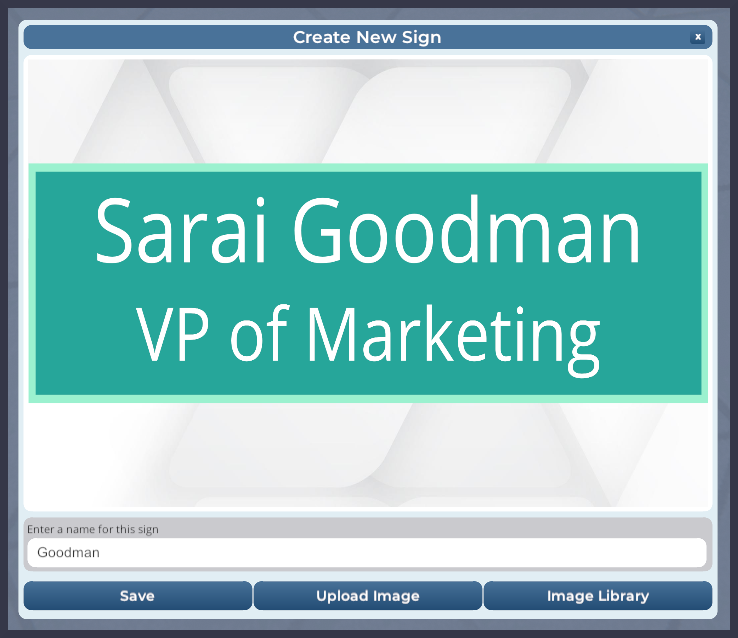
Pictured: An example sign.
- If you are creating a sign, the Create New Sign dialog box will appear. Click the Upload Image button to select a new image from your computer, or click the Image Library button to select an image that you have previously uploaded.
- Enter a name for the sign in the name field, and click the Save button. You will see your image added to the presentation control panel in the form of a button.
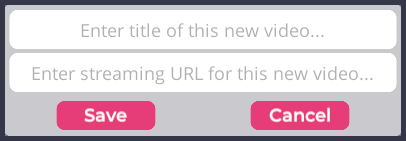
- If you are adding a video, the Video information dialog box will appear. Enter a title for your video and the streaming URL into the appropriate fields. When you are done, click the Save button.
Managing and deploying signs and videos
Once a sign or video has been added to the presentation control panel, it can be ordered in the list, activated, or deactivated using the available UI components.
| Button | Function |
| X | Deletes the chosen sign or video from the presentation control panel. |
| ⬇️ | Moves the chosen sign or video down one space in the list. |
| ⬆️ | Moves the chosen sign or video up one space in the list. |
| Sign or video name | Displays the chosen sign on the screens located to either side of the presentation area, or starts the chosen video on the central screen. |
| No Sign button | Turns off any active signs and removes the display boards from the presentation area. |
| No Video button | Stops the video playing on the central presentation screen. |