LogoLogo
Tutorial VideosScripting DocumentationLegalHome
Breakroom
Breakroom
  • Welcome to Breakroom
  • GETTING STARTED
    • Helpful terms
    • UI tour
    • Keyboard shortcuts
    • Customizing your avatar
      • Choosing a starter avatar
      • Editing avatars in the Outfit window
      • Using the Sine Wave Shop
    • Controlling your avatar
    • Controlling your camera
    • Communicating with other users
    • Using the conference system
      • Troubleshooting audio and video issues
    • Using Breakroom for Training
    • Settings
    • Language and accessibility
    • Reporting issues
  • EXPLORING BREAKROOM
    • Region navigation tools
    • Bookmarks and teleport invites
    • Using the Explore window
    • Using the Meetings window
    • Networking with other users
      • People
      • Groups
    • Snapshots
  • BUILDING NEW WORLDS
    • Breakroom Dashboard tour
    • Creating and managing Regions
    • Default Landing and Orientation Regions
    • Region settings
    • Region template descriptions
  • CREATING CUSTOM EXPERIENCES
    • Branding tools
    • UI customization options
    • Filtering the Sine Wave Shop
    • Selecting default avatars
      • Default avatar collections
    • Using the Region Editor
      • Editing and moving objects
      • Editing terrain and sky
      • The Region Editor ADVANCED window
    • Exploring the Breakroom Toolkit
      • Breakroom Video Player
      • Breakroom Web Browser
      • Breakroom Image Viewer
      • Breakroom Info Kiosk
      • Breakroom Teleport Portal
      • Breakroom Web Collab
      • Breakroom Note Board
      • Breakroom Games
      • Breakroom Reactives
      • Breakroom Orientation Quest
      • Breakroom Tour Cameras
      • Conference rooms and booths
      • Add-on seats
      • Breakroom Start Here UI
      • Breakroom Basic Emojis
    • Managing your Media Library
  • Breakroom for Training
    • Installing Breakroom for Training
    • Creating and managing courses
    • Waivers
    • Quizzes
    • Syllabuses
    • Instructor orientation
    • Reviewing student information
  • OPENING THE DOORS
    • Seats and concurrency
    • Creating and managing user accounts
      • World-level user permissions
      • Region-level user permissions
      • Single sign-on
      • Eventbrite integration
    • World Stream
      • Purchasing and managing World Credits
      • Pre-allocation campaigns
      • World Stream viewer toolbars
      • World Stream keyboard shortcuts
      • Troubleshooting World Stream issues on Chrome
      • Troubleshooting World Stream issues on macOS
    • Desktop viewers
    • Privacy Policies, EULAs, and data collection
    • Analytics
    • Toggling World availability
  • RUNNING YOUR EVENT
    • Understanding the conference system
      • Voice zones, zone types, and conference permissions
      • Voice chat and spatial audio
    • Customizing the conference system components
      • Adding breakout areas
      • Creating custom voice zones
      • Setting up Presenter and Audience zones
      • Designating triage zones
      • Troubleshooting duplicate zone errors
      • The RoomFurniture component
    • Moderator tools
      • Broadcast messages
      • Crowd management
      • Audience questions
      • Raised hands
      • Presentation controls
      • Hidden UI toggle
      • Participation
      • Audio streams
  • TIPS FOR SUCCESS
    • Region Editor best practices
    • Onboarding new users
  • ADVANCED TUTORIALS
    • Uploading your own Region
      • Installing Unity and the Breakroom SDK
      • Reducing poly counts on CAD files
      • Uploading a Region from Unity to Breakroom
      • Creating and uploading custom chairs
      • Testing items on the preview server
      • Pushing items to the live server
      • Installing the conference system components
    • Uploading your own virtual objects
    • Uploading your own virtual clothing
    • Creating and copying avatar shapes
    • Installing the Quest System
    • Registration and grid APIs
    • Video streaming
    • Sinespace scripting documentation
  • HELP
    • Where to find support
    • Tutorial video playlists
      • Platform basics
      • Dashboard
      • Moderator tools
      • Breakroom Games
      • Creator Core
      • Breakroom for Training - Students
      • Breakroom for Training - Instructors
      • Breakroom for Training - Dashboard and Backend
    • Account management
    • System requirements
    • Troubleshooting network ports and firewalls
  • RELEASE NOTES
    • Breakroom SDK
    • Breakroom Viewer
    • Breakroom Dashboard
Powered by GitBook

©2008-2024 Sine Wave Entertainment Ltd. All Rights Reserved.

On this page
  • Overview
  • Adding a new course
  • Activating and deactivating courses
  • Editing course information
  • Adding course notes
  • Archiving courses
Export as PDF
  1. Breakroom for Training

Creating and managing courses

Courses are the backbone of the Breakroom for Training LMS -- and once you've created them, you can edit and preserve their contents as needed. Learn how to create, edit, archive and retrieve courses.

PreviousInstalling Breakroom for TrainingNextWaivers

Last updated 3 days ago

Overview

In the Breakroom for Training system, courses contain all of the information required for administration of a single class or an entire academic or vocational course. Courses can consist of , , and , which may be administered individually or included as part of student- or Instructor-led content modules.

Once students interact with a particular course's content, and progress can be tracked and reviewed as needed. Courses can also be , which preserves their contents and prevents them from being edited.

Adding a new course


  1. Click on the Learning Management tab.

  2. Click the Add Course button.

  3. In the Create New Course window that appears, enter a name and description for your course.

  4. If you like, you can click the Upload Image button to upload a course header from your own computer, or click the "Select from Our Course Image Templates" link to choose a basic color or generic course image.

  5. When you are satisfied, click the Create button.

Activating and deactivating courses

Once you add a course to Breakroom for Training, you will see that course appear as a card under the Learning Management tab. When courses are first created, they are inactive by default. To activate or deactivate a course, click the vertical ellipses icon in the upper right corner of the card, and then click the Activate/Deactivate Course button.

Activated courses are live on your Breakroom World and can be accessed by students and Instructors. Inactive courses are inaccessible to students and Instructors, but World Owners and World Administrators can still edit their contents via the Dashboard.

Editing course information

You can edit your course details at any time by clicking the vertical ellipses icon in the upper right corner of the course card on the Learning Management tab, and then clicking the Edit Course Info button.

Adding course notes

You can add notes to a course that will only be visible to those with Dashboard access. To do so, click the Notes button in the course card.

Archiving courses

Breakroom for Training courses can be archived, which deactivates them and prevents their contents from being edited. This preserves their contents for future use.

To archive a course, follow these steps.

  1. Click on the Learning Management tab.

  2. Click the vertical ellipses icon in the course card, and select Archive in the menu that appears.

To locate an archived course and make it accessible again, follow these steps.

  1. Click on the Learning Management tab.

  2. Click the Filter button in the top right corner. In the menu that appears, check the Archived List option. This will reveal all of your archived courses.

  3. Locate the course you want to unarchive. Click the vertical ellipses icon in the course card, then select Unarchive This Course in the menu that appears.

  4. To display all of your active and inactive courses, click the Filter button again and check the box beside the Show All option.

Only and can access the Dashboard.

Breakroom for Training course content is created and managed through the . To create a new course, follow these steps.

Navigate to your .

Navigate to your .

Navigate to your .

World Owners
World Administrators
Dashboard
Dashboard
Dashboard
Dashboard
waivers
quizzes
syllabuses
student information
archived
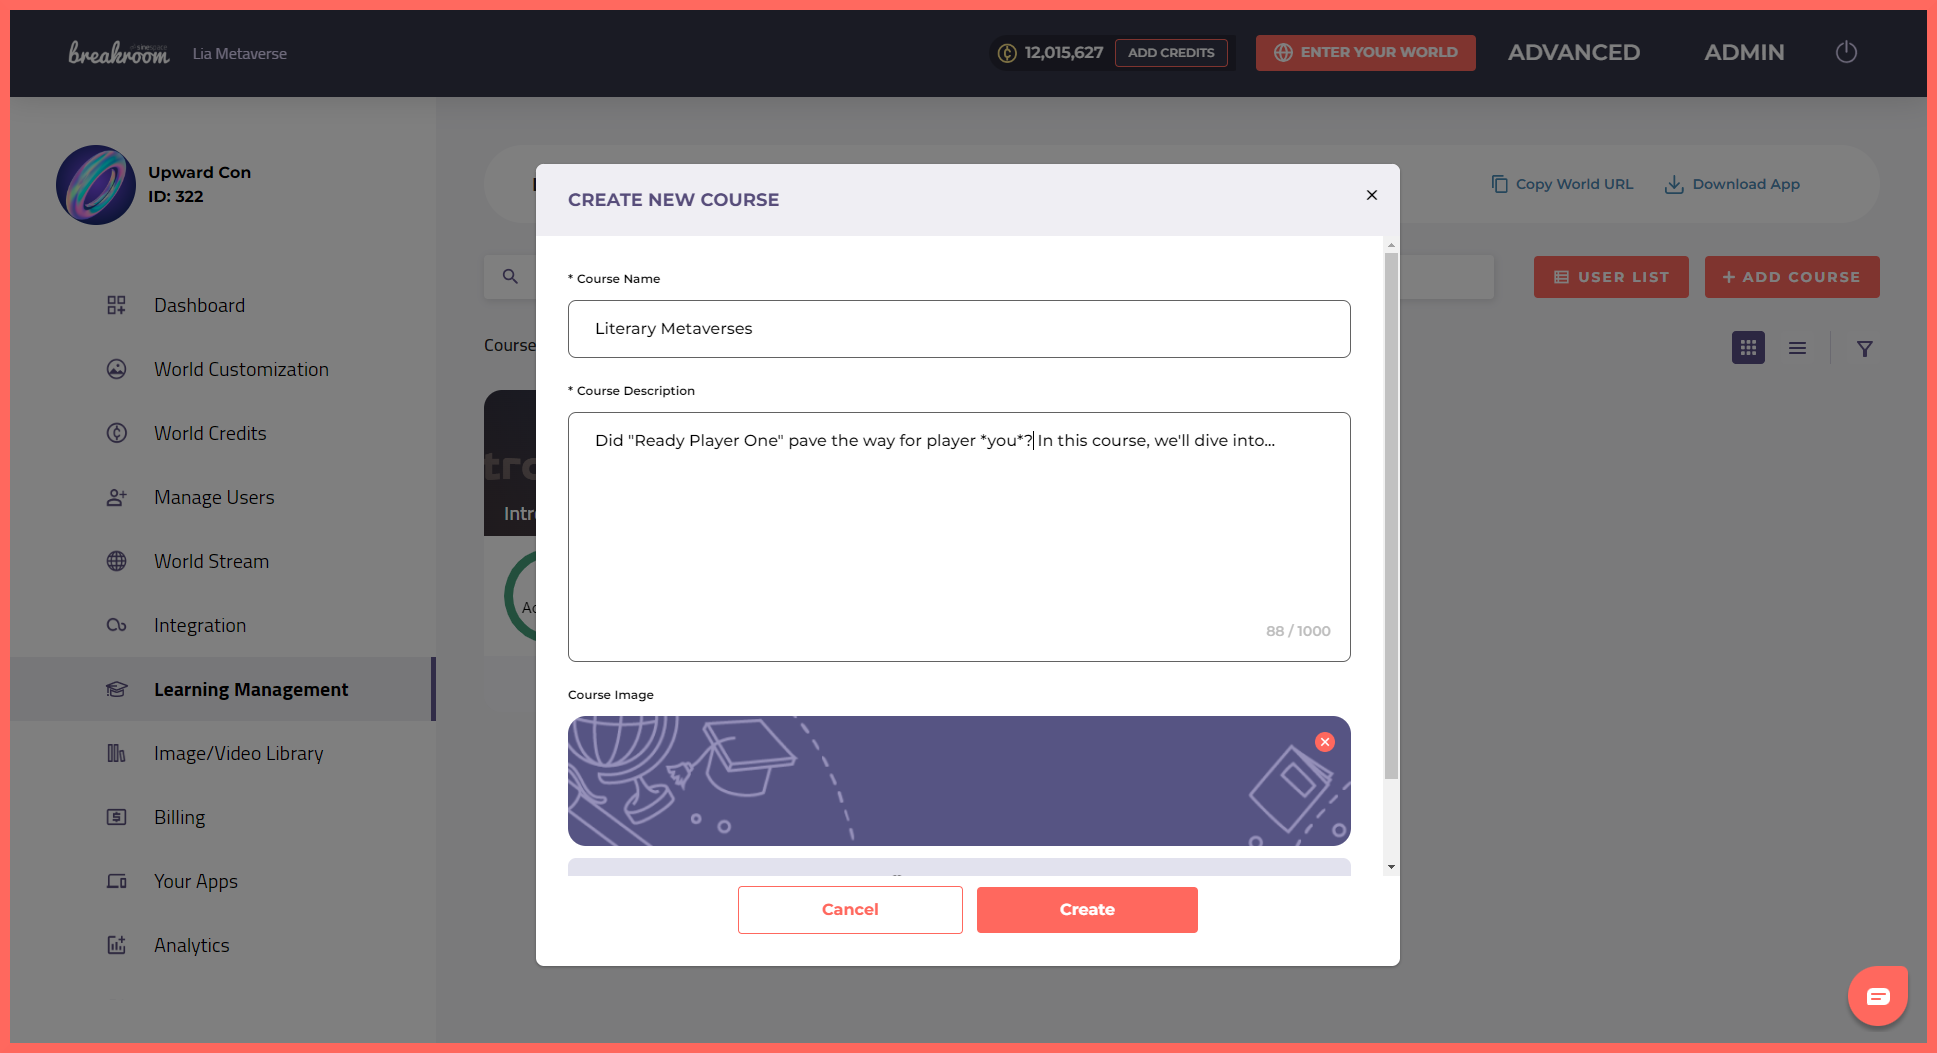
Pictured: The Dashboard > Learning Management > Create New Course window.
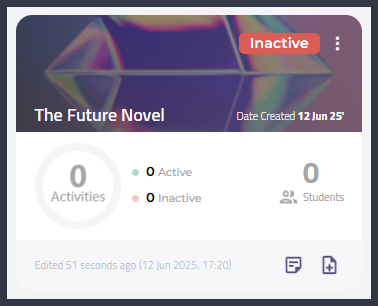
Pictured: A course card. Note the "Inactive" tag in the top right corner.
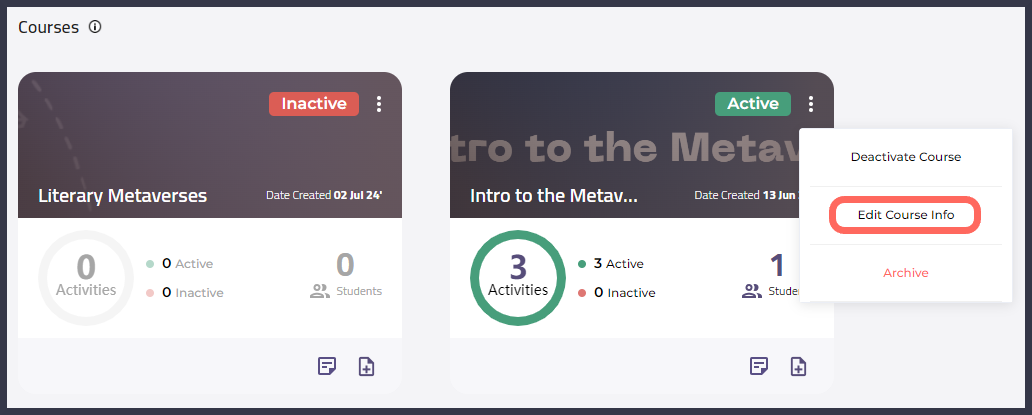
Highlighted: The location of the Edit Course Info button.
Highlighted: The location of the Notes and Add Quiz buttons.
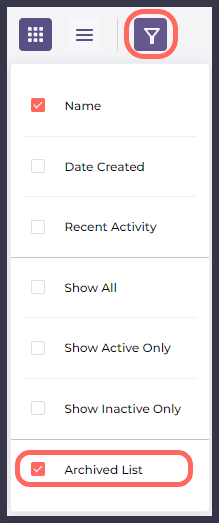
Highlighted: The location of the Filter button and Archived List checkbox.