Uploading your own virtual objects
Overview
A virtual object is any in-world item that is not a full Region or clothing item. Common virtual objects include chairs and other pieces of furniture, avatar animations, and 3D models (such as a company logo). Once these items are uploaded to your World, you can deploy them through the use of the Region Editor and other means.
Within our advanced documentation, you may see different words used to describe the same concept or tool. This is because Breakroom is based on the Sinespace virtual world platform. Please be aware of the following:
- When you install the Breakroom SDK, you may notice that certain tools and menus refer to Sinespace, Sinespace components, or the Sinespace SDK. This is normal and has no effect on performance.
- When testing and uploading virtual items, you may see documentation, menus, and buttons that refer to Breakroom Worlds as grids.
The instructions provided in this section presume an advanced working knowledge of Breakroom, virtual assets, and third-party 3D software. Please consult our documentation if you need help installing and positioning virtual objects, or editing the RoomFurniture component.
Only World Owners, World Administrators, and World Developers can upload custom items to Breakroom.
Import or create your virtual object in Unity
In order to follow the steps outlined below, you must already have Unity and the Breakroom SDK installed on your computer.
Merging items in Unity
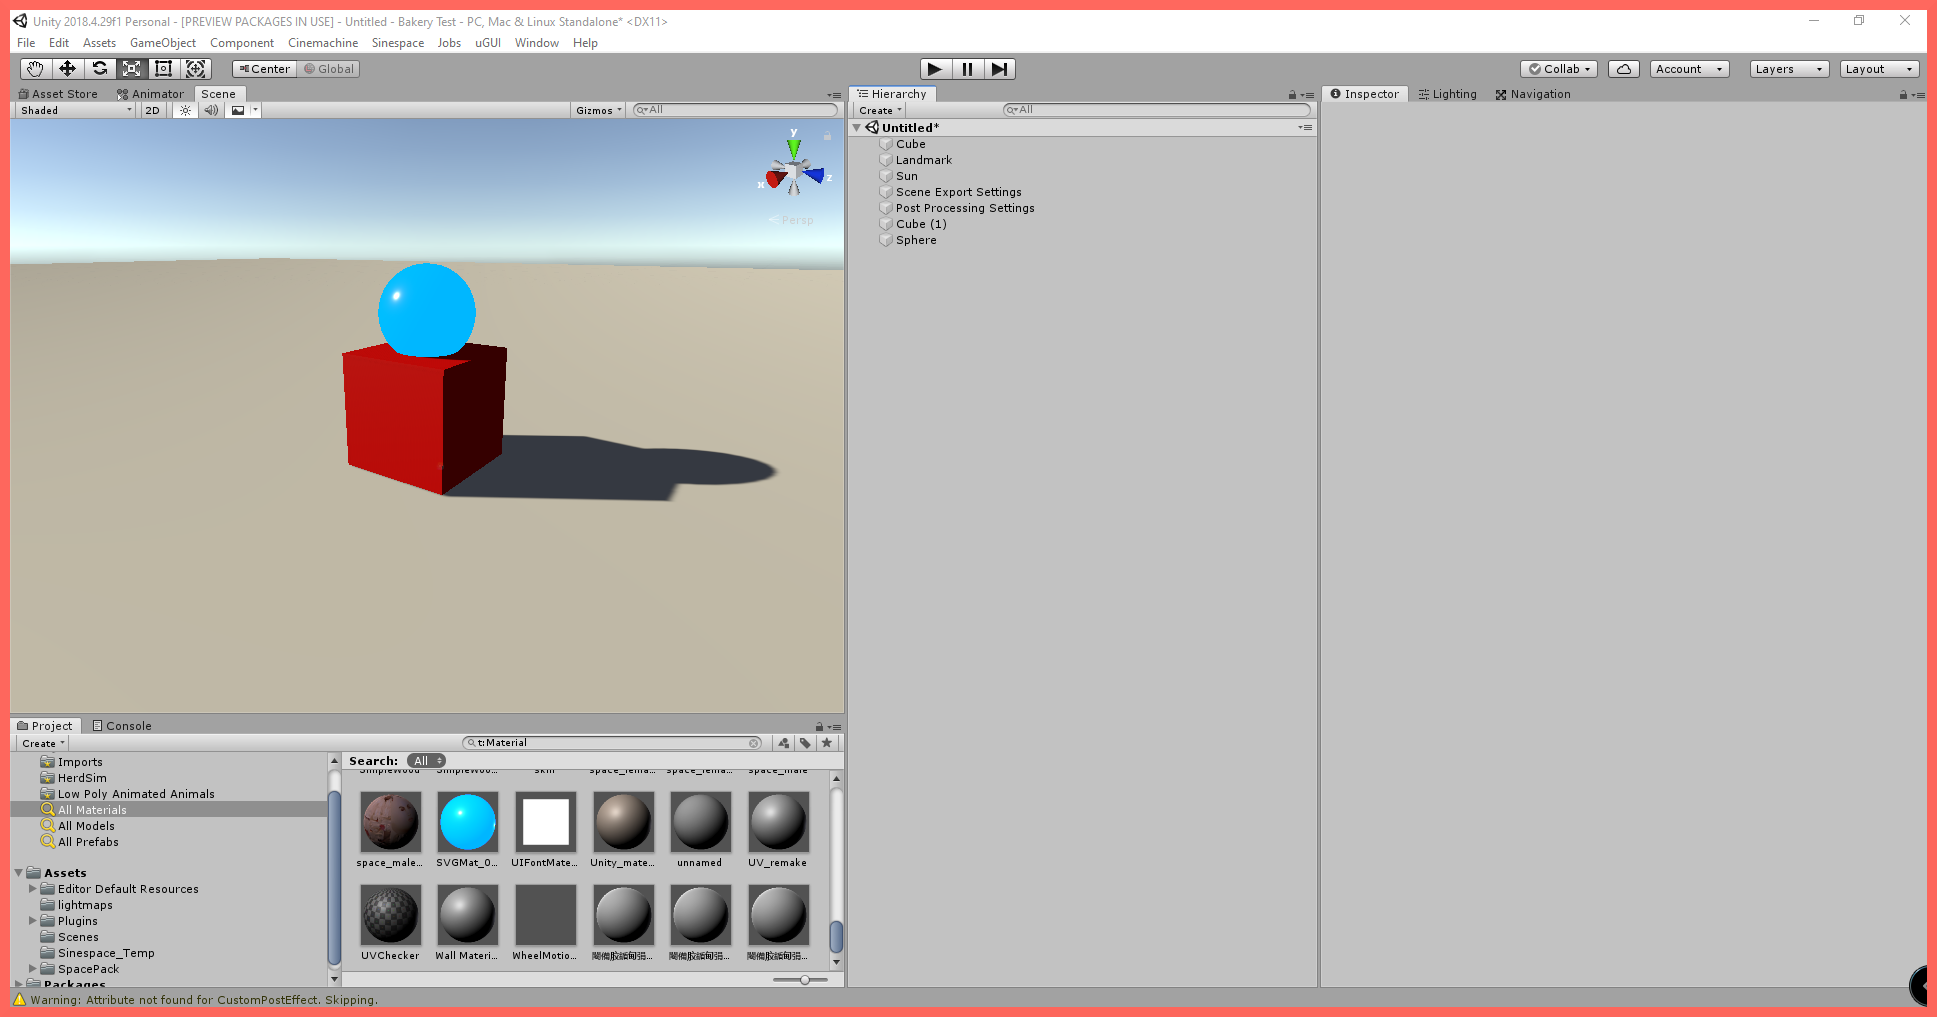
Pictured: An example object—a globe on top of a cube.
As an example object, let's take a look at the globe sculpture pictured above. It consists of two items—a sphere placed on top of a cube. To merge these two items into a single item and upload it to your World, first right click on an empty area in the Hierarchy panel and select Create Empty in the menu that appears. Rename this object to something meaningful—for example, "My First Object."
Now drag the cube and the sphere into this object.
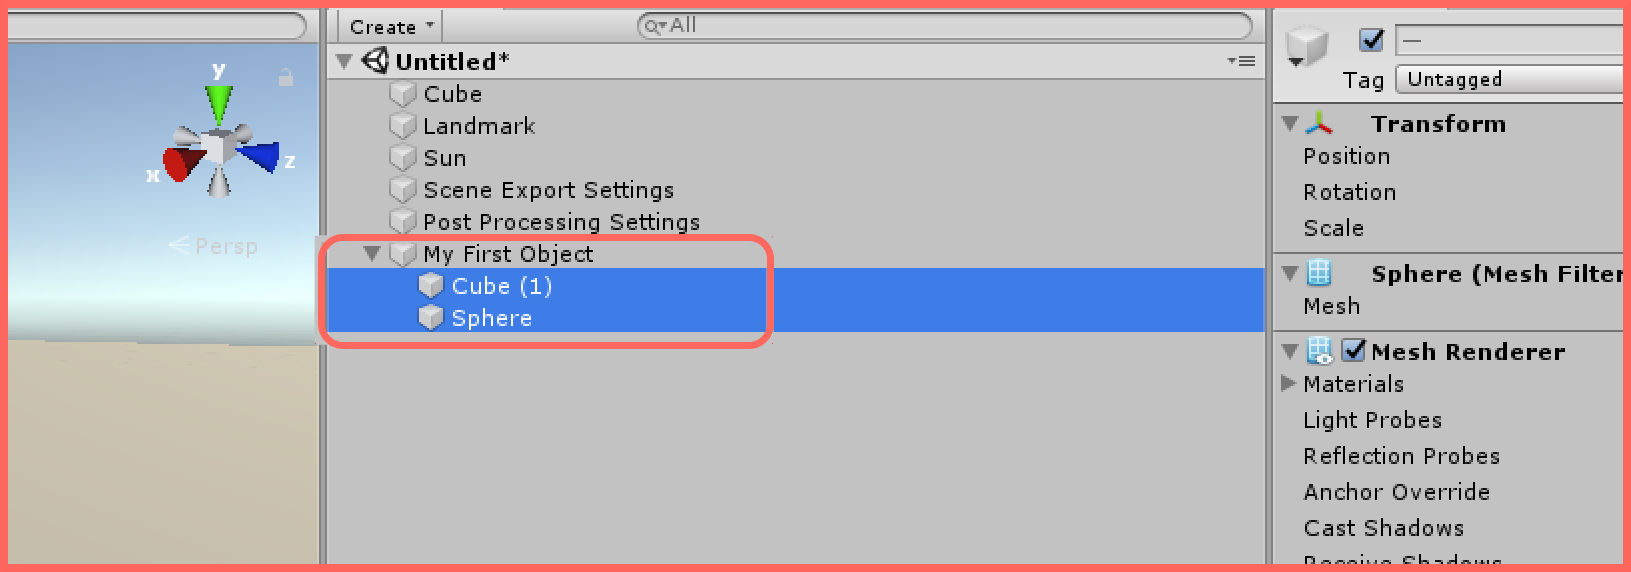
Pictured: The original sphere and cube items, now merged under "My First Object."
Turning your item into a virtual good
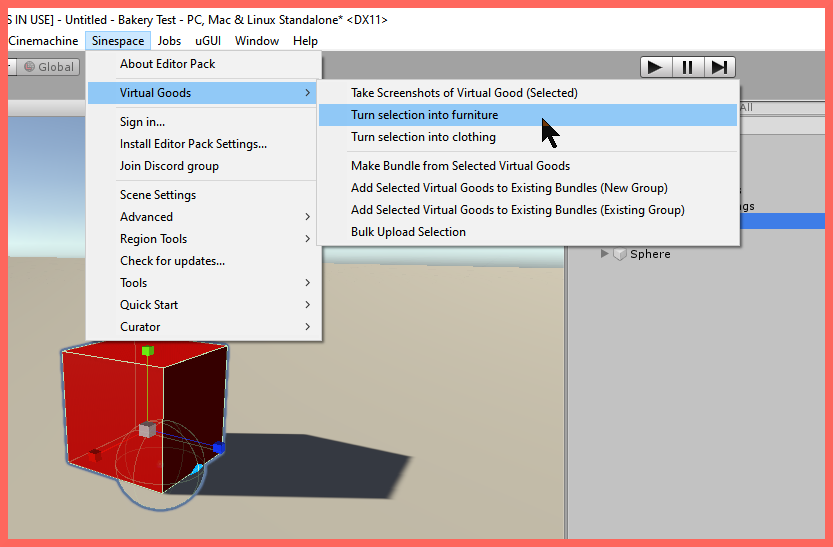
Pictured: The Sinespace menu, with the Virtual Goods sub-menu expanded.
Click on My First Object to highlight it, and then click on the Sinespace menu and navigate to Virtual Goods > Turn selection into furniture. Clicking this action will convert your object into a virtual good that can be uploaded to your World. You do not need to alter the Room Furniture component that was just added.
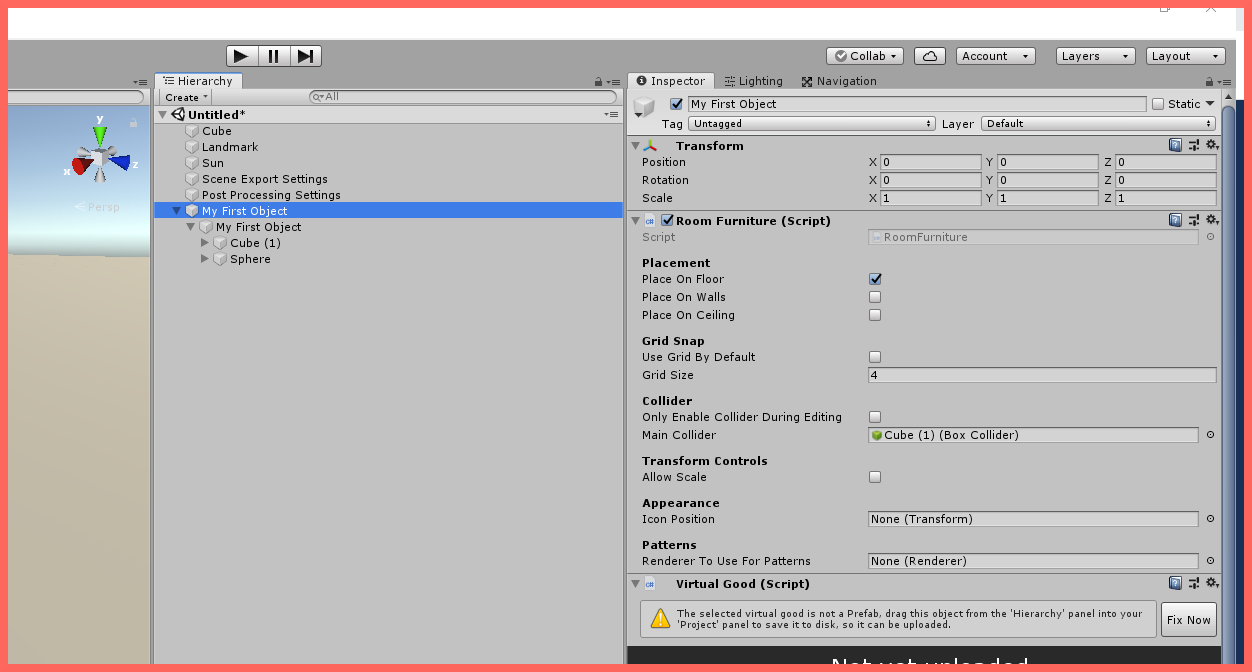
Pictured: "My First Object," with the Virtual Good and Room Furniture components added.
Editing the Virtual Good component
Scroll down to the Virtual Good component. To complete setup of your item, you'll need to navigate through the Virtual Good component tabs and change certain information. Here are the key steps you'll need to take.
1. Provide basic item information
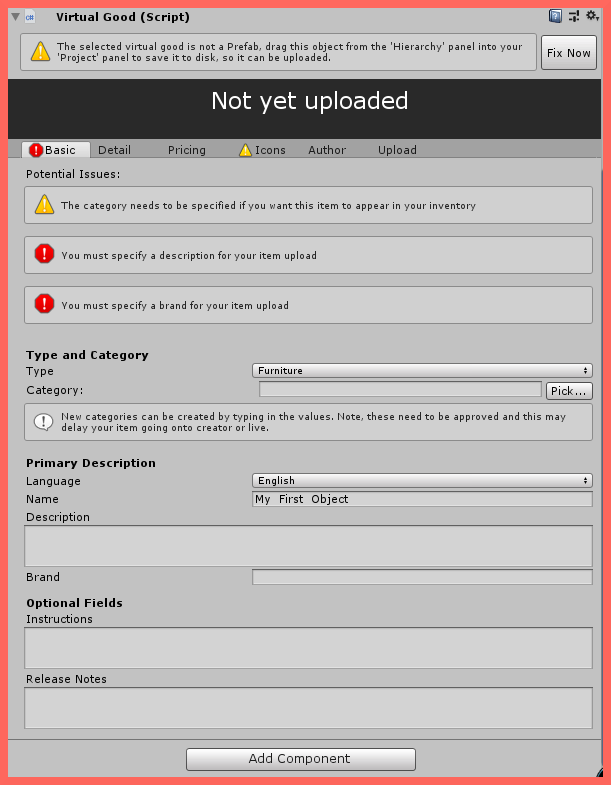
Pictured: The Virtual Good component, with the Basic tab active. Note that the item type is set to Furniture.
In the Virtual Good component, under the Basic tab, you will need to select the item type and category. The category you select will influence where your item appears in your Inventory.
There are additional details under the Basic tab that you'll need to provide:
- Name: The item's name
- Description: A brief description of the item
- Brand: Your brand name (corporate clients may want to use their company name)
2. Edit the item details
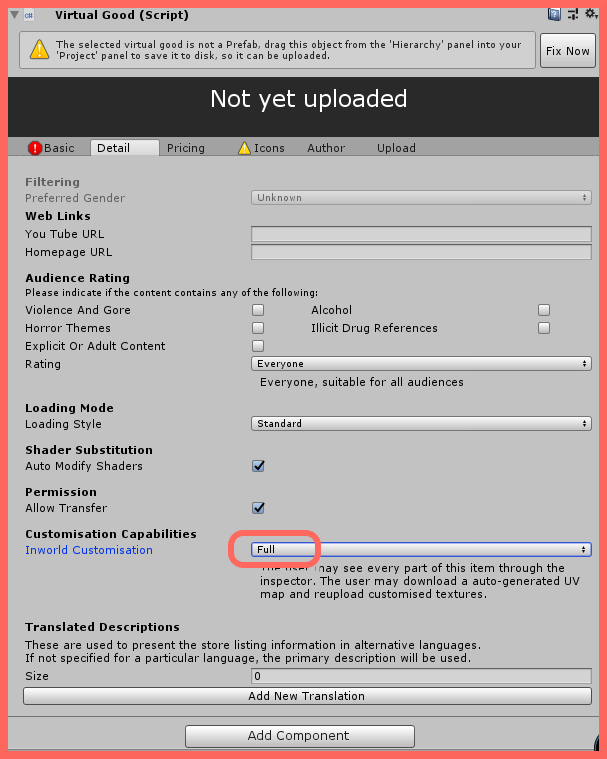
Highlighted: The Inworld Customization setting, under the Detail tab. This must be set to Full.
Next, click on the Detail tab. The settings listed under this tab are optional, and usually can be left in their default state—except for the Inworld Customization setting. You will need to set this to Full.
3. Edit the Pricing information
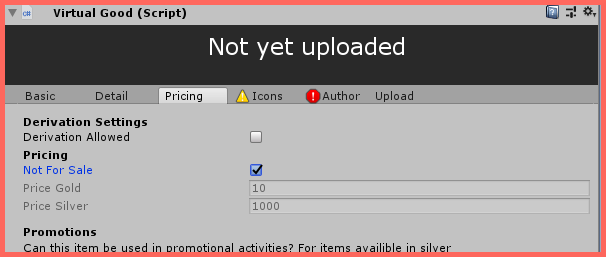
Pictured: The Pricing tab, with the "Not for Sale" option checked.
Next, click on the Pricing tab. Check the box to enable the "Not for Sale" option.
4. Edit the Icons information
You can skip the Icons tab, as this is only used if the item will be sold in the Sinewave Shop.
5. Edit the Author information
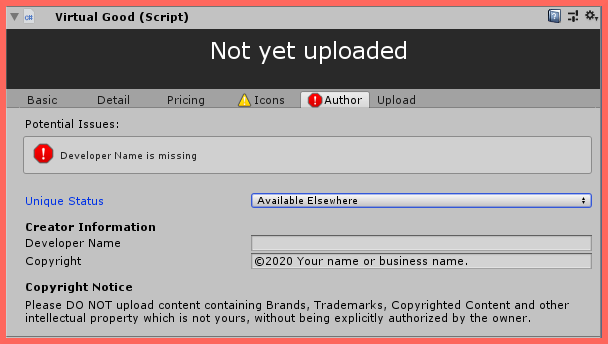
Pictured: The Author tab, where you can specify creation details about your item.
Click on the Author tab. Fill in the details that best suit your upload. If in doubt, leave the item's Unique Status as Available Elsewhere, edit the Developer's Name field to include your name, and edit the Copyright field to include your company name.
6. Edit the Upload information
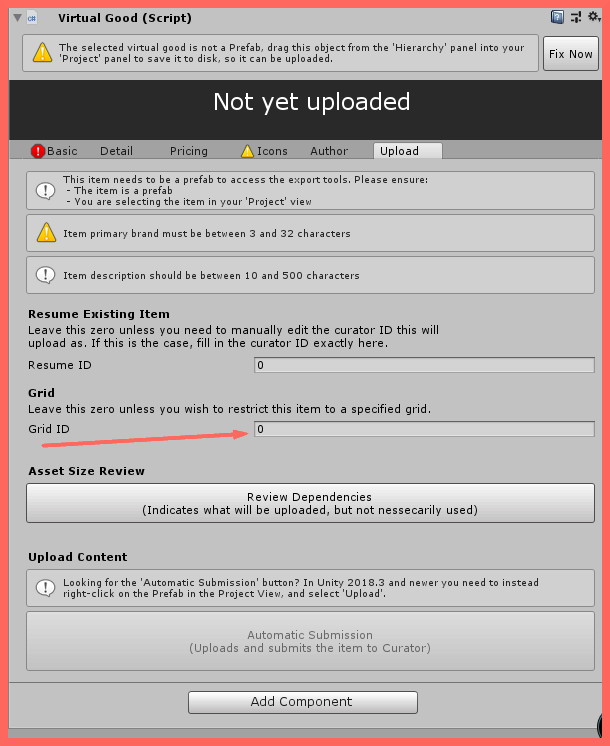
Pictured: The Upload tab, with the Grid ID field highlighted.
Lastly, click the Upload tab. In the Grid ID field, enter your Breakroom World's unique grid ID number. There are multiple places where you can obtain your grid ID number.
Finding your grid ID on Dashboard
- Navigate to your Dashboard.
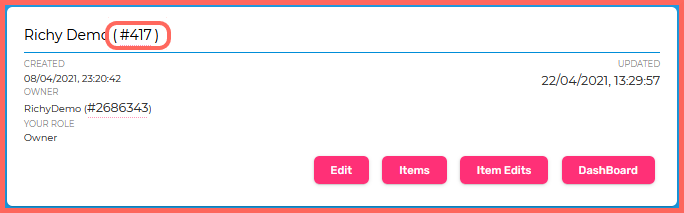
- Look in the top left corner of the screen. You will see your world name followed by an ID number. This ID number is your grid ID.
Finding your grid ID on Curator
- Navigate to your Dashboard.
- Click the Advanced button at the top of the page. This will take you to Curator.
- In the Curator window that appears, locate the Grid listing for your World. Your grid ID will be displayed next to the World name.
Highlighted: The location of your grid ID in Curator.
Once you have your grid ID, it can be entered into the Grid ID field under the Upload tab as shown.
Converting your item to a Unity prefab
Create a new folder in your Unity project by right clicking on the Project Assets panel. Call this folder "Uploads," and double click on it.
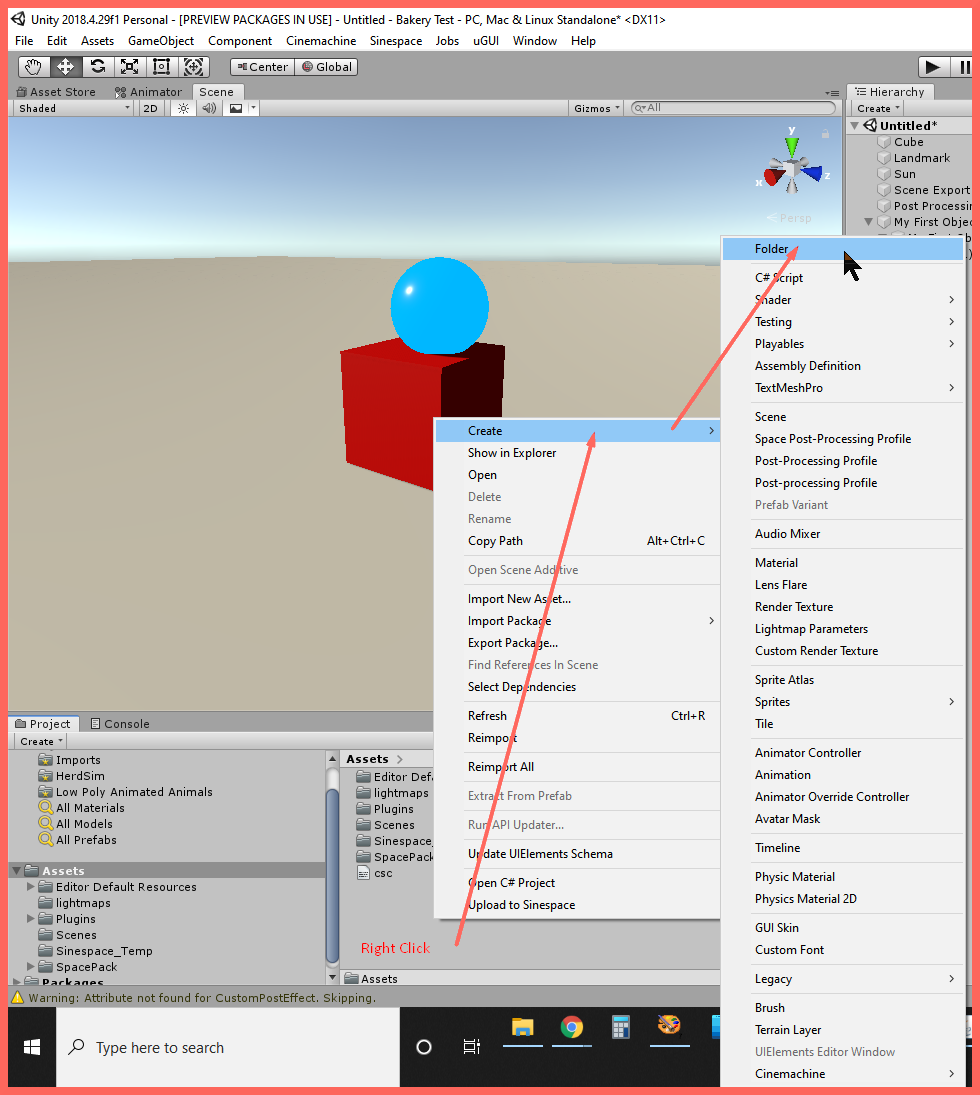
Pictured: How to create a new folder in your Unity project.
Now drag the parent object from the Hierarchy to the "Uploads" folder in the Project panel.
Pictured: Dragging the parent object from the Hierarchy into the "Uploads" folder.
Next, right click on this new prefab object and select Upload to Sinespace in the menu that appears.
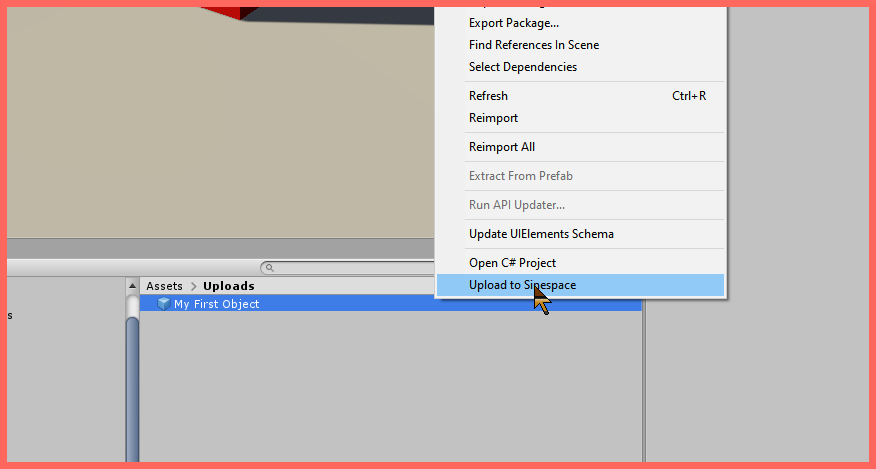
Pictured: The location of the Upload to Sinespace action.
Finally, confirm the upload.
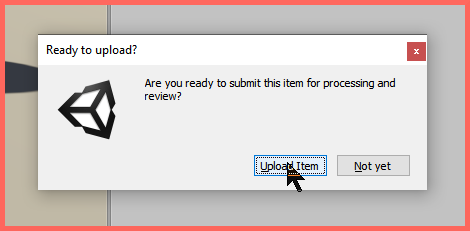
Confirm the upload by clicking the Upload Item button.
You will be asked to save the scene before the upload can proceed. We do recommend saving, as you may have other items in the scene and this will make editing easier in the future.
Completing your upload
For your next steps, you'll want to test your item on the preview server and then push it to the live server. Detailed instructions can be found in the linked documentation.