Groups
Overview
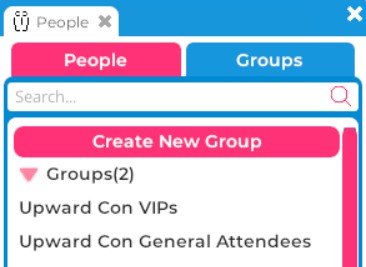
Pictured: The combined People and Groups window.
Groups serve several functions in Breakroom, including:
- Casual and professional networking
- Streamlining the invitation process for private meetings
- Region access control
The Groups window lists all of your current groups. You can search for a particular group using the search field located at the top of the window.
World Owners and World Administrators can enable and disable parts of the UI via the Dashboard. You may not have access to every function described in this section.
Opening the Groups window
-8aa19c47df168630d6c8d9051c004bc5.jpg)
Highlighted: The location of the People button.
You can open the Groups window by clicking the People button in the bottom toolbar, or by pressing Ctrl + F on your keyboard. Then click the Groups tab.
Accessing group information
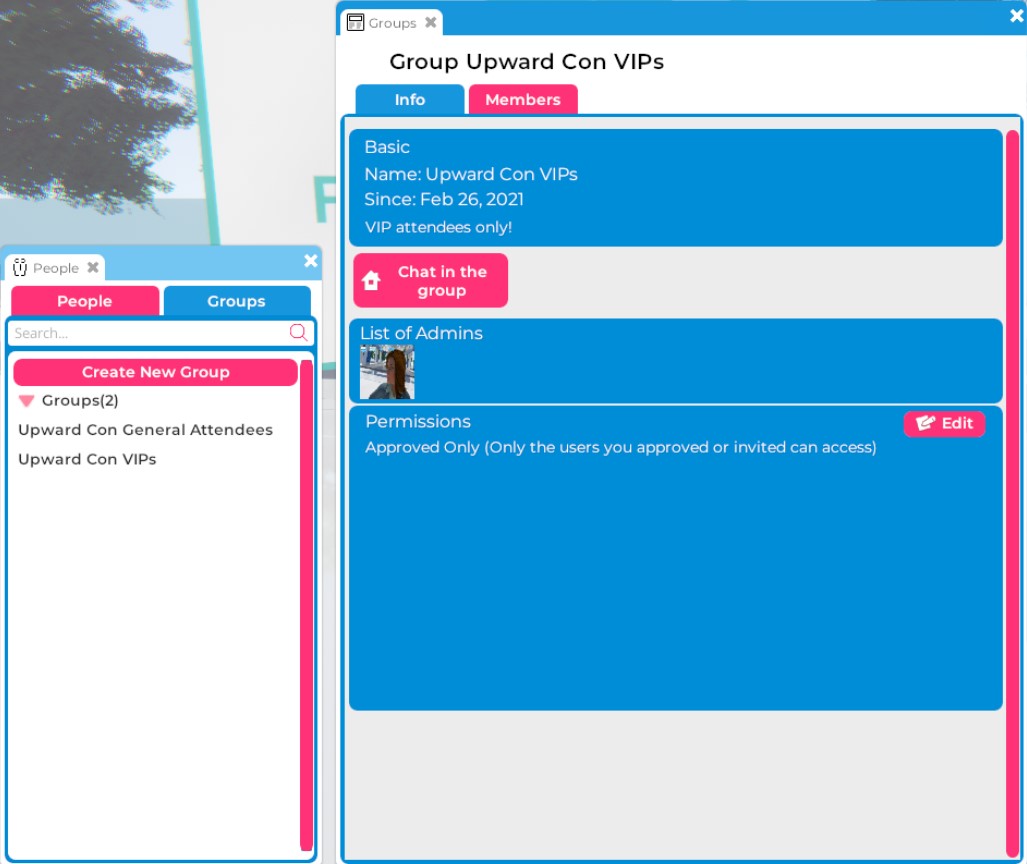
Pictured: A user's group list and an example Group Information window.
If you belong to a group, clicking on its name will open the Group Information window. In addition to reviewing details about the group under the Info tab, you can click the "Chat in the group" button to begin a global text chat with all online members.
If you have the appropriate permissions, you may also see an Edit button in the Info tab > Permissions section. Clicking this button will allow you to make changes to the group's name, description, and group access type.
Finding and joining existing groups
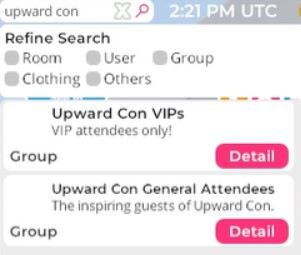
Pictured: A group search with two results returned.
If you know the name of a group you want to join, you can search for it using the search field located at the top of your screen. If you like, you can filter the search results by checking the Refine Search > Group option.
Once you've found the right group, click the Detail button to open the Group Information window. Then click the "Apply to join" button. If the group is set to Public access, then congrats—you're officially a member! If the group is set to Contact Only or Approved Only access, your application will be submitted for review.
Creating a group
If you want to create a new group, open the Groups window and click the Create New Group button. This will open the Groups dialog box.
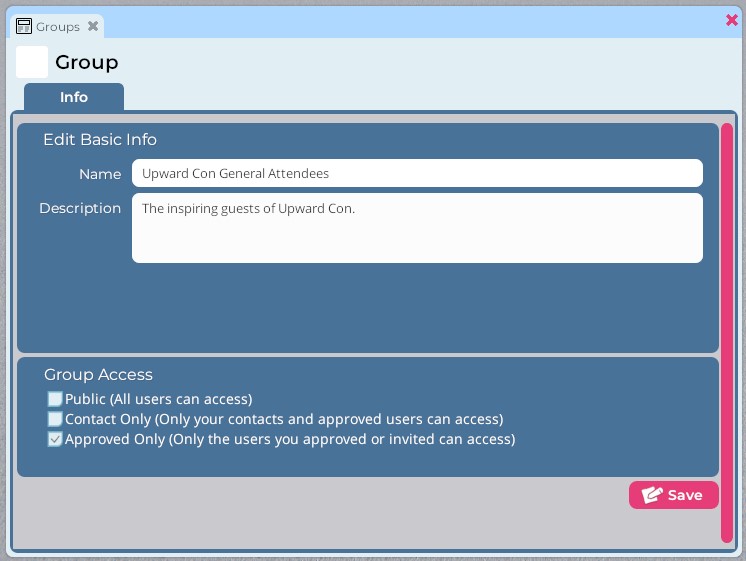
Pictured: The Groups dialog box.
Here you can enter a name and description for your group. You can also change your group access type to Public, Contact Only, or Approved Only. When you're done, click the Save button.
Group access types
| Group access type | Description |
| Public | Users can join this group with no approval process. Users can also be added to the group manually. |
| Contact Only | Contacts listed in the Group Owner's People list and other approved users can join the group. Users can apply to join, and a Group Owner, Administrator, or Mod can approve or reject the application. Users can also be added to the group manually. |
| Approved Only | Only approved users can join the group. Users can apply to join, and a Group Owner, Administrator, or Mod can approve or reject the application. Users can also be added to the group manually. |
Deleting a group
To delete a group, follow these steps.
- Open the Groups window by clicking the People button in the bottom toolbar, or by pressing Ctrl + F on your keyboard. Then click the Groups tab.
- Locate the group you want to delete and click on its name to launch the Group Information window. Then click on the Members tab.
- Scroll to the bottom of the page and click the "Delete this group" button. Follow the prompts to confirm deletion.
Managing group members
Approving group applicants

Pictured: An example of an Approved Only group with a pending applicant.
If you are the Owner, Administrator, or Moderator of a group that requires member approval, you will see membership requests appear in the Group Information window under the Members tab > Requests category. Here you can click the Edit button located to the far right of the individual's name in order to approve, block, or delete the user request.
To approve multiple users at once, check the boxes located to the left of their names and then use the Set Role drop-down menu to assign them all the same role. (For instance, you could select five users and approve them all at once by assigning them "Member" status.)
Adding and removing group members

Pictured: The "Add new members" dialog box.
To add a user to your group manually, follow these steps.
- Open the Groups window by clicking the People button in the bottom toolbar, or by pressing Ctrl + F on your keyboard. Then click the Groups tab.
- Click on the name of the group you want to edit. This will open the Group Information window.
- In the Group Information window, click on the Members tab, and then click the Add Members button. This will open the "Add new members" dialog box.
- Use the search field to search for the user's name. Once you find it, click the Add button.
To remove a user from the group entirely, follow these steps.
- Open the Groups window by clicking the People button in the bottom toolbar, or by pressing Ctrl + F on your keyboard. Then click the Groups tab.
- Click on the name of the group you want to edit. This will open the Group Information window.
- In the Group Information window, click on the Members tab, and use the search field to search for the user's name.
- Once you locate the user you want to remove, click the Edit button located to the right of their name. In the action menu that appears, click Delete.
You can remove multiple group members simultaneously by checking the boxes located to the left of their names, clicking the Set Status drop-down menu, and selecting Delete.
Deleted members can reapply for membership to the group. To ban a user from reapplying, select Block instead of Delete.
Assigning group roles
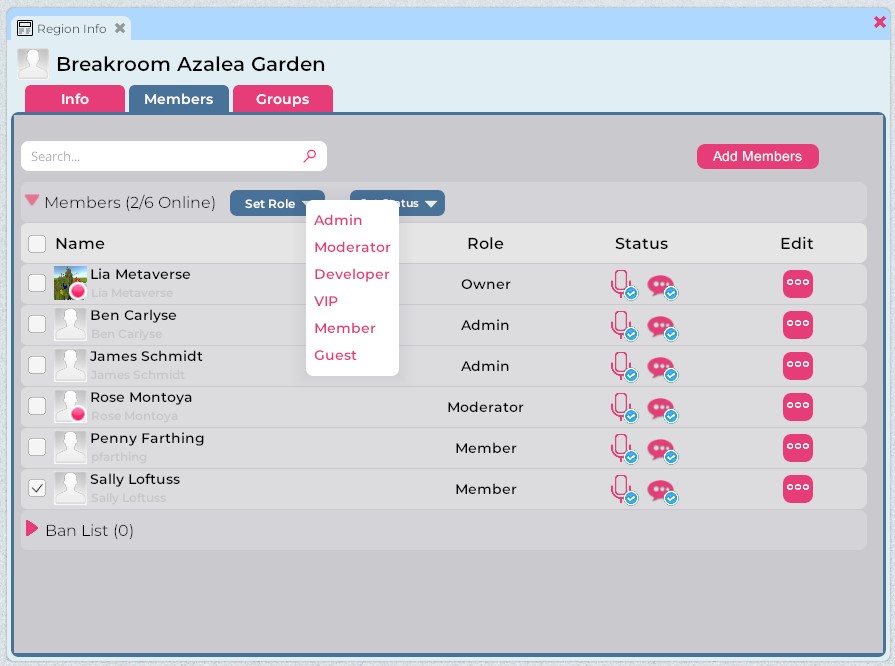
Pictured: An example of the Group Information window Members tab.
Within groups, there are several roles that members can be assigned. Some roles confer special powers and privileges, both within the group and when Regions are assigned to a particular group using the "Groups Only" Region access option.
In brief, these roles are:
- Owner
- Administrator
- Moderator
- Developer
- Member
- Guest
- VIP
Group Owners have absolute control over the group and its settings. If a group is set to Contact Only permissions, then any contacts on the Group Owner's People list will automatically be granted access to the group.
Owners can:
- Manage and delete the group
- Manage the group member list and deal with disruptive group members
- Assign group members advanced permissions
When a Region is set to the "Groups Only" region access option, Group Owners have all the rights and permissions of a Region Owner.
Group Administrators can perform many of the same tasks as Group Owners. Administrators can invite users to Contact Only and Approved Only groups, and approve membership requests. They cannot appoint additional Administrators.
Administrators can:
- Manage the group member list and deal with disruptive group members
- Assign and manage advanced group permissions below the Administrator level
When a Region is set to the "Groups Only" Region access option, Group Admins have all the rights and permissions of a Region Admin.
Group Moderators can approve membership requests. They can mute, block, and reinstate members. They cannot appoint additional Moderators.
Moderators can:
- Manage the group member list and deal with disruptive group members
- Assign and manage advanced group permissions below the Moderator level
When a Region is set to the "Groups Only" Region access option, Group Moderators have all the rights and permissions of a Region Moderator.
When a Region is set to the "Groups Only" Region access option, Group Developers have all the rights and permissions of a Region Developer. Otherwise, they have no special powers.
Group Members have no special privileges, but they will be permitted to enter any Region that has been set to "Groups Only" Region access for that group.
Coming soon.
Designating a user as a VIP gives them no special powers. Currently, this role is only useful for Lua script functionality and presenter seats in Regions set to "Groups Only" Region access.
To assign a group member a different role, check the box located next to the member's name in the Members tab. Then use the Set Role drop-down menu to select the new role. You can assign users the Member role to revoke advanced permissions at any time.
You can assign multiple users the same role simultaneously by checking the boxes located to the left of their names and then using the Set Role drop-down menu to assign them all the same role.
Muting and banning group members
In order to mute or ban/block a user, that user must be a current member of your group.
Muting users
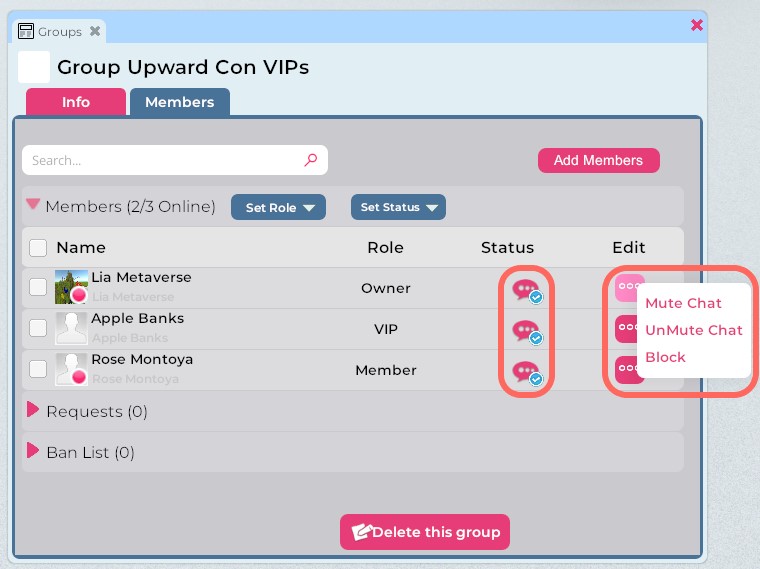
Highlighted: The location of the Status icons and the Edit button action menu.
To mute a single user on group text chat, follow these steps.
- Open the Groups window by clicking the People button in the bottom toolbar, or by pressing Ctrl + F on your keyboard. Then click the Groups tab.
- Click on the name of the group you want to edit. This will open the Group Information window.
- In the Group Information window, click on the Members tab, and use the search field to search for the user's name.
- Once you locate the user you want to mute, you can either:
- Click the Edit button located to the far right of the user's name. In the action menu that appears, select Mute Chat.
- Toggle the Speech bubble icon located to the right of the user's name. When the blue check mark disappears, the user is muted.
To restore communication to a previously muted user, repeat steps 1-4 above, and either:
- Click the Edit button located to the right of the user's name. In the action menu that appears, select Unmute Chat.
- Toggle the Speech bubble icon located to the right of the user's name. When a blue check mark appears, the user can communicate over text chat.
To mute multiple users at once, follow these steps.
- Open the Groups window by clicking the People button in the bottom toolbar, or by pressing Ctrl + F on your keyboard. Then click the Groups tab.
- Click on the name of the group you want to edit. This will open the Group Information window.
- In the Group Information window, click on the Members tab, and locate the users you want to mute. Check the box located to the left of each user's name.
- Click the Set Status drop-down menu, and select Mute Chat.
To restore communication to multiple users, repeat steps 1-3 above. Then, click the Set Status drop-down menu, and select Unmute Chat.
Banning users
To block a user from participating in your group or reapplying for membership, follow these steps.
- Open the Groups window by clicking the People button in the bottom toolbar, or by pressing Ctrl + F on your keyboard. Then click the Groups tab.
- Click on the name of the group you want to edit. This will open the Group Information window.
- In the Group Information window, click on the Members tab, and use the search field to search for the user's name.
- Once you locate the user you want to ban, click the Edit button located to the far right of the user's name. In the action menu that appears, select Block.
To undo a ban, repeat steps 1-3 above. Locate the user under the Ban List, and then click the Edit button located to the far right of their name. In the action menu that appears, select Unblock.
To ban multiple users at once, follow these steps.
- Repeat steps 1-2 above.
- In the Group Information window, click on the Members tab, and locate the users you want to ban. Check the box located to the left of each user's name.
- Click the Set Status drop-down menu, and then click Block.
To undo a ban for multiple users, repeat steps 1-2 above. Then click the Set Status drop-down menu, and select Unblock.
Banning a member with Administrator, Moderator, Developer, or VIP permissions will revoke this special role. If you choose to unban such a user and reinstate them in the members list, please take a moment to ensure that they have been assigned the proper role.