Installing Unity and the Breakroom SDK
Overview
If you would like to create and upload custom items to the Breakroom platform, you will need to download a compatible version of the Unity real-time development platform and install the Breakroom SDK. Instructions for downloading and installing these components can be found below.
Only World Owners, World Administrators, and World Developers can upload custom items to Breakroom.
The virtual asset files that were used to create Breakroom's Region templates (e.g., the plants, buildings, furniture, etc.) are not available for individual distribution. 3D assets for use in Unity can be purchased through the Unity Asset Store, or any other 3D content warehouse.
Downloading Unity
For the best possible development experience, we recommend that creators use Unity version 2018.4.x up to and including 2018.4.36. This software can be obtained by visiting the Unity download archive. Later versions of Unity may work, but we cannot guarantee their compatibility. Please review Breakroom's system requirements for more information.
Installing Unity
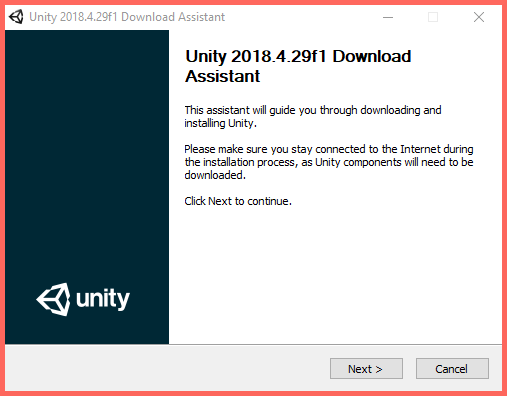
Pictured: The Unity download assistant.
Once you've downloaded a compatible version of Unity, launch the download assistant. Click the Next button, and follow the installation instructions. A standard install of Unity is all that is required to begin creating in Breakroom.
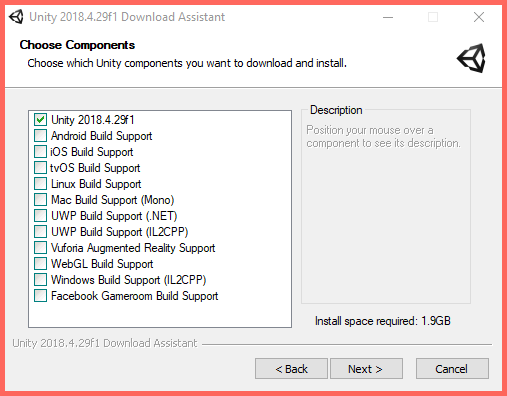
Pictured: The Unity download assistant, with the standard install of Unity selected.
To begin using Unity, you will need to register for a Unity ID. You can create one during the sign-in process, or visit the Unity website in order to sign up.
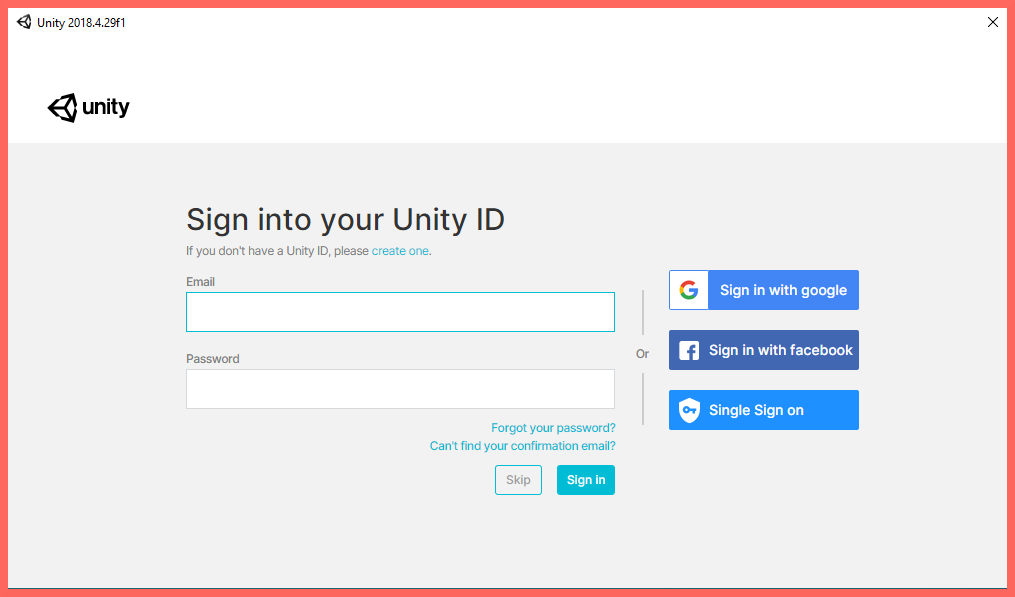
Pictured: The Unity ID sign-in panel. Click the "create one" link if you do not have a Unity ID.
Unity is free to use for individuals earning under $100K USD in revenue or funding per year. Please review all of the terms and conditions published on the Unity website.
Downloading the Breakroom SDK
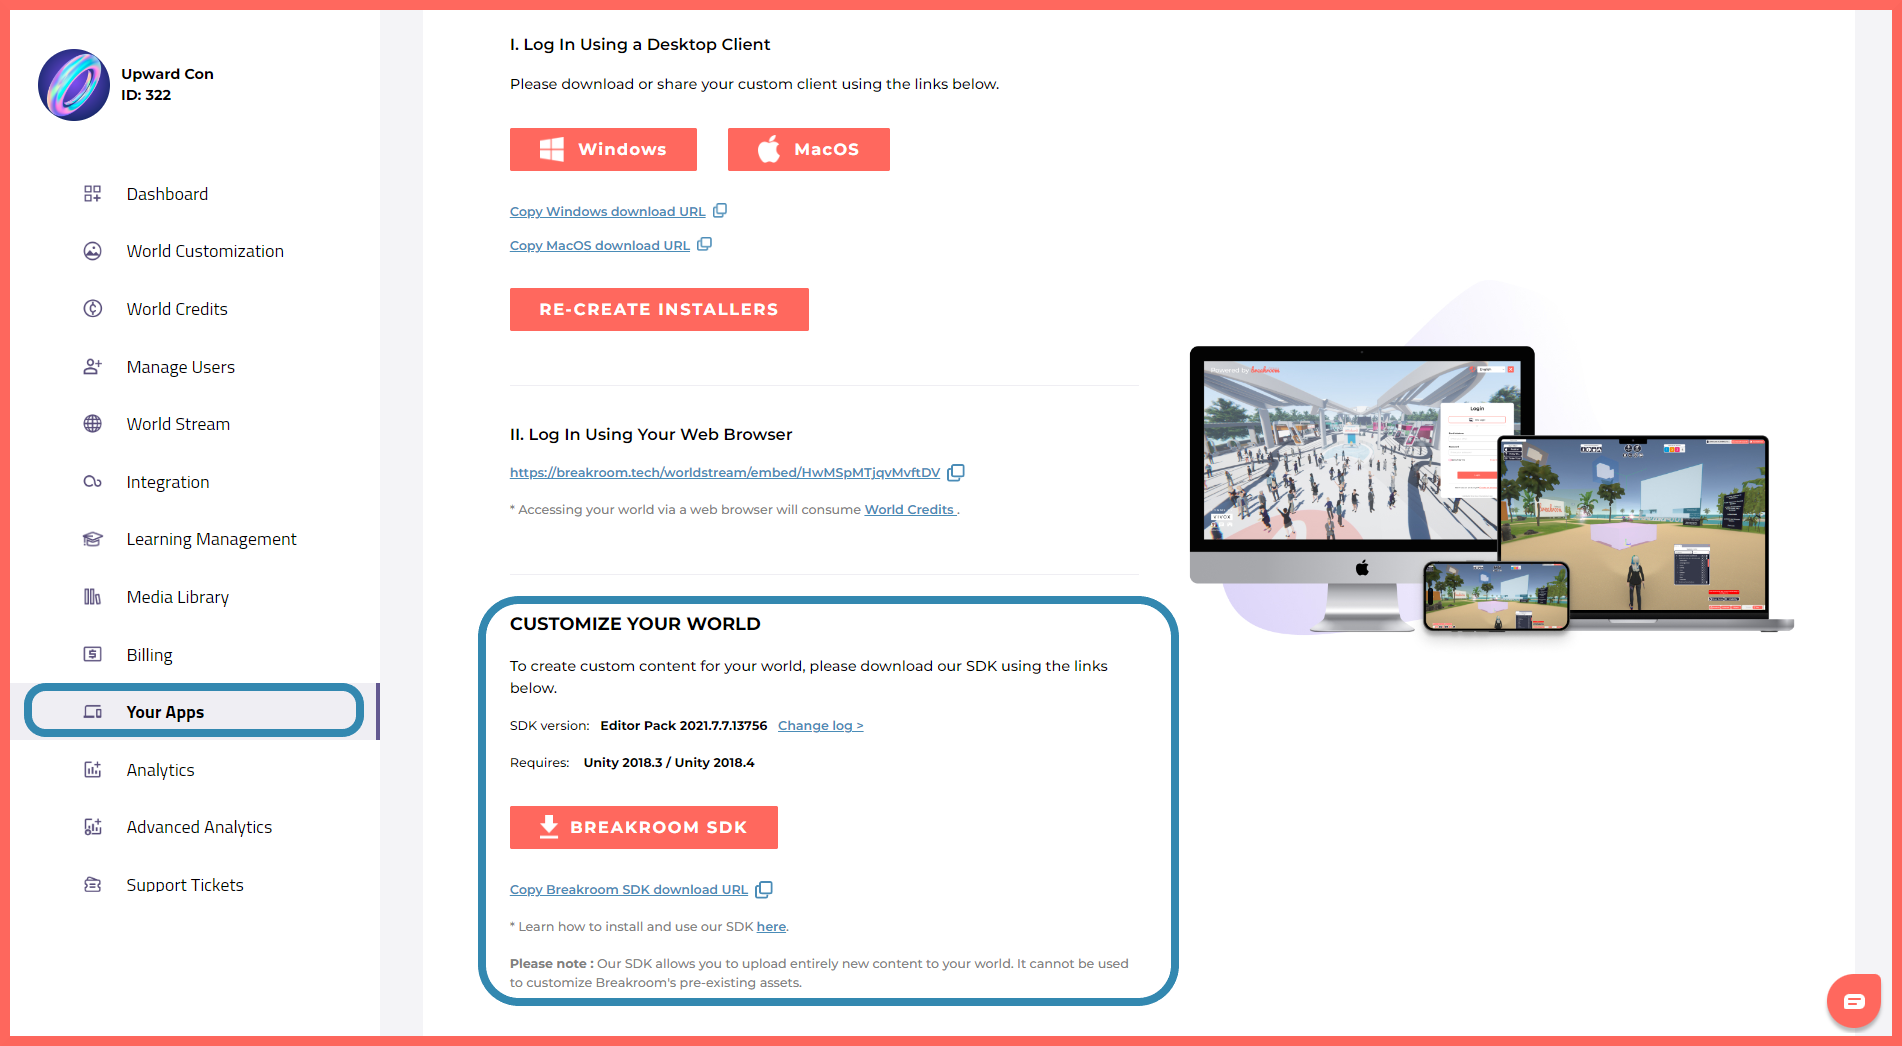
Highlighted: The location of the Dashboard > Your Apps tab and the Breakroom SDK download button.
The Breakroom SDK comes packaged as a standard .unitypackage file. You can find the file download link under the Your Apps tab on the Dashboard.
To download the SDK, click the Breakroom SDK button and save the file to your local drive. You can also copy the download link to share with collaborators who may not have access to the Dashboard.
Installing the Breakroom SDK
Once you have installed Unity and signed in, you can create a new project by clicking the Create button. Give your project a name. Make sure the 3D template is selected, and then click the Create button again to start Unity.
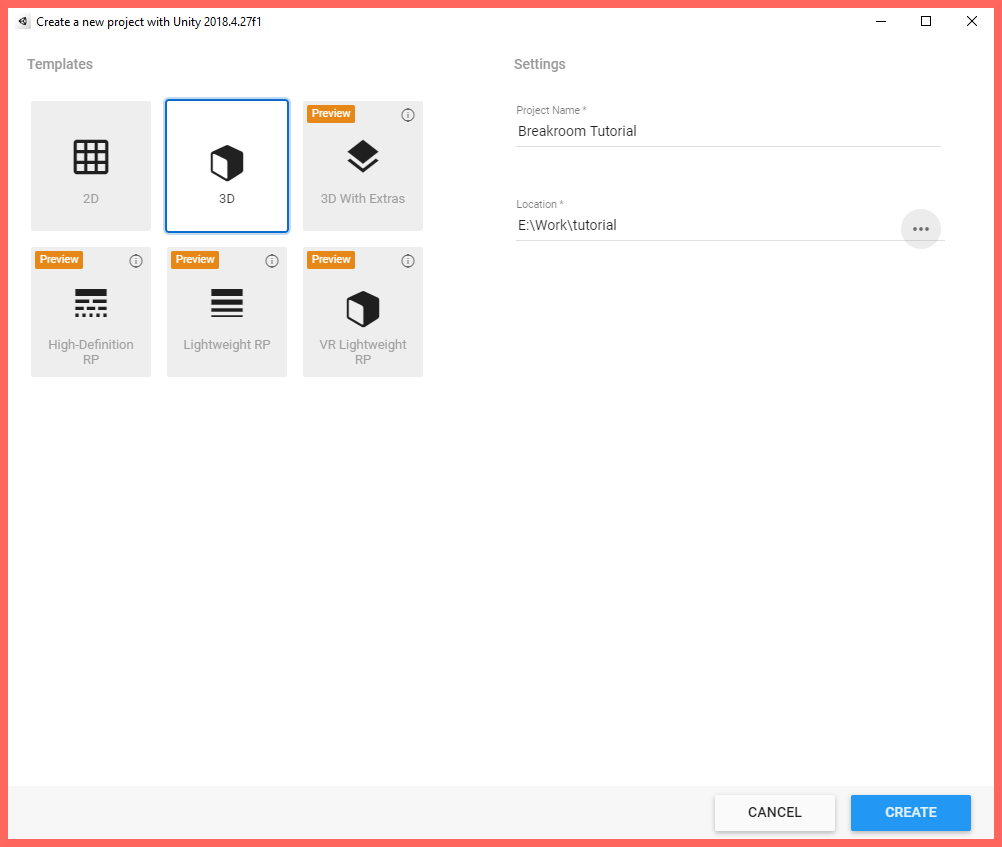
Pictured: The project creation window, with the 3D template selected.
Once Unity has fully launched, navigate to Assets > Import Package > Custom Package. This will launch a standard file import window.
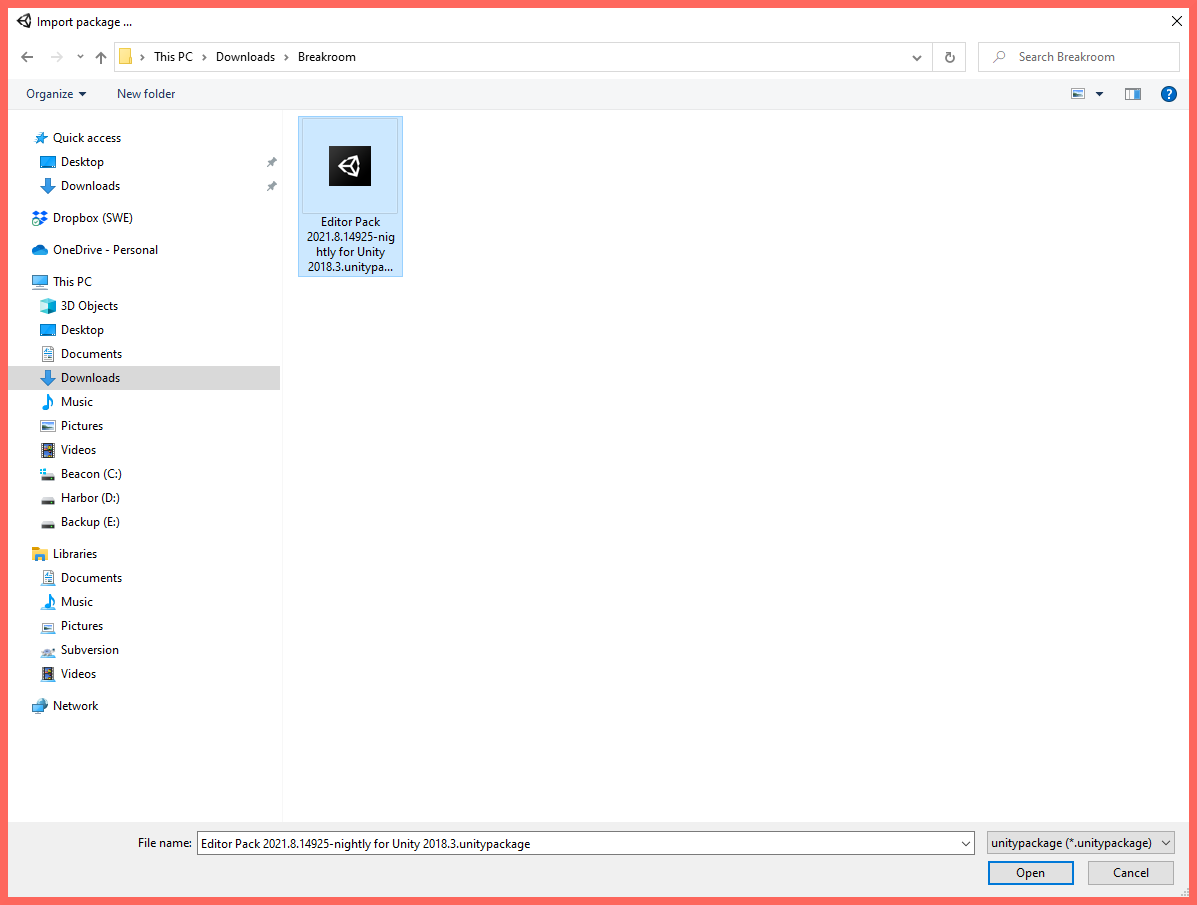
Pictured: The Custom Package import window, with the Breakroom SDK selected for import.
Locate the Breakroom SDK file on your computer's hard drive and select it. Then click the Open button.
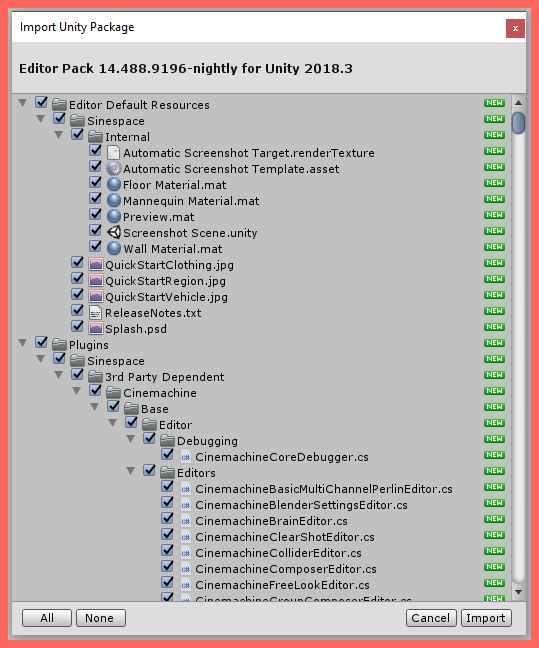
Pictured: The Import Unity Package window, with asset files expanded.
Next, a window will appear listing the assets that will be installed with the SDK. Click the Import button to continue the install.
During the installation process, you may see a Restart button appear. This is normal. Click the Restart button to continue the install.
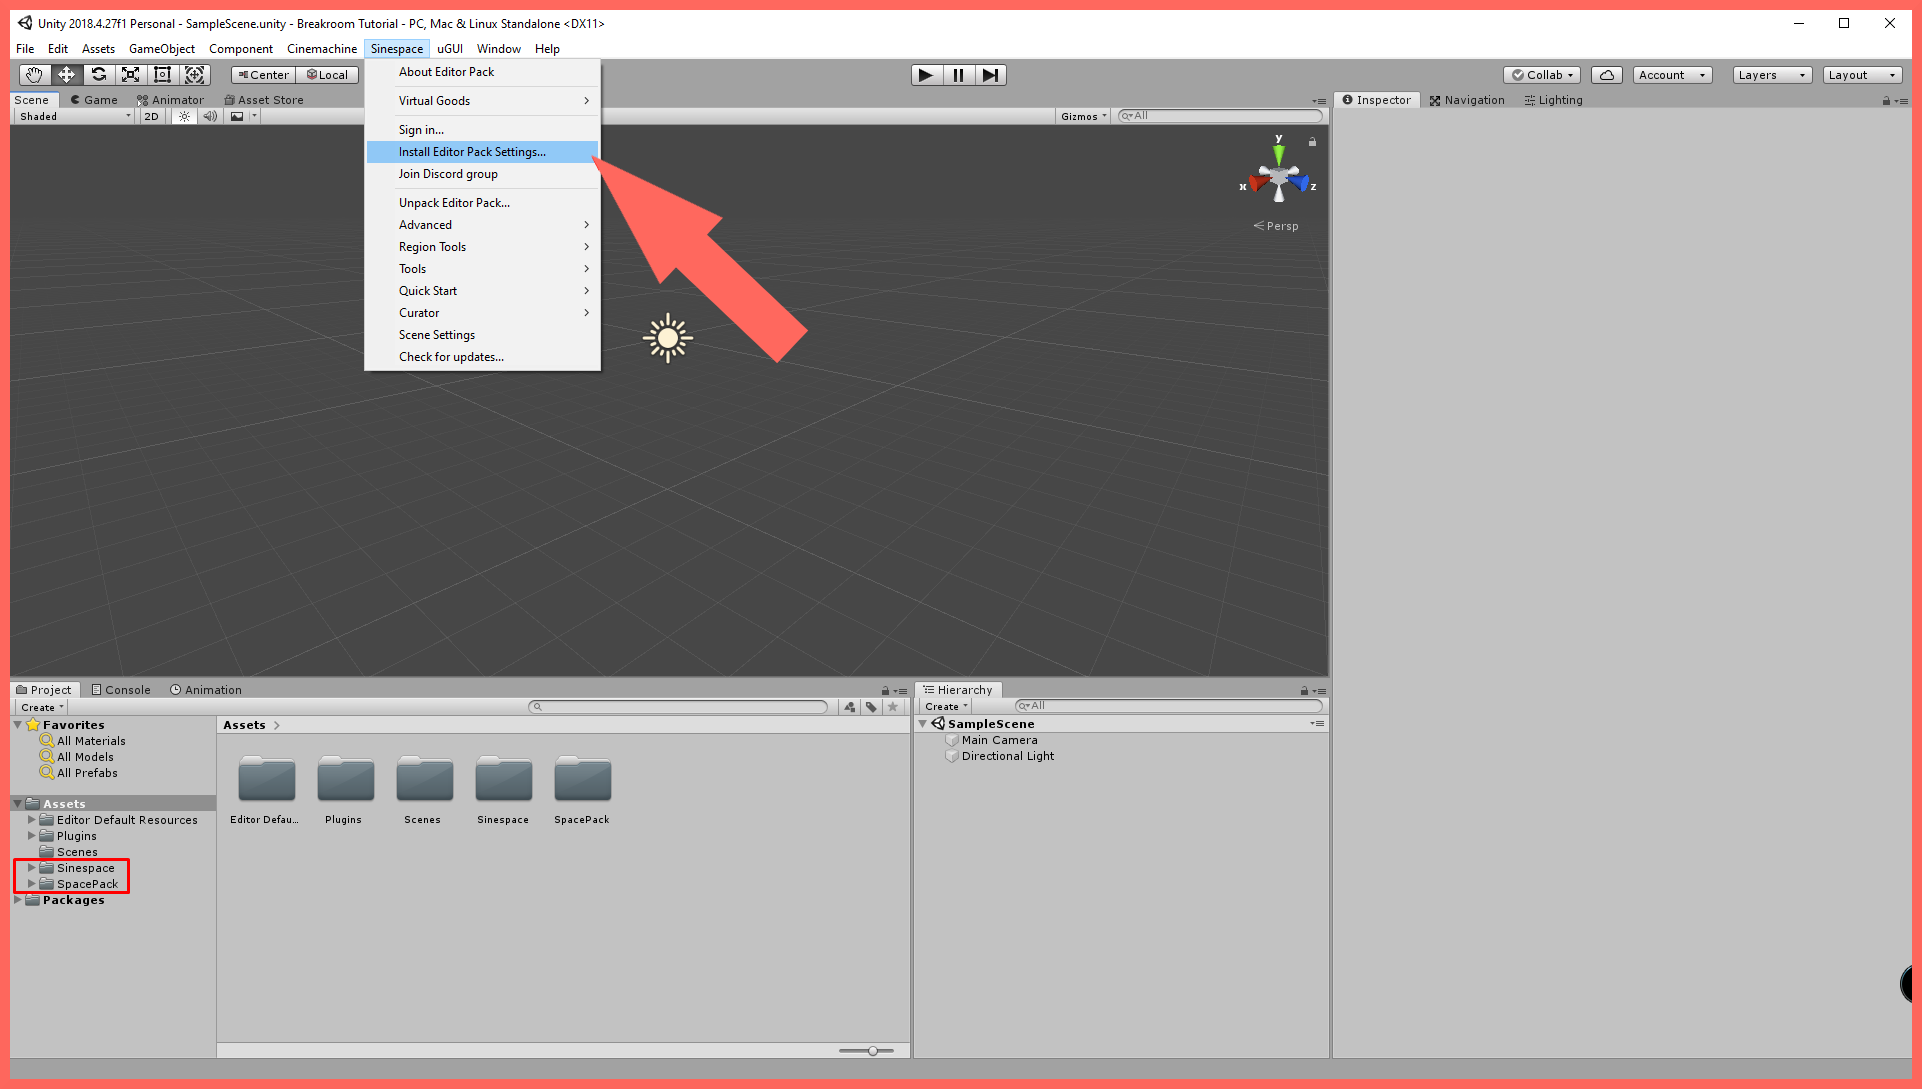
Highlighted: The location of the Sinespace > Install Editor Pack Settings function.
Once the SDK install has completed, click on the Sinespace menu located at the top of the screen and select Install Editor Pack Settings.
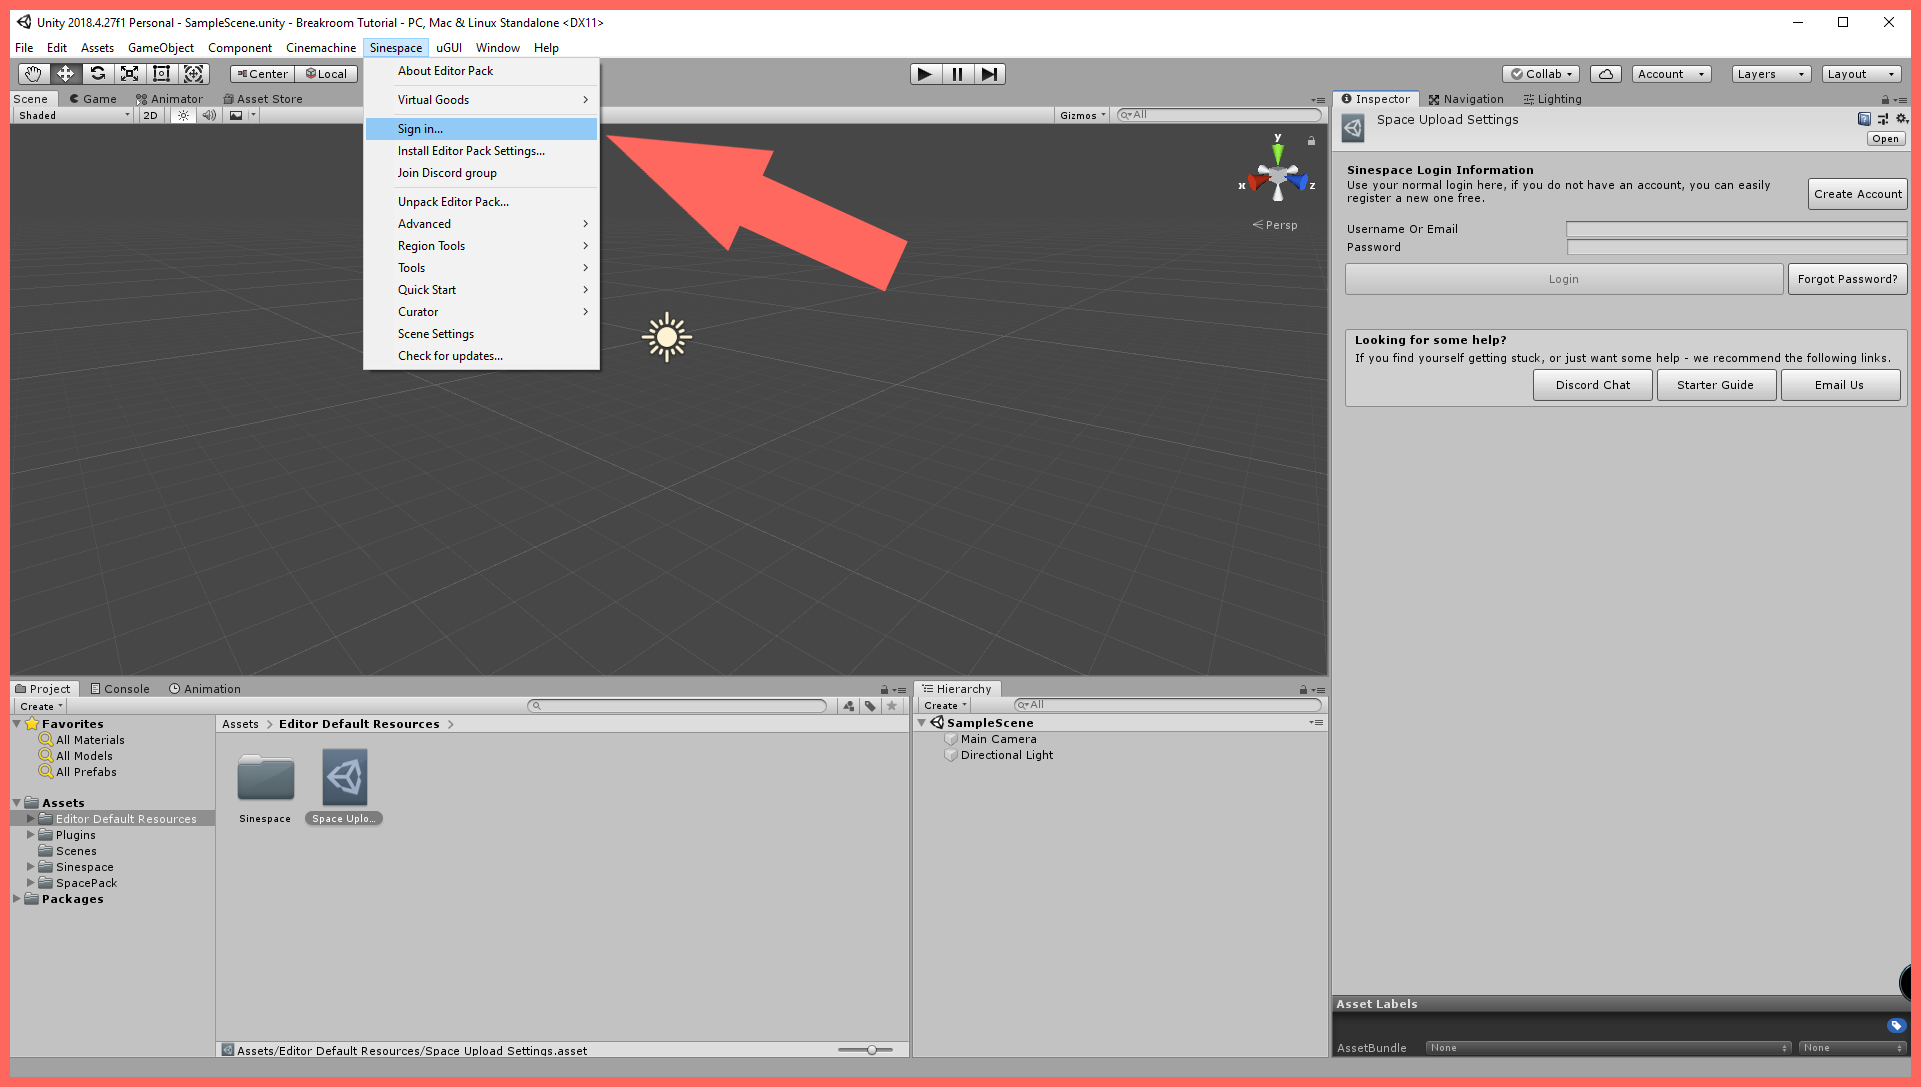
Highlighted: The location of the Sinespace > Sign In function.
Click on the Sinespace menu again and select Sign In. You will be prompted to sign in to the SDK. As a new creator, you will be required to sign up for a creator account. You can do this by clicking the Create Account button located in the Inspector panel on the right. If you have already signed up for a creator account, you can log in using your pre-existing username and password.
Special tips for Mac users
Mac users are required to use the native Mac uploader. To access this, click the Sinespace menu at the top of the screen and navigate to Tools > Install > Native Mac Uploader.
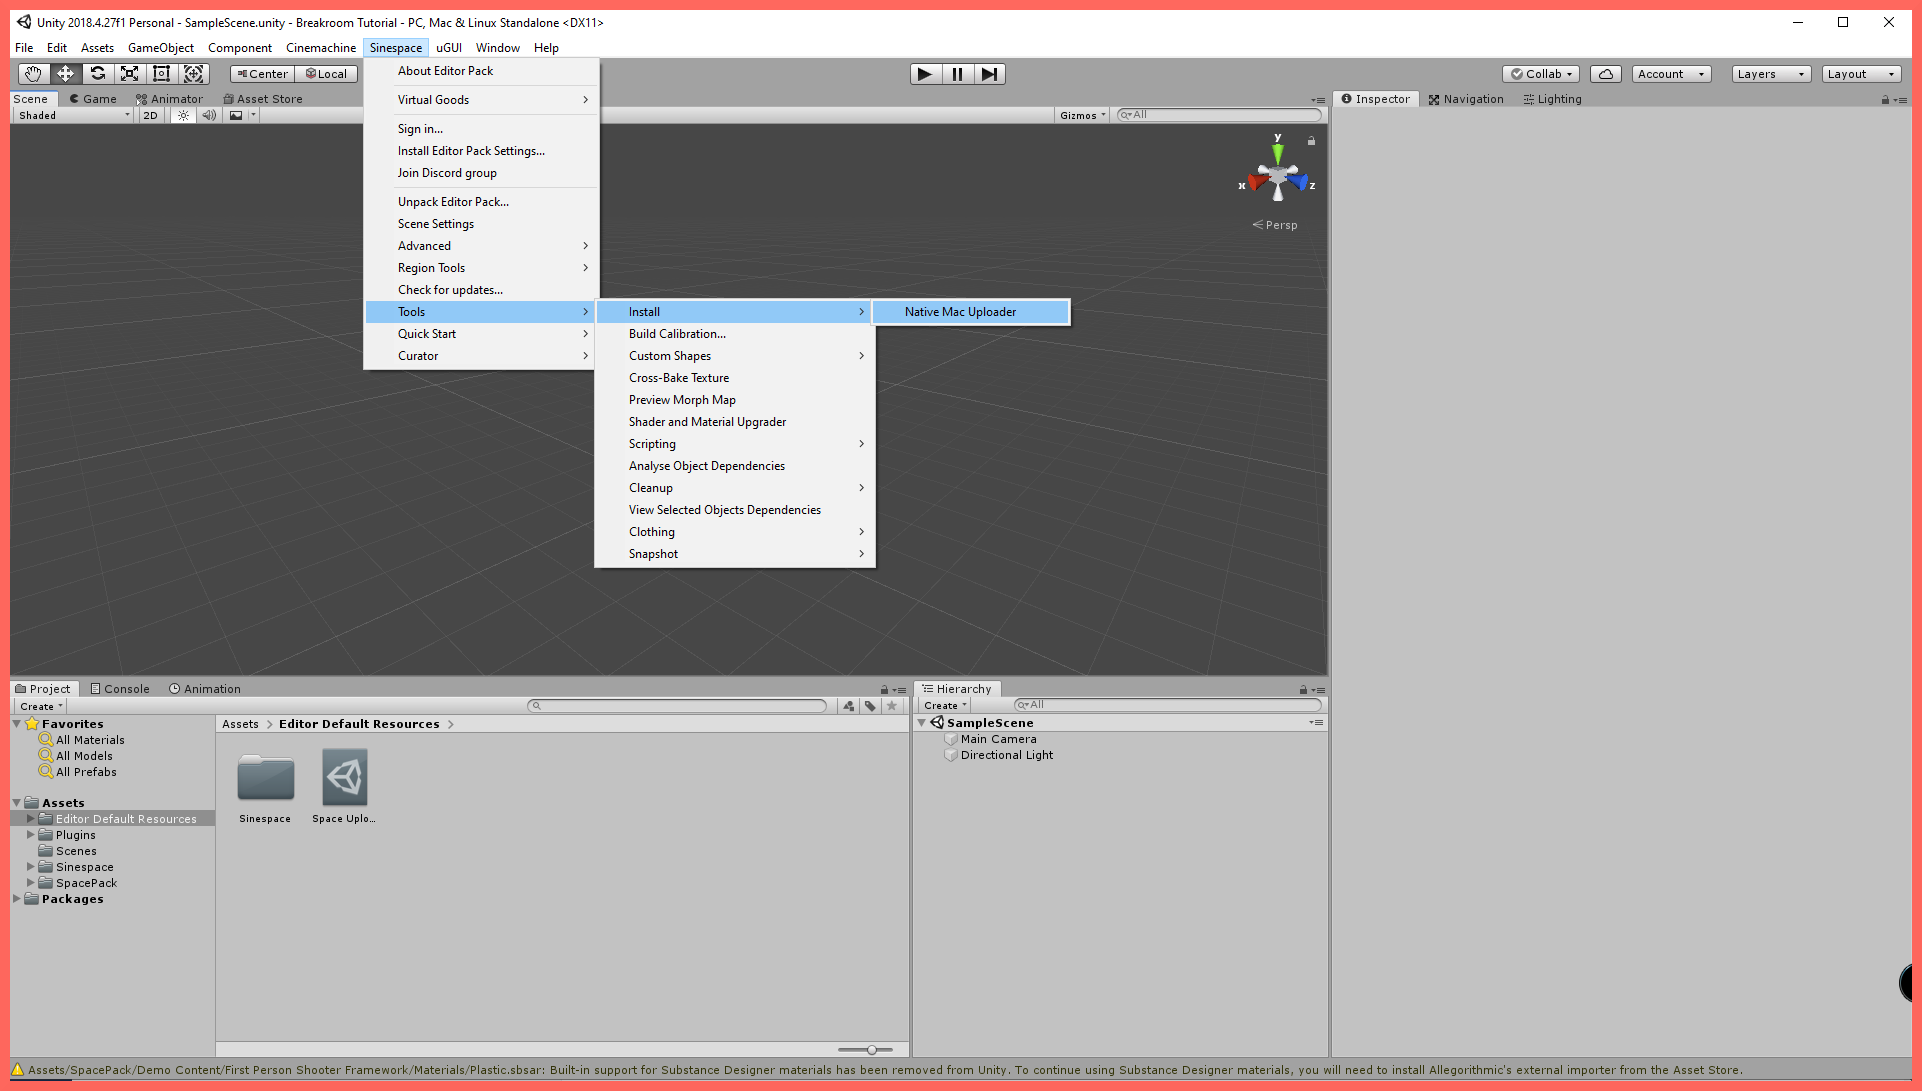
Pictured: The location of the Sinespace > Tools > Install > Native Mac Uploader.