Broadcast messages
Overview

Highlighted: The location of the Broadcast messages button.
The Broadcast messages button (highlighted above) gives Moderators the ability to send text messages to all users currently gathered within a Region, or to individual users. Moderators can flag their messages for reply, allowing users to respond with a minimum of effort. Moderators can also create countdown timers to assist with event management.
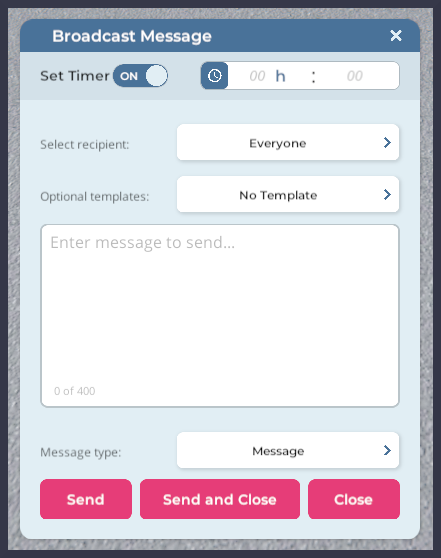
After accessing the moderator tools, click the Broadcast messages button in the panel that appears on the right-hand side. This will open the Broadcast Message panel. A quick rundown of the UI will be helpful before we delve into the various messaging options.
| Button or UI component | Function |
| Set Timer toggle | Allows you to activate or deactivate the countdown timer displayed on users' screens. |
| Timer field | Allows you to enter the countdown timer start value (in hours and minutes). |
| Select recipient menu | Allows you to select a message recipient (i.e., Everyone or a specific user). |
| Optional templates menu | Allows you to select a pre-defined message template. |
| Message field | Allows you to compose your own message. |
| Message type menu | Allows you to choose whether users can respond to your message, and how they can respond. |
| Send button | Sends the current message. |
| Send and Close button | Sends the current message and closes the Broadcast Message panel. |
| Close button | Closes the Broadcast Message panel. |
Message types
Region broadcasts
Region broadcasts are useful when it comes to managing event logistics. You can use them to keep everyone in your Region on task, announce schedule changes, or provide event transition cues.

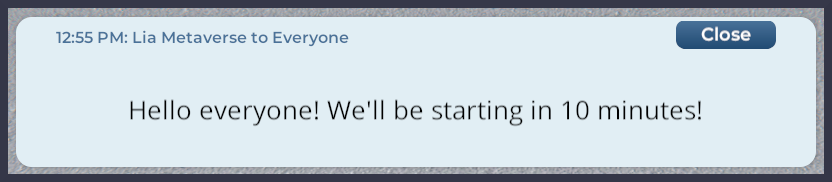
Pictured: An example Region broadcast message.
Here's an example of a message intended for everyone within the Region. Notice how the options are set up:
- The Select recipient drop-down menu is set to Everyone, so everyone in the Region will see the announcement
- The Message type drop-down menu is set to Message, so the announcement will be displayed with no expectation of a reply
Here's how the example message might appear to users located within the Region:
To send a Region broadcast message like the one above, follow these steps:
- Navigate your avatar to the Region where you want to communicate with your users.
- Click the Moderator tools/Key button located on the right side of the screen.
- Click the Broadcast messages button.
- In the Broadcast Message panel that appears, use the Select recipient drop-down menu to select Everyone.
- Enter the message you want to send, or select a template using the Optional templates drop-down menu.
- Set the Message type drop-down menu to Message.
- Click the Send or Send and Close button.
Direct messages
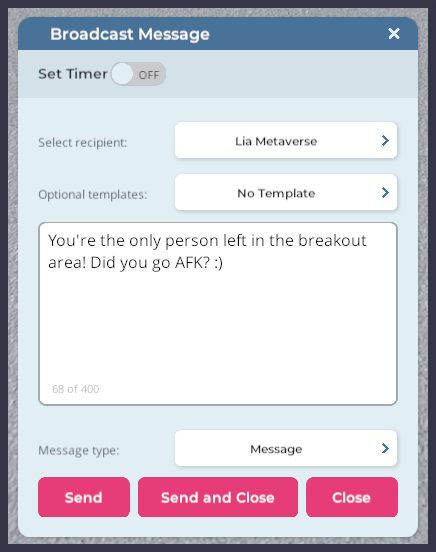
Pictured: An example direct broadcast message.
You can also send direct messages to individual users located in a region. To do so, follow these steps.
- Navigate your avatar to the Region where you want to communicate with your users.
- Click the Moderator tools/Key button located on the right side of the screen.
- Click the Broadcast messages button.
- In the Broadcast Message panel that appears, use the Select recipient drop-down menu to select your intended recipient. You can use the search field to search for a specific name.
- Enter the message you want to send, or select a template using the Optional templates drop-down menu.
- Set the Message type drop-down menu to Message.
- Click the Send or Send and Close button.
Yes-or-no messages
In certain cases, you may want to gather feedback from users in the form of a yes-or-no response. You can broadcast an open question to everyone gathered within your Region, or limit your question to a particular user.
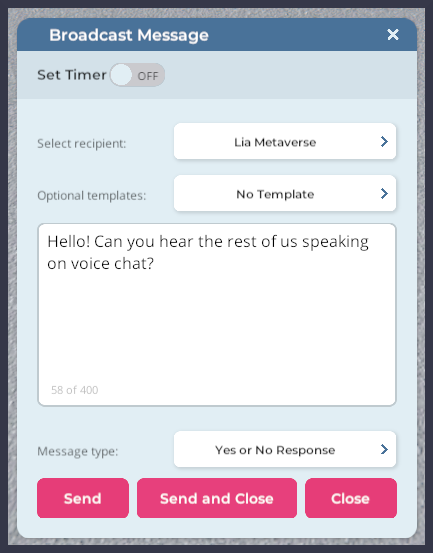
Pictured: An example direct yes-or-no broadcast message.
Here's an example of how you might approach a specific user. Notice that:
- The Select recipient menu is set to a specific user
- The Message type menu is set to Yes or No Response
Here's how the example message might appear to the intended user:
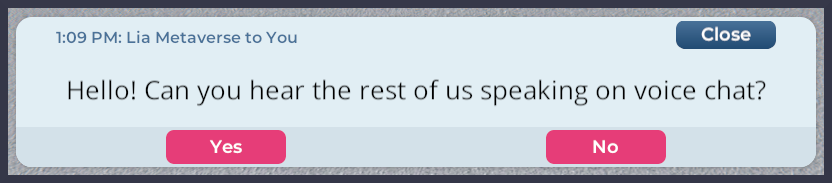
You can see that in addition to being able to close the message, the user can answer Yes or No by clicking the relevant buttons.
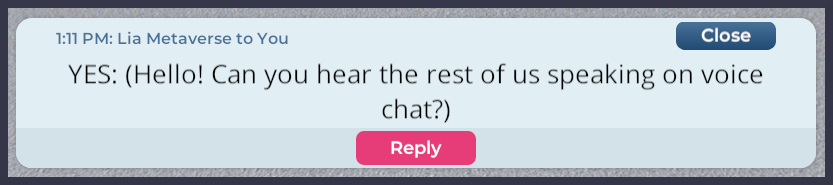
In our hypothetical example, the user has responded by answering that yes, she can hear other attendees speaking. Above is the return message a Moderator might receive. From here, the Moderator can reply again through the message pop-up by clicking the Reply button. Alternatively, the Moderator may close the message by clicking the Close button, and approach the user directly through text or voice chat.
To send a yes-or-no message, follow these steps:
- Navigate your avatar to the Region where you want to communicate with your users.
- Click the Moderator tools/Key button located on the right side of the screen.
- Click the Broadcast messages button.
- In the Broadcast Message panel that appears, enter the following information:
- Use the Select recipient drop-down menu to select Everyone or your intended recipient. You can use the search field to search for a specific name.
- Enter the message you want to send, or select a template using the Optional templates drop-down menu.
- Set the Message type drop-down menu to Yes or No Response.
- Click the Send or Send and Close button.
Input messages
Input messages allow Moderators to solicit detailed responses and feedback from users. These messages can be broadcast to an entire Region, or targeted at a single person.

Pictured: An example input response message.
In the example image above, the Moderator is sending a message to everyone. Notice that:
- The Select recipient menu is set to Everyone
- The Message type drop-down menu is set to Input Response
Here's how the example message might appear to users located within the Region:
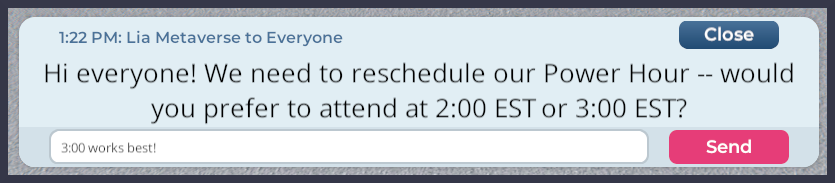
You can see that a user has received this message and has entered her thoughts in the response field. She can now click Send to reply to the Moderator, or dismiss the announcement pop-up by clicking Close.
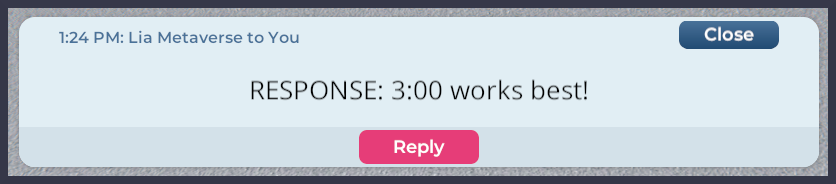
Here's an example of how the user's response may appear to a Moderator. The Moderator can now respond to the user by clicking Reply, or Close the conversation.
To send an input message, follow these steps:
- Navigate your avatar to the Region where you want to communicate with your users.
- Click the Moderator tools/Key button located on the right side of the screen.
- Click the Broadcast messages button.
- In the Broadcast Message panel that appears, enter the following information:
- Use the Select recipient drop-down menu to select Everyone or your intended recipient. You can use the search field to search for a specific name.
- Enter the message you want to send, or select a template using the Optional templates drop-down menu.
- Set the Message type drop-down menu to Input Response.
- Click the Send or Send and Close button.
Countdown timers
You can also use the Broadcast Message panel to create countdown timers that will appear on users' screens. Timers can be added to any message type, and users can see one individual timer and one global timer.
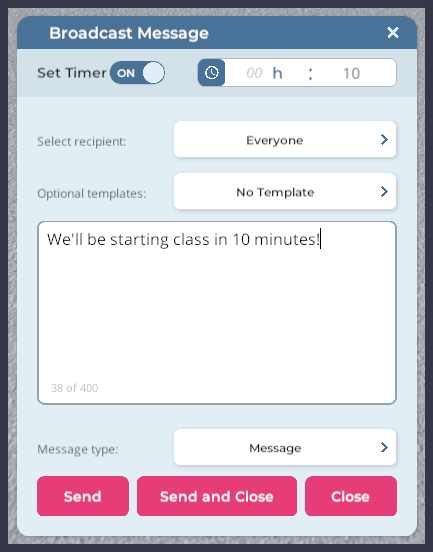
Pictured: An example broadcast message with an associated timer.
In the example image above, the Moderator is sending a message to everyone. Notice that:
- The Set Timer toggle is switched On
- A number value has been entered into the minutes field
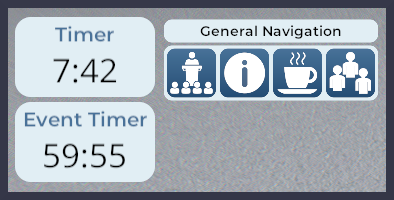
Here's an example of how timers may appear to an individual user. This user has received one private timer ("Timer") and one global timer ("Event Timer"). By attaching private timers to direct messages, you can issue individual cues to help speakers and educators transition between events.
To attach a timer to any type of broadcast message, follow these steps:
- Navigate your avatar to the Region where you want to communicate with your users.
- Click the Moderator tools/Key button located on the right side of the screen.
- Click the Broadcast messages button.
- In the Broadcast Message panel that appears, switch the Set Timer toggle to On. Enter the timer length in hours and minutes.
- Complete your message as normal.
- Click the Send or Send and Close button.
When you issue a new event or private timer, it will override any previous timers.