Breakroom Tour Cameras
Overview
The Breakroom Tour Camera system allows users with advanced permissions to implement customized visual tours of any Region. This powerful tool can be used to highlight networking areas, visually illustrate the steps necessary to complete a task, or generate excitement about the various activities available in a particular Region—the possibilities are endless.
In your inventory, you will see the Breakroom Tour Camera system represented by this icon: 
In order to set up the Breakroom Tour Cameras system, users with appropriate World- or Region-level permissions will need to place the object in a Region and edit its sub-objects and components. The instructions provided below presume an advanced working knowledge of Breakroom. Please consult our documentation if you need help installing and positioning virtual objects or editing the RoomFurniture component.
In order for this Toolkit object to work, you must have the Breakroom conference core components installed in the same Region. If you have uploaded a custom Region, you will need to install these components manually prior to setting up this object.
Breakroom Tour Cameras user controls
Pictured: The Start Here panel.
Users can launch your custom Region tour at any time by clicking the Eye / Take Tour button in the Start Here panel. To exit the tour, they can press the Esc key.
If you do not have the Start Here panel installed in your Region, users will not have access to the Take Tour button. If you prefer, you can trigger your tour using a Lua script. Please note that Breakroom does not offer individualized Lua support.
Setting up the Breakroom Tour Cameras
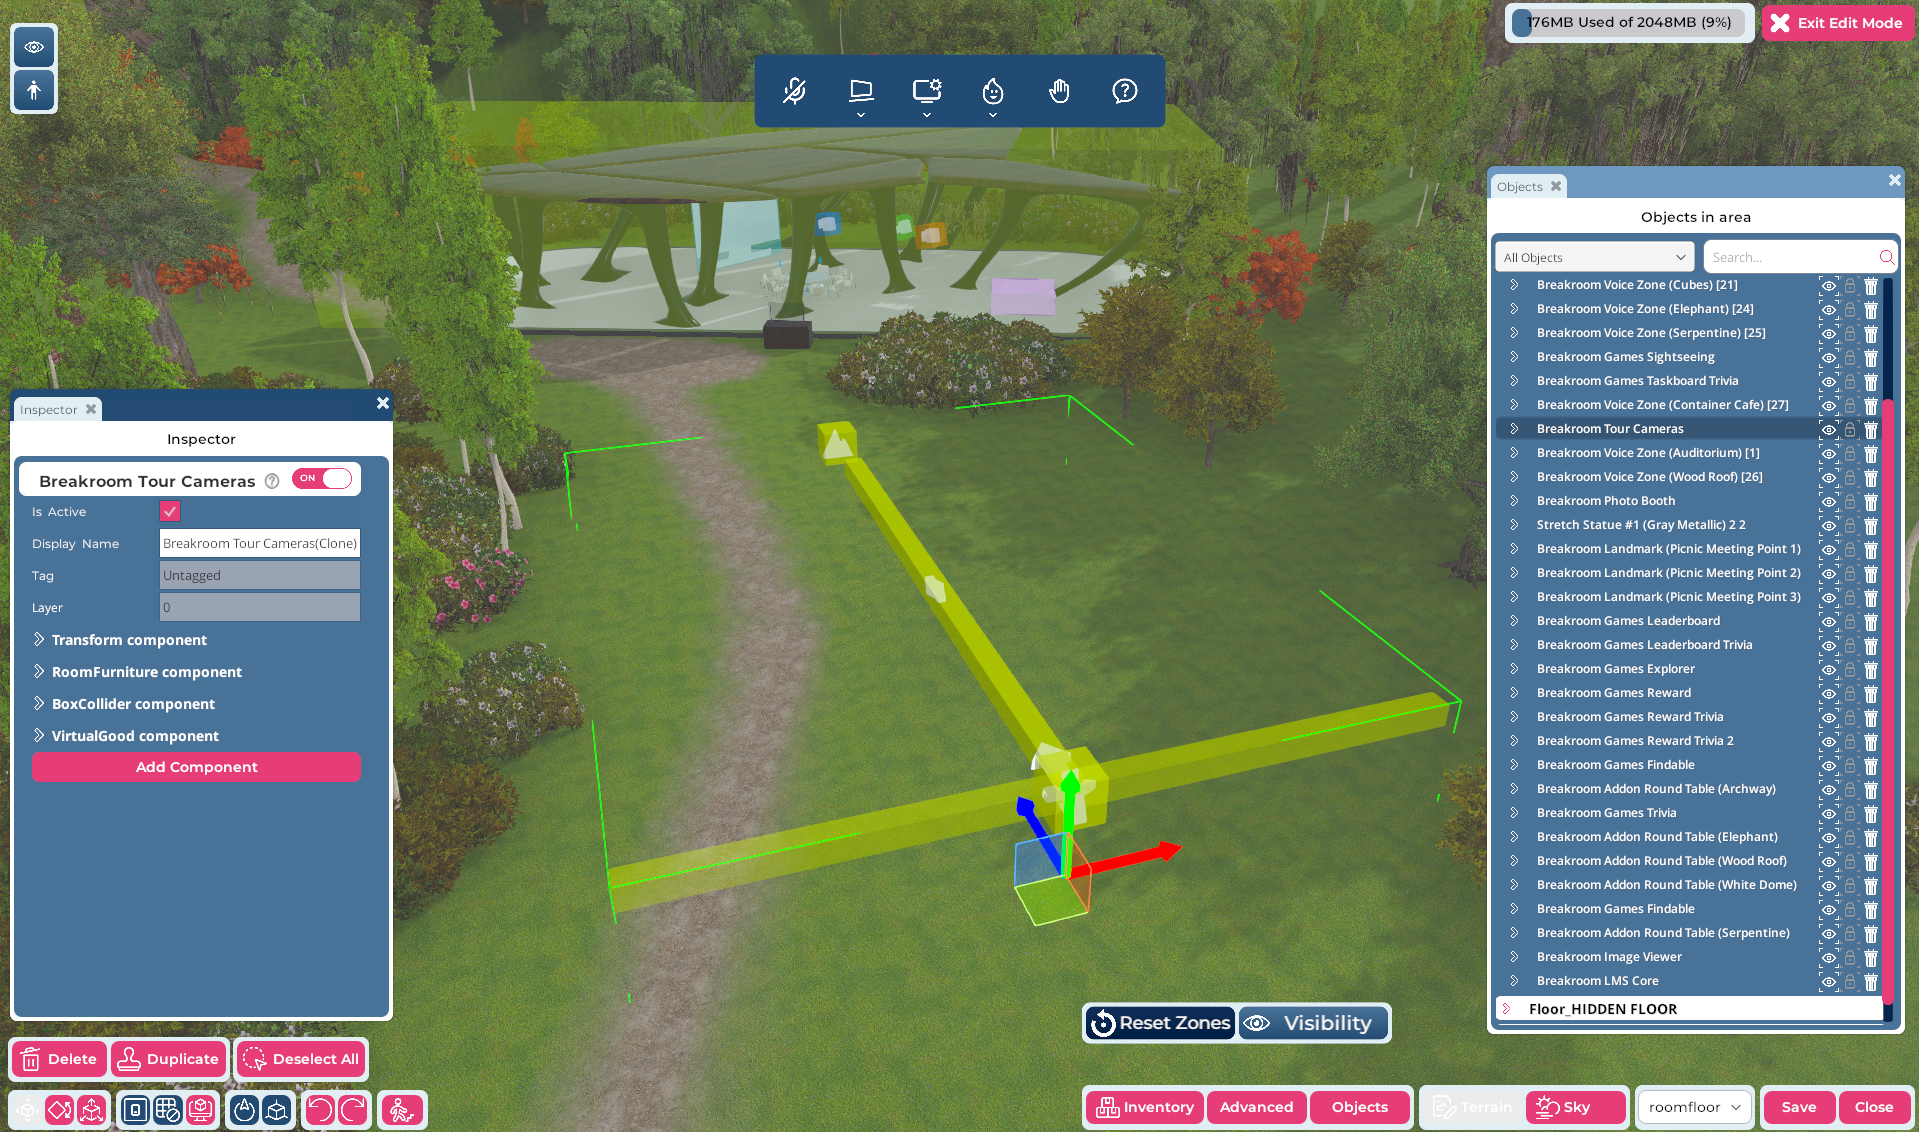
Pictured: The Region Editor, with a Breakroom Tour Cameras object highlighted.
To place a Breakroom Tour Cameras object in your Region, follow the quick-start steps below.
- Open the Region Editor by clicking the Edit Region button in the top toolbar.
- Click the Inventory button in the bottom right toolbar.
- Search for the Breakroom Tour Cameras object in your Inventory and drag the item into your Region.
- The primary Breakroom Tour Cameras object does not need to be located close to the areas you want to film. It can be located anywhere in your Region. For convenience and consistency, we encourage you to locate it at 0,0,0 in your Region by manually editing the Transform component.
- Click the Save button to store your changes, and the Close button to exit the Region Editor.
Overview of the system components
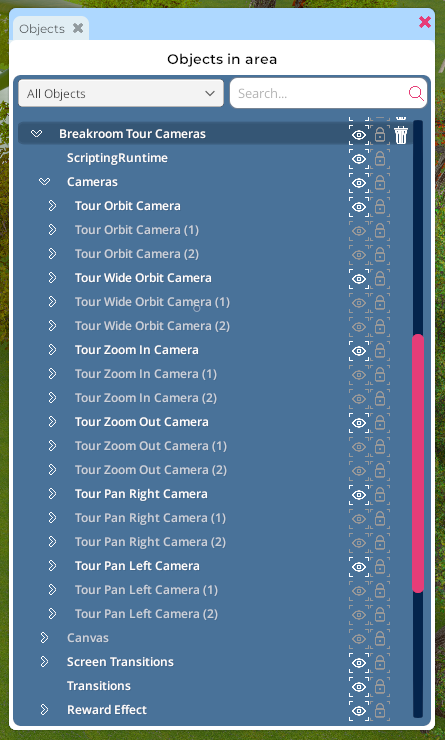
Pictured: The Breakroom Tour Cameras > Cameras object expanded.
The Breakroom Tour Cameras object contains several preconfigured cameras. You can use one or all of these cameras to create your custom Region tour—the choice is up to you.
You can locate the individual cameras by following the steps below.
- Open the Region Editor by clicking the Edit Region button in the top toolbar.
- Click the Objects Button to launch the Objects window.
- In the Objects window, search for the Breakroom Tour Cameras object. Click the > arrow located to the left of its name to expand it.
- Locate the Cameras object. Click the > arrow located to the left of its name to expand it.
Each camera type offers a unique approach to viewing your Region.
| Camera type | Behavior |
|---|---|
| Orbit | Performs a close-end 360° orbit around a center focal point. |
| Wide Orbit | Performs a wider 360° orbit around a center focal point. |
| Zoom In | "Pushes in" along a fixed track. |
| Zoom Out | "Pulls out" along a fixed track. |
| Pan Right | Shifts from left to right along a fixed track. |
| Pan Left | Shifts from right to left along a fixed track. |
Activating and deactivating individual tour cameras
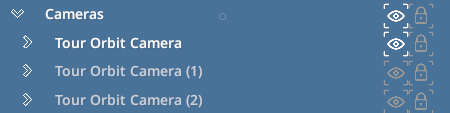
Pictured: Three Zoom In cameras, two of which are active.
Each camera in the Breakroom Camera Tour object can be activated or deactivated as necessary. If a camera is active, then its "view" will be included in your custom tour. If a camera is deactivated, it will not be included in your custom tour.
To activate a camera, click the eye icon located to the right of its name in the Objects window. (When active, the eye icon will appear bright white.) To deactivate a camera, click the eye icon again (when deactivated, the camera's name and its icon set will appear grayed out).
Editing individual tour cameras
The Breakroom Tour Cameras can be edited in a variety of ways to achieve dramatic effects.
Positioning tour cameras
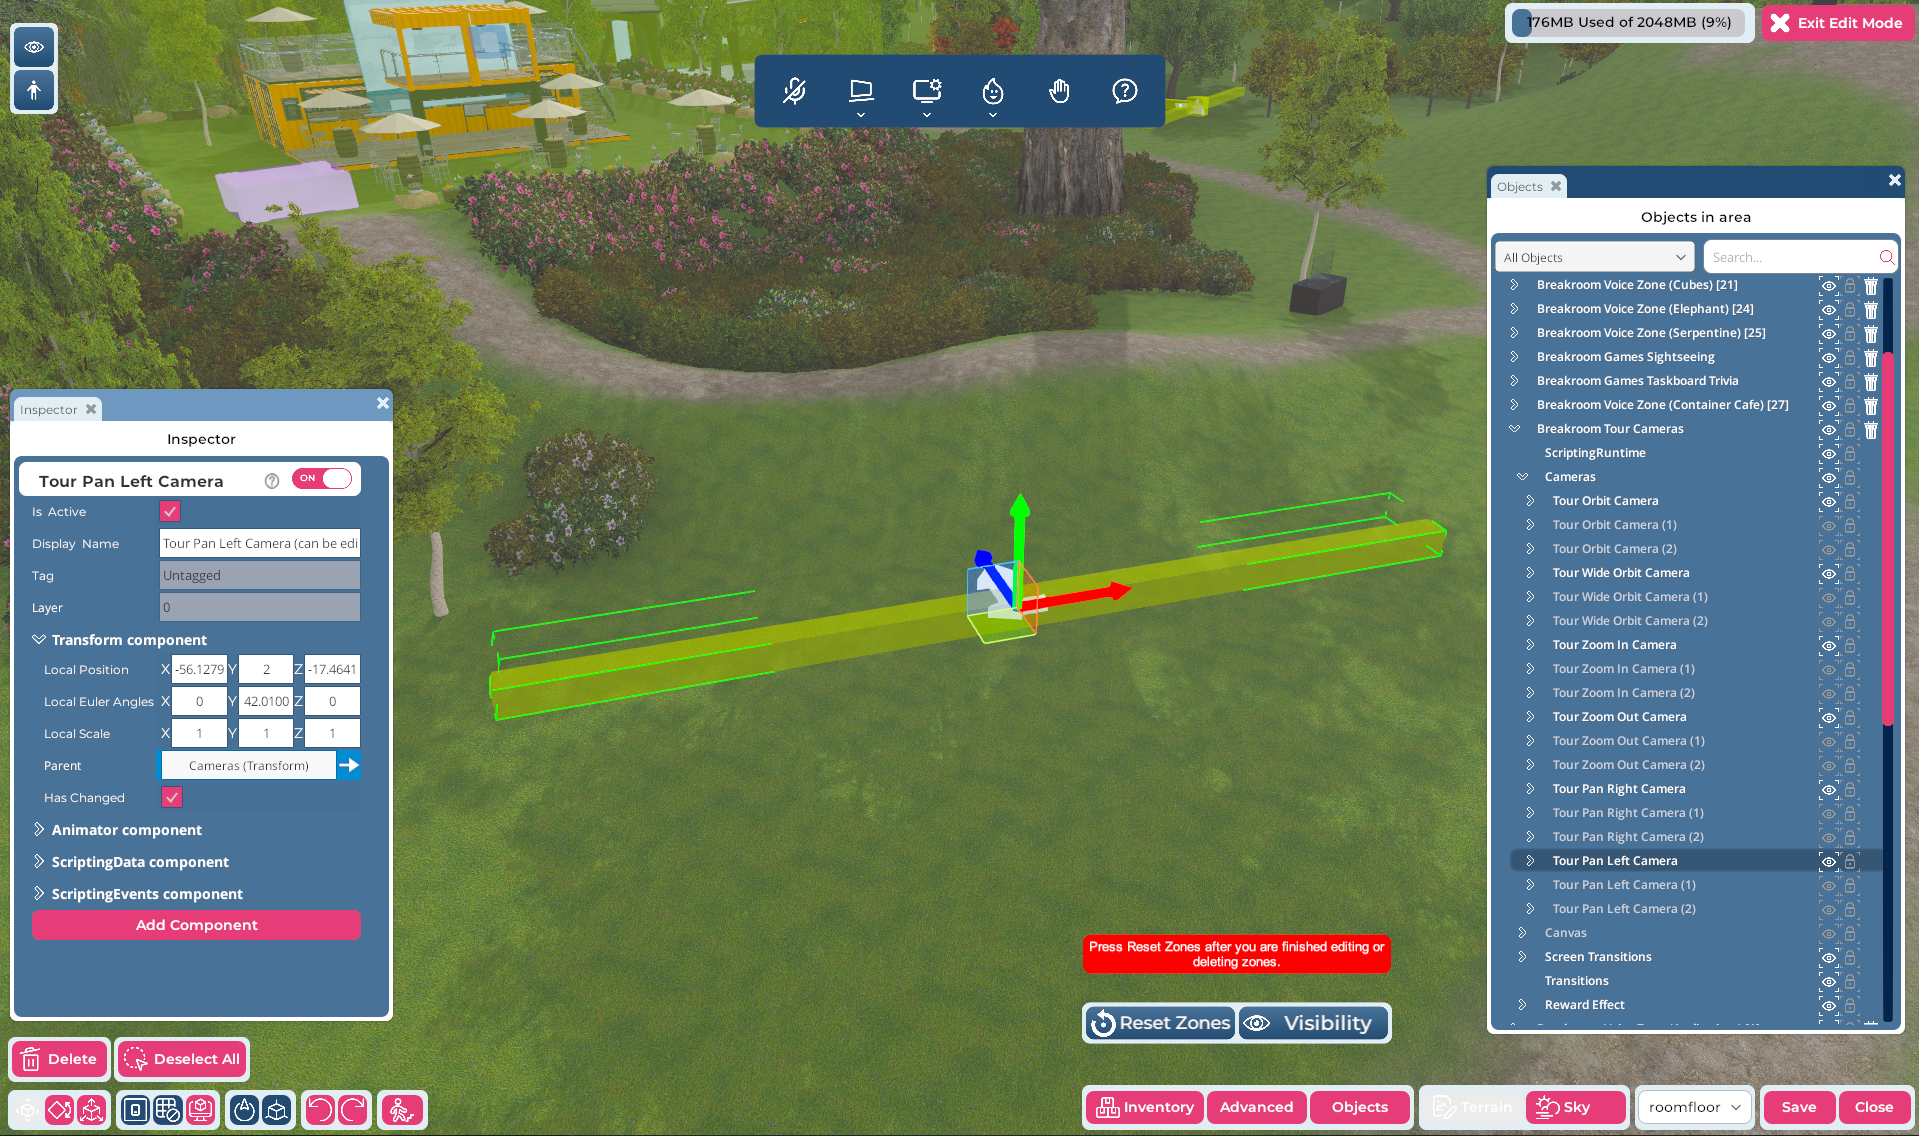
Pictured: An individual Pan Left Camera object being positioned within a Region.
While the Breakroom Tour Cameras object can be placed at 0,0,0 in your Region, the individual tour cameras must be moved into position to capture the scenes you want to include in your tour. Many of the camera types include arrows and other markers designed to help with positioning.
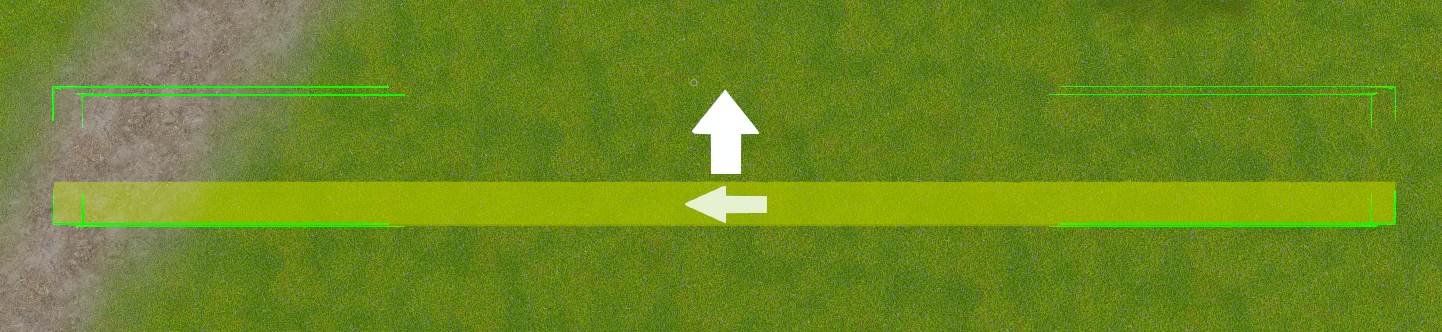
Pictured: An individual Pan Left camera.
Here we see a close-up of the Pan Left Camera, with arrows indicating the direction the camera is facing and the path it will follow. The camera's track is highlighted in green.
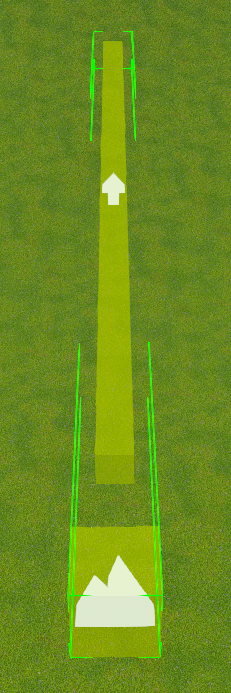
Pictured: An individual Zoom Out camera.
Here we see the Zoom Out Camera, with icons indicating the camera focus point (the mountain) and the path and direction the camera will travel (down the highlighted green track, pulling away from its starting point).
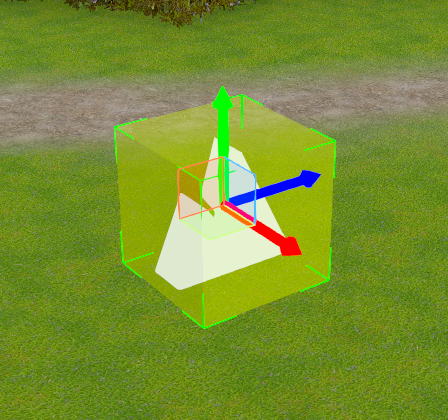
Pictured: An individual Orbit Camera.
Here we see the Orbit Camera, where the camera focus point (the mountain) will remain in the center. The camera will circle this focus point.
To edit the position of individual cameras in your Region, follow these steps.
- Open the Region Editor by clicking the Edit Region button in the top toolbar.
- Click the Objects Button to launch the Objects window.
- In the Objects window, search for the Breakroom Tour Cameras object. Click the > arrow located to the left of its name to expand it.
- Locate the Cameras object. Click the > arrow located to the left of its name to expand it.
- Click on the name of the individual tour camera you want to position in order to highlight it.
- Use the Region Editor's object positioning tools to place the tour camera where you want it. Alternatively, you can manually edit the tour camera's Transform values.
- Click the Save button to store your changes, and the Close button to exit the Region Editor.
You can test your chosen placement and effects by clicking the Take Tour button located in the Start Here panel.
Using the "Move Object to Camera" button to move tour cameras
You can use the "Move Object to Camera" button located in the object editing tray to snap a tour camera object to your current camera position (the live camera that you control with your mouse and keyboard).
For this portion of the tutorial, we will refer to the individual tour camera object that you want to move as the tour camera, and your own user camera as the working camera.
![]()
Highlighted: The location of the "Move Object to Camera" button.
Each tour camera type will react differently to the position of your working camera.
| Tour camera type | "Move Object to Camera" behavior |
|---|---|
| Orbit/Wide Orbit Cameras | The camera focus will snap to the location of your working camera. |
| Zoom In Camera | The camera track's start point will snap to the location of your working camera. |
| Zoom Out Camera | The camera track's end point will snap to the location of your working camera. |
| Pan Right/Left Cameras | The camera track's center point will snap to the location of your working camera. |
To position a tour camera using the "Move Object to Camera" function, follow these steps.
- Open the Region Editor by clicking the Edit Region button in the top toolbar.
- Click the Objects Button to launch the Objects window.
- In the Objects window, search for the Breakroom Tour Cameras object. Click the > arrow located to the left of its name to expand it.
- Locate the Cameras object. Click the > arrow located to the left of its name to expand it.
- Locate the individual tour camera you want to edit, and click on its name in order to highlight it.
- Leaving the tour camera selected, move your working camera into position.
- Click the "Move Object to Camera" button. The tour camera will snap into place.
- Click the Save button to store your changes, and the Close button to exit the Region Editor.
Customizing a tour camera focal point
Some individual Breakroom Tour Cameras offer the ability to position the camera focal point independent of the camera track. By changing the relation of the camera's focal point with its animated track, you can achieve unique customized effects.
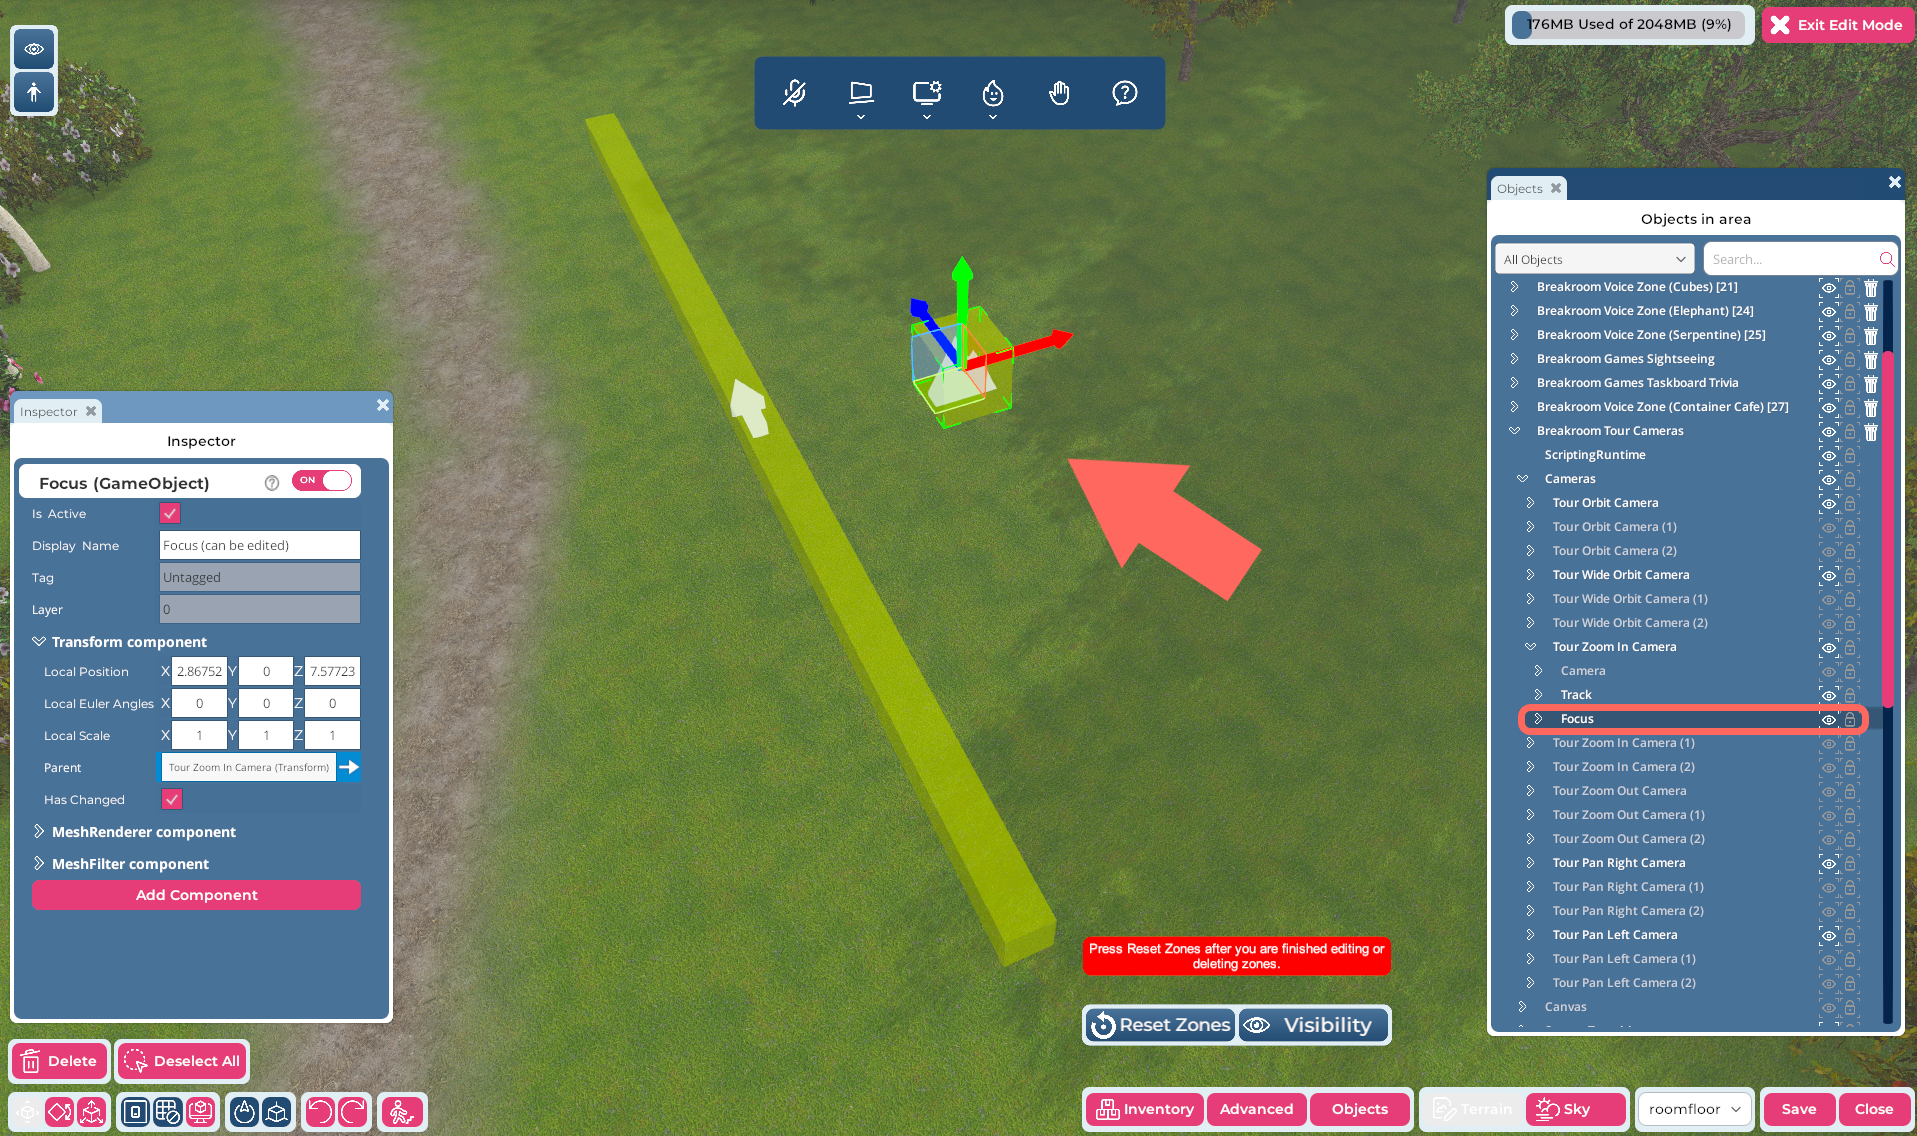
Pictured: The Region Editor, with a Zoom In Camera highlighted in the Objects window. The focal point has been isolated and manually shifted to the right of the camera track.
To position a tour camera's focal point and track independently of one another, follow the steps below.
- Open the Region Editor by clicking the Edit Region button in the top toolbar.
- Click the Objects Button to launch the Objects window.
- In the Objects window, search for the Breakroom Tour Cameras object. Click the > arrow located to the left of its name to expand it.
- Locate the Cameras object. Click the > arrow located to the left of its name to expand it.
- Click on the individual tour camera you want to edit in order to highlight it.
- Click the > arrow located to the left of the individual tour camera to expand it. (Note: Not all Breakroom Tour Cameras include a modifiable focal point.)
- Click on the Focus or Track object to highlight it. A translation gizmo will superimpose over your chosen object.
- Use the Region Editor's object positioning tools to place the Focus and/or Track where you want them. Alternatively, you can manually edit the component Transform values or use the "Move Object to Camera" feature detailed above.
- Click the Save button to store your changes, and the Close button to exit the Region Editor.
Configuring the Breakroom Tour Cameras
In addition to editing their physical placement, there are a number of transition and speed options available within each tour camera object. By modifying these, you can add additional interest and drama to your custom Region tour.
To locate these options, follow the steps below.
- Open the Region Editor by clicking the Edit Region button in the top toolbar.
- Click the Objects Button to launch the Objects window.
- In the Objects window, search for the Breakroom Tour Cameras object. Click the > arrow located to the left of its name to expand it.
- Locate the Cameras object. Click the > arrow located to the left of its name to expand it.
- Click on the individual tour camera you want to edit in order to highlight it. The Inspector window will launch for that object.
- In the Inspector window, click the > arrow located to the left of the ScriptingData component.
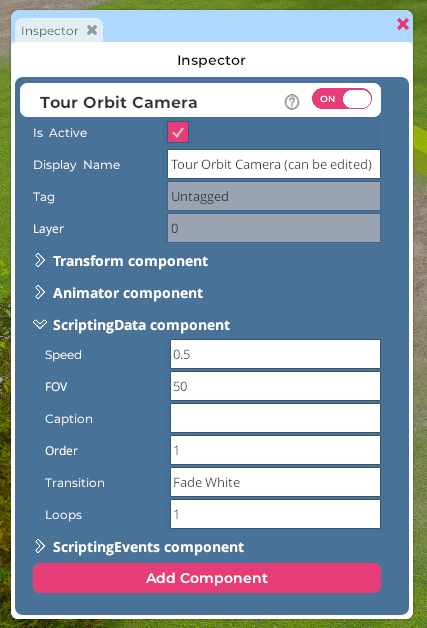
Pictured: An example of the ScriptingData component attached to an Orbit Camera.
All of the options under the ScriptingData component can be manually edited by keying words or values into their respective fields. Here's a quick reference chart to get you started.
| ScriptingData camera option | Purpose or result |
|---|---|
| Speed | By default, each tour camera takes 5 seconds to move along its associated track. By editing the multiplier value in this field, you can change how fast that individual camera travels during your tour. (For example, entering a value of 0.5 would halve the default speed. The camera would then take 10 seconds to travel along its track.) |
| FOV (Field of View) | FOV refers to how much of the Region an individual tour camera can see, or how focused that camera is on a particular object or scene. The default value is 50. The lower the number, the more focused the camera will be. If you "pull out" the camera too much (beyond a field value of 70-75), you may see a fisheye distortion. |
| Caption | You can use this field to enter a caption for each individual camera view, which will then be displayed at the bottom of the screen. If this field is blank, no words will appear at the bottom of the screen. |
| Order | This option refers to the camera order in your final tour. The default value is 1, which means that all cameras have the same priority. Therefore, they will be played in the same order as they appear in the Objects window. You can manually order your chosen tour cameras by assigning them individual numbers, or you can create priority groups that will then play in the order in which they appear in the Objects window. (E.g. all priority 1s play first, then all priority 2s, etc.). |
| Transition | Here you can change how each tour camera transitions into the one that follows. Transition options are described in more detail below. |
| Loops (only on Orbit Cameras) | This value refers to the number of times the camera travels along its circular track, and defaults to 1. You can edit this value to make the camera complete multiple loops (ex: 3) or partial loops (ex: 0.5, which would be a 180° arc). |
Currently, Breakroom Tour Cameras support eight different transition types.
| Transition | Effect |
|---|---|
| Fade White | A blended fade into the next scene through a white screen. |
| Fade Black | Same as above, but with a black screen. |
| Wipe White | A horizontal wipe into the next scene through a white screen. |
| Wipe Black | Same as above, but with a black screen. |
| Door White | A close shot into the middle, then opening up from the middle into the next scene, through a white background. |
| Door Black | Same as above, but with a black background. |
| Spin White | A spinning effect into the next scene through a white screen. |
| Spin Black | Same as above, but with a black screen. |
Once you're satisfied, click the Save button to store your changes and the Close button to exit the Region Editor.
Configuring intro and outro transitions and the Breakroom interface
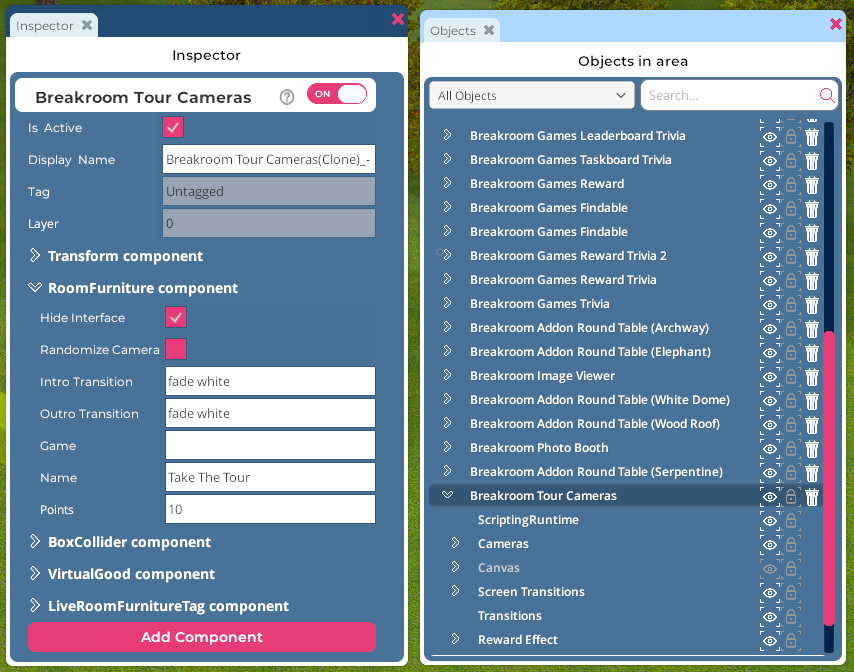
Pictured: The Breakroom Tour Cameras object highlighted in the Objects Window. The RoomFurniture component has been expanded.
There are additional customization options available under the RoomFurniture component attached to the primary Breakroom Tour Cameras object. To locate these options, follow the steps below.
- Open the Region Editor by clicking the Edit Region button in the top toolbar.
- Click the Objects Button to launch the Objects window.
- In the Objects window, search for the Breakroom Tour Cameras object. Click on it in order to highlight it. The Inspector window will launch for that object.
- In the Inspector window, click the > arrow located to the left of the RoomFurniture component.
Here is a quickstart guide to the options contained under the RoomFurniture component.
| RoomFurniture component option | Purpose or effect |
|---|---|
| Hide Interface | If checked, this option hides the Breakroom UI while the tour is playing. |
| Randomize Cameras | If checked, enabled cameras will play in random order for each tour. |
| Intro Transition | This field can be changed to any of the transition options described above. |
| Outro Transition | This field can be changed to any of the transition options described above. |
Once you're satisfied, click the Save button to store your changes and the Close button to exit the Region Editor.