Using the Meetings window
Overview
The Meetings window allows users with the appropriate permissions to schedule virtual events and publish them for review. Attendees can manage their own calendars and teleport to the venue when it's time to meet, saving staff the hassle of teleporting users individually.
World Owners and World Administrators can enable and disable parts of the UI via the Dashboard. You may not have access to the Meetings window and other tools described in this section.
Opening the Meetings window

Highlighted: The location of the Meetings button.
You can open the Explore window by clicking the Meetings button in the bottom toolbar.
The Meetings window UI
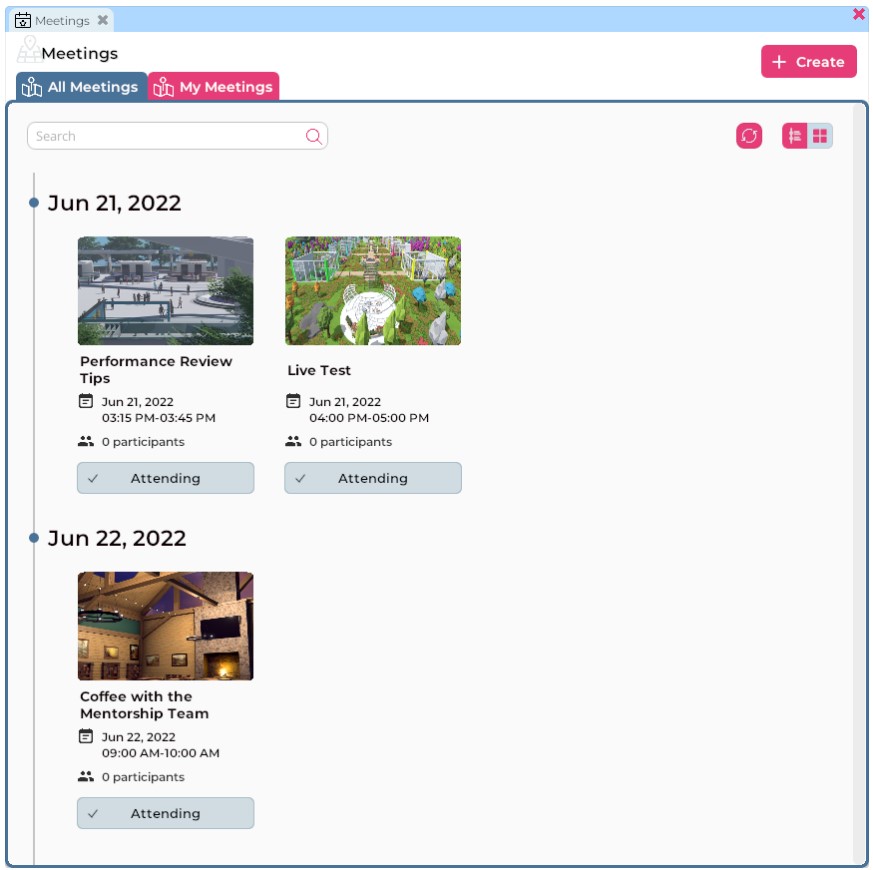
Pictured: An example of how the Meetings window may appear.
In the Meetings window, you will see events listed in chronological order. Here's a brief overview of the UI.
| UI component | Function |
|---|---|
| All Meetings tab | Displays all upcoming meetings. |
| My Meetings tab | Displays only meetings you have scheduled or indicated you will attend. |
| Search field | Allows you to search for a specific meeting. |
| Refresh button | Refreshes the meeting list. |
| Timeline view button | Lists meetings in a linear timeline. |
| Category view button | Lists Featured and Upcoming meetings. |
| Create button | Allows you to create a new meeting. |
| Attend/Attending button | Allows you to confirm or cancel your attendance at a meeting. |
Finding and attending meetings
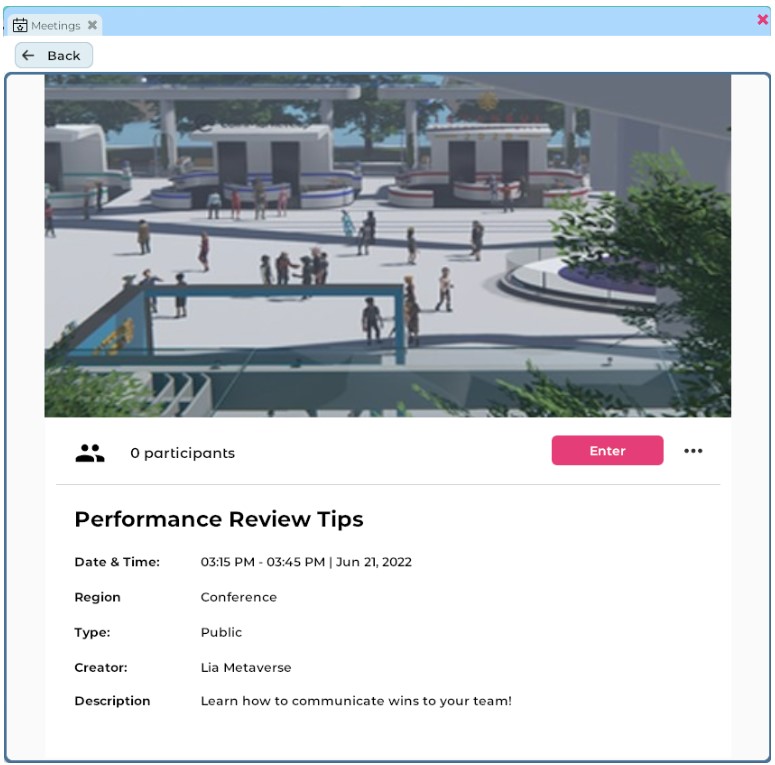
Pictured: An example of how a single event listing may appear.
To learn more about a meeting, click on the listing in the Meetings window. If the meeting is of interest to you, click the Attend button to RSVP. Doing so will add the event to the My Meetings tab.
When it comes time for the meeting, a notification will appear in the top toolbar. Clicking the Enter button contained in this notification will teleport you directly to the meeting. You can also open the listing again and click the Enter button to teleport to the meeting space.
Scheduling meetings

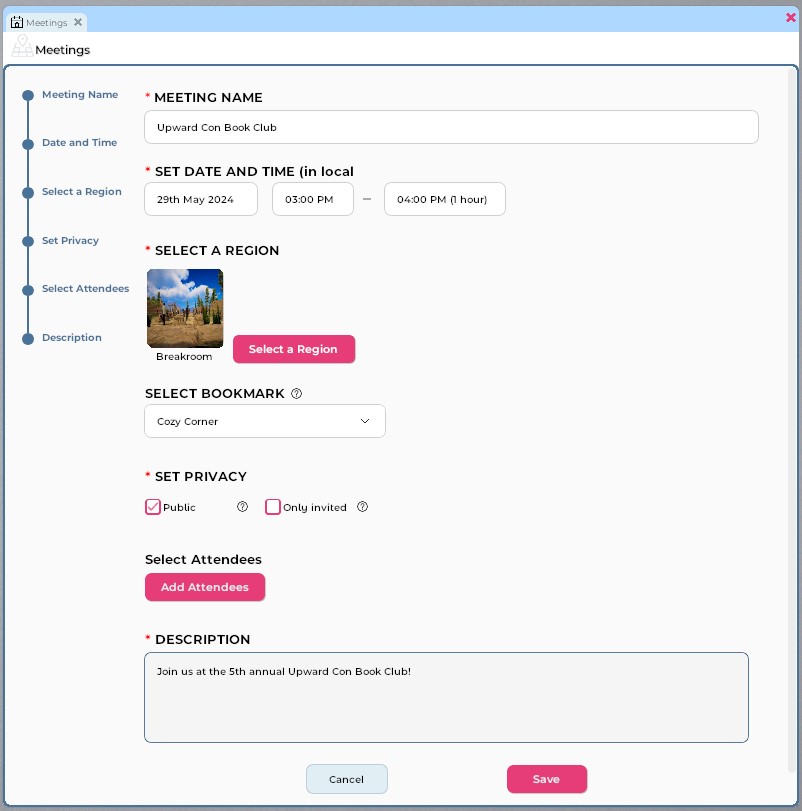
Pictured: The Meeting creation window.
To schedule a meeting, follow these steps.
- Open the Meetings window by clicking the Meetings button located in the bottom toolbar.
- In the Meetings window, click the Create button located in the top right corner.
- Enter the required information:
- Enter the meeting name.
- Select a date, start time, and duration for the meeting. (Note: Please enter the start time in your local time.)
- Click the Select a Region button. In the menu that appears, select the Region where you want your meeting to take place. (Note: You can use the search field to locate a specific region.) Click the Confirm button when you are satisfied with your choice.
- If desired, use the Select Landmark drop-down menu to select a specific arrival point for your Region visitors.
- Select a privacy setting for your event by ticking either the Public or Only Invited checkbox.
- Enter a meeting description.
- Click the Save button.
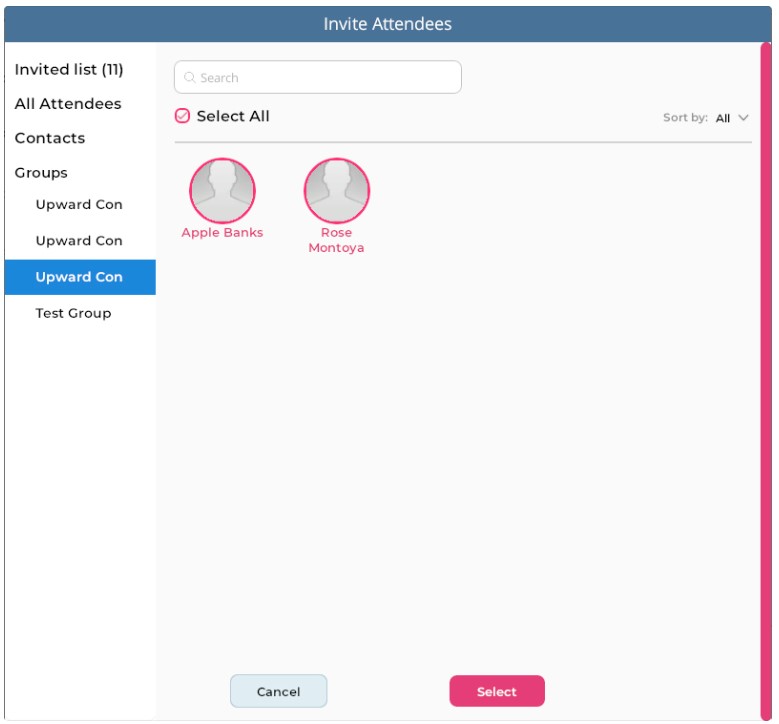
Pictured: The Invite Attendees window.
If you set your meeting to Public, anyone will be able to view the event in the Meetings window, RSVP, and attend. If you set your meeting to Only Invited, you will need to invite attendees using these additional steps.
- Click the Add Attendees button. This will open the Invite Attendees window.
- To invite individual users: Using the tabs on the left, locate the users you want to invite. Click on each attendee's name to highlight it, or check the Select All box at the top of a user category to invite all of the listed users. You can also use the search field to locate users.
- Category listings include:
- Invited List: All users currently invited to the meeting.
- All Attendees: All users who have accounts on your World.
- Contacts: All users in your People list.
- Category listings include:
- To invite all members of a group: Using the group tabs on the left, locate the group(s) you want to invite. Click on each group member's name to highlight it, or check the Select All box at the top of the group tab to invite every member of that group.
- When you have chosen all the attendees you want to invite, click the Select button.
Once you have scheduled an invite-only meeting, invitations will go out on the Breakroom platform, allowing users to RSVP. Public meetings will immediately be published in the Meetings window.
Editing meeting details
To edit a meeting you've already published, open the Meeting window and click on the meeting listing. Then click on the ellipses button to edit or delete the event.
Using direct bookmarks
In addition to selecting a Region for your meeting, you can choose the precise location attendees will arrive. To get started, you will first need to bookmark your chosen landing spot by following these steps.
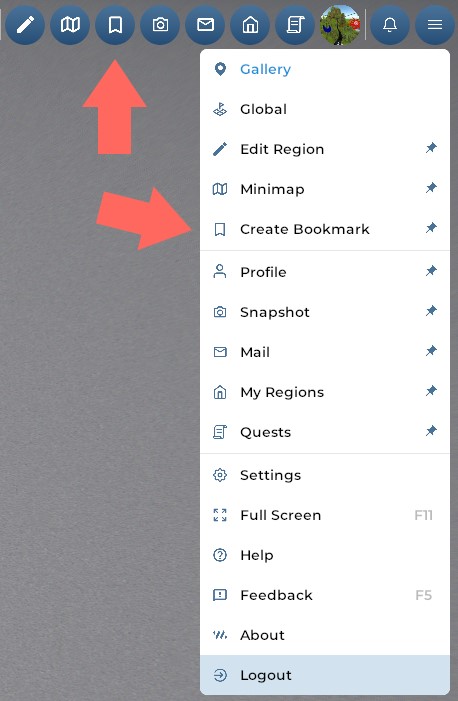
Highlighted: The location of both Create Bookmark buttons.
- Navigate your avatar to the area you want to bookmark. Keep in mind that the bookmark coordinates will point to the exact point where your avatar is positioned.
- When your avatar is in the right spot, click the hamburger menu in the top toolbar and then click Create Bookmark. (Or click the on-screen button if you have it pinned.)
- In the dialog box that appears, enter a name for your bookmark and click the OK button. This will create a bookmark object in your Inventory.
Pictured: The Meeting creation window.
Once you have your bookmark prepared, you can add it to the meeting details.
- Using the steps outlined above, schedule a new meeting.
- After you select the event Region, use the Select Bookmark drop-down menu to choose the bookmark you just created.
- Once you are satisfied with your meeting details, click the Save button.