Breakroom Web Browser
Overview
The Breakroom Web Browser allows users to access and interact with web-based content anywhere within your world. Object Owners and users with appropriate World- or Region-level permissions can also configure access options and add a splash screen that will be displayed when the web browser is not in use.
In your Inventory, you'll see the Breakroom Web Browser represented by this icon: 
For help installing the Breakroom Video Player, please review our information on using the Region Editor.
In order for this Toolkit object to work, you must have the Breakroom conference core components installed in the same Region. If you have uploaded a custom Region, you will need to install these components manually prior to setting up this object.
The Breakroom Web Browser will not play MP4 or HLS videos. Please use the Breakroom Video Player to share media using these formats.
Breakroom Web Browser user controls

Pictured: The Breakroom Web Browser user control bar.
Users can control any Breakroom Web Browser using the buttons located in the bottom control bar. Webpages are displayed on a per-user basis, not streamed openly to the Region as a whole.
| Control bar component | Function |
|---|---|
| Home | Takes the user back to the web browser's default URL. |
| Forward and back arrows | Allow users to navigate forward and backward within a website. |
| External open | Opens the default URL in the user's own web browser. |
| Zoom In / Zoom Out | Allows the user to zoom in on the panel and away again. |
| Settings | Only available to Object Owners and users with appropriate permissions. |
Setting up the Breakroom Web Browser
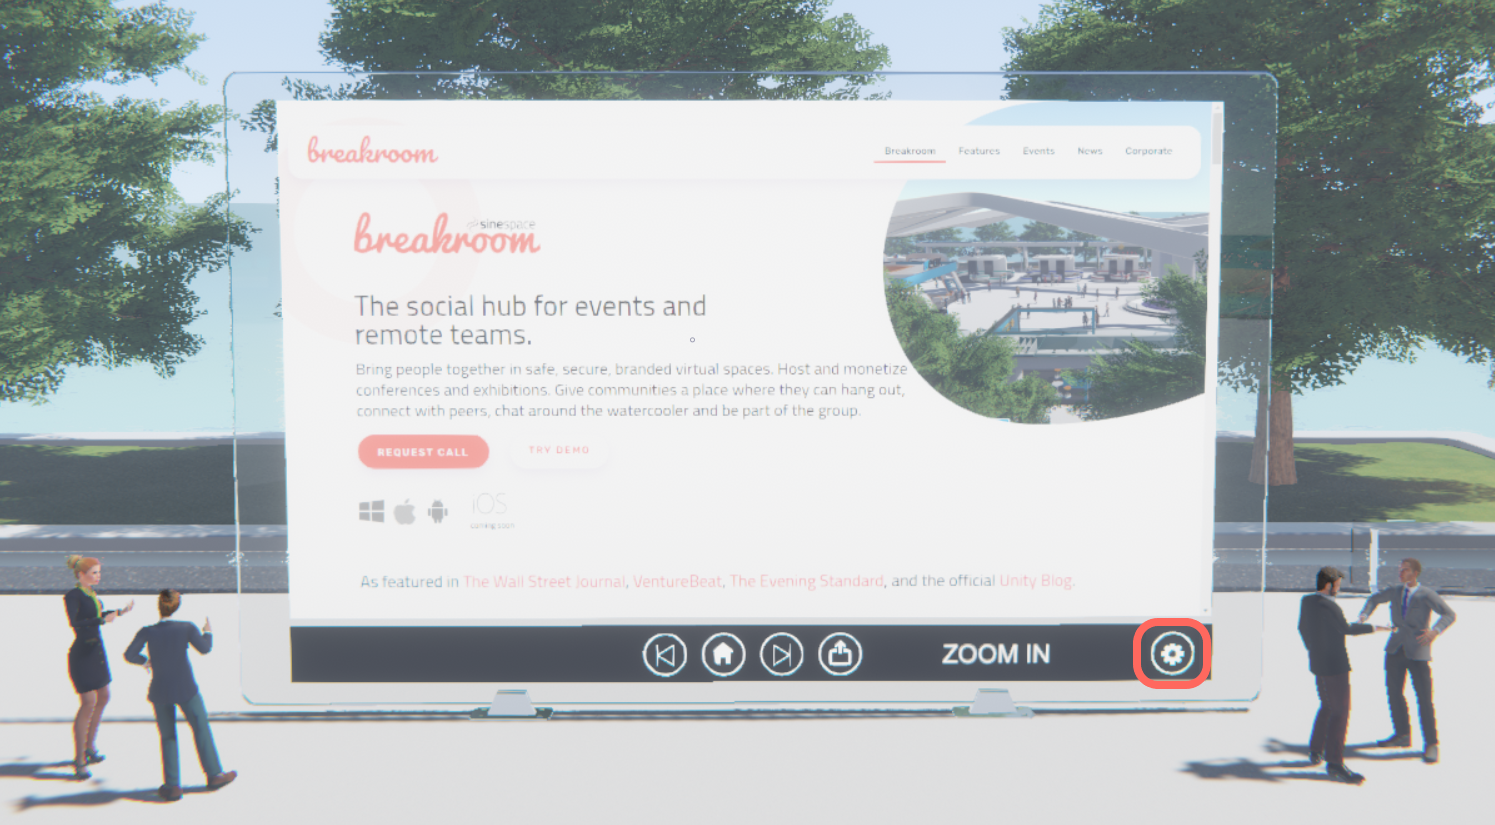
Highlighted: The location of the Breakroom Web Browser gear icon.
The Breakroom Web Browser control panel is only accessible to the Object Owner and users with appropriate World- or Region-level permissions. To access it, click on the gear icon in the bottom control bar.
Adding a splash screen image
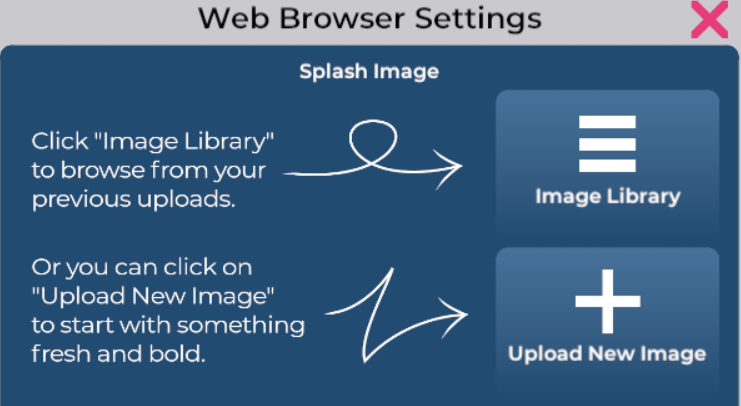
Pictured: The Breakroom Web Browser settings.
Splash screen image settings are the very first thing you'll see in the Breakroom Web Browser control panel. You can either choose an image from your Media Library or upload a new splash image from your computer.
To set a splash screen for your web browser, follow these steps:
- Locate the Breakroom Web Browser object you want to edit.
- Click on the gear icon to open the Breakroom Web Browser control panel.
- To choose an image you've already uploaded to Breakroom, click the Image Library button. This will open the image picker. Click on the image you want to use.
- To upload a new image from your computer, or click the Upload New Image button. This will open a standard file picker on your computer. Locate the image you want to use, click on it, and then click the Open button.
- Your selected image will display in the preview window. Make sure everything looks good, and then click the Save and Close button.
Entering a webpage URL
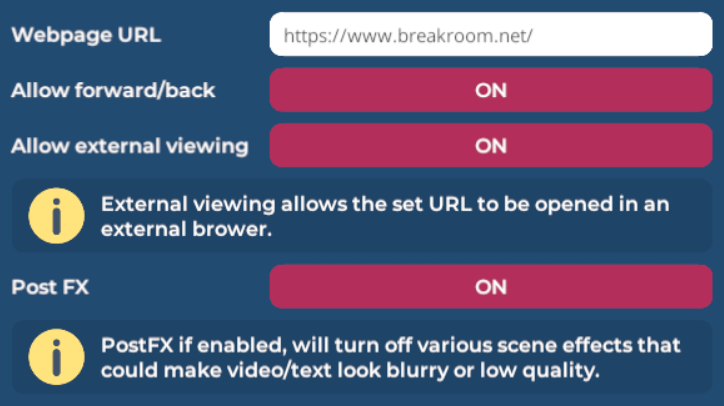
Pictured: The webpage URL and web browser options in the Breakroom Web Browser control panel.
To enter a webpage URL, follow these steps:
- Locate the Breakroom Web Browser object you want to edit.
- Click on the gear icon to open the Breakroom Web Browser control panel.
- Paste your URL into the Webpage URL field.
- Click the Save and Close button.
Web browser options
The Breakroom Web Browser control panel also allows you to customize the way users can interact with your content.
To edit the web browser options, follow these steps:
- Locate the Breakroom Web Browser object you want to edit.
- Click on the gear icon to open the Breakroom Web Browser control panel.
- Click the ON or OFF button located next to each web browser option.
- Click the Save and Close button.
| Web browser option | Function |
|---|---|
| Allow forward/back | If set to ON, web navigation buttons will be displayed in the bottom control bar. |
| Allow external viewing | If set to ON, a button will appear in the bottom control bar allowing users to open the webpage in an external browser. |
| Post FX | If set to ON, will turn off various graphics settings within the web browser collider zone that could distort the screen. |
Editing the Breakroom Web Browser collider zone
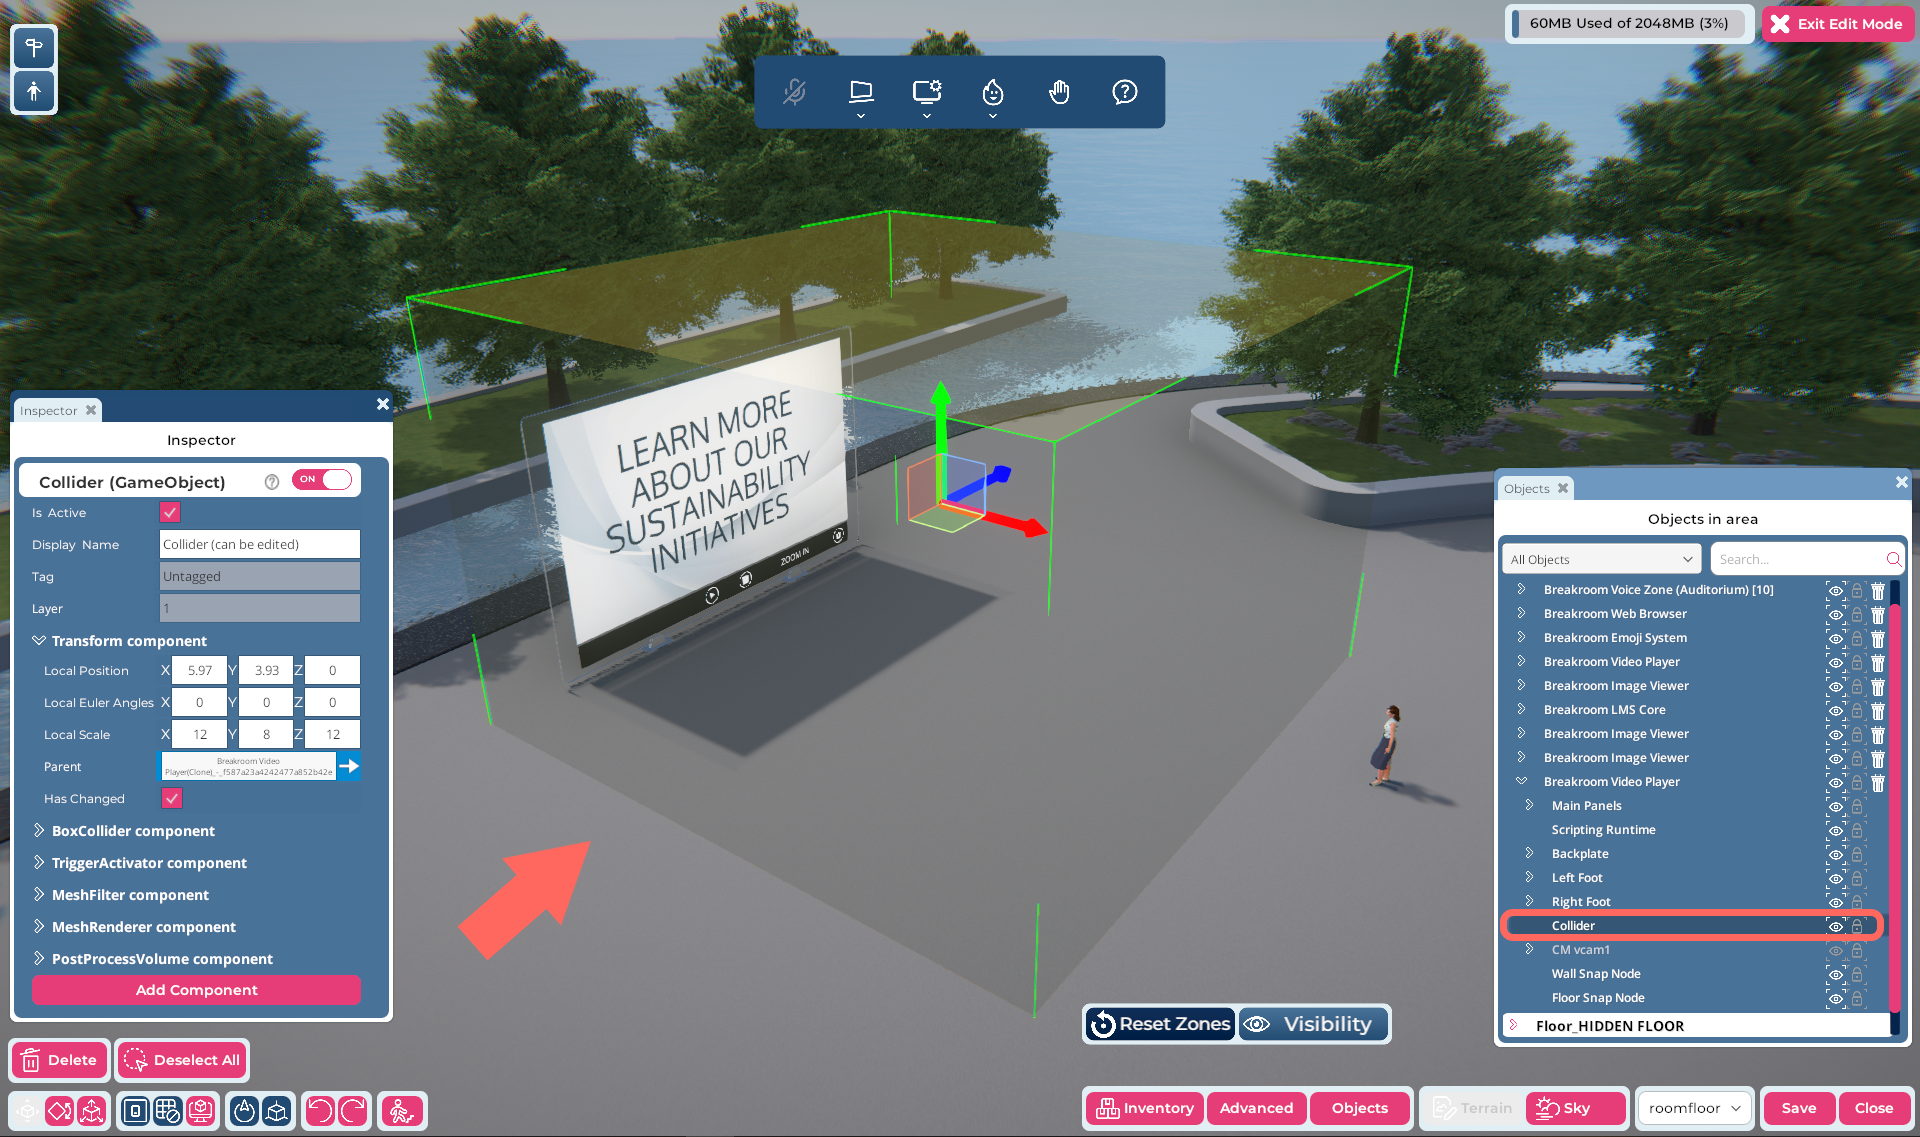
Pictured: The Region Editor, with a Breakroom Video Player object selected. The transparent green box indicates the size and location of the collider zone. In the Objects window, you can see that the collider zone is nested within the Breakroom Video Player object. This information also applies to Breakroom Web Browsers.
Several website display options are triggered when an avatar enters the Breakroom Web Browser collider zone. The size and position of this collider zone can be customized using the Region Editor.
The instructions provided below presume an advanced working knowledge of Breakroom. Please consult our documentation if you need help installing and positioning virtual objects or editing the RoomFurniture component.
To edit the Breakroom Web Browser collider zone, follow these steps:
- Open the Region Editor by clicking the Edit Region button in the top toolbar.
- Locate the Breakroom Web Browser object you want to edit. Click on it to highlight it in the Objects window.
- In the Objects window, click the > arrow to the left of the Breakroom Web Browser object to expand it. Then click on the Collider component.
- Using the Region Editor tools or the Transform component, move, rotate, and resize the collider to meet your specifications.
- When you are satisfied, click the Save button to store your changes.