LogoLogo
Tutorial VideosScripting DocumentationLegalHome
Breakroom
Breakroom
  • Welcome to Breakroom
  • GETTING STARTED
    • Helpful terms
    • UI tour
    • Keyboard shortcuts
    • Customizing your avatar
      • Choosing a starter avatar
      • Editing avatars in the Outfit window
      • Using the Sine Wave Shop
    • Controlling your avatar
    • Controlling your camera
    • Communicating with other users
    • Using the conference system
      • Troubleshooting audio and video issues
    • Using Breakroom for Training
    • Settings
    • Language and accessibility
    • Reporting issues
  • EXPLORING BREAKROOM
    • Region navigation tools
    • Bookmarks and teleport invites
    • Using the Explore window
    • Using the Meetings window
    • Networking with other users
      • People
      • Groups
    • Snapshots
  • BUILDING NEW WORLDS
    • Breakroom Dashboard tour
    • Creating and managing Regions
    • Default Landing and Orientation Regions
    • Region settings
    • Region template descriptions
  • CREATING CUSTOM EXPERIENCES
    • Branding tools
    • UI customization options
    • Filtering the Sine Wave Shop
    • Selecting default avatars
      • Default avatar collections
    • Using the Region Editor
      • Editing and moving objects
      • Editing terrain and sky
      • The Region Editor ADVANCED window
    • Exploring the Breakroom Toolkit
      • Breakroom Video Player
      • Breakroom Web Browser
      • Breakroom Image Viewer
      • Breakroom Info Kiosk
      • Breakroom Teleport Portal
      • Breakroom Web Collab
      • Breakroom Note Board
      • Breakroom Games
      • Breakroom Reactives
      • Breakroom Orientation Quest
      • Breakroom Tour Cameras
      • Conference rooms and booths
      • Add-on seats
      • Breakroom Start Here UI
      • Breakroom Basic Emojis
      • Breakroom 360° Video Player
    • Managing your Media Library
  • OPENING THE DOORS
    • Seats and concurrency
    • Creating and managing user accounts
      • World-level user permissions
      • Region-level user permissions
      • Single sign-on
      • Eventbrite integration
    • World Stream
      • Purchasing and managing World Credits
      • Pre-allocation campaigns
      • World Stream viewer toolbars
      • World Stream keyboard shortcuts
      • Troubleshooting World Stream issues on Chrome
      • Troubleshooting World Stream issues on macOS
    • Desktop viewers
    • Privacy Policies, EULAs, and data collection
    • Analytics
    • Toggling World availability
  • RUNNING YOUR EVENT
    • Understanding the conference system
      • Voice zones, zone types, and conference permissions
      • Voice chat and spatial audio
    • Customizing the conference system components
      • Adding breakout areas
      • Creating custom voice zones
      • Setting up Presenter and Audience zones
      • Designating triage zones
      • Troubleshooting duplicate zone errors
      • The RoomFurniture component
    • Setting up Breakroom for Training courses
    • Moderator tools
      • Broadcast messages
      • Crowd management
      • Audience questions
      • Raised hands
      • Presentation controls
      • Hidden UI toggle
      • Participation
      • Audio streams
  • TIPS FOR SUCCESS
    • Region Editor best practices
    • Onboarding new users
  • ADVANCED TUTORIALS
    • Uploading your own Region
      • Installing Unity and the Breakroom SDK
      • Reducing poly counts on CAD files
      • Uploading a Region from Unity to Breakroom
      • Creating and uploading custom chairs
      • Testing items on the preview server
      • Pushing items to the live server
      • Installing the conference system components
    • Uploading your own virtual objects
    • Uploading your own virtual clothing
    • Creating and copying avatar shapes
    • Installing the Quest System
    • Registration and grid APIs
    • Video streaming
    • Sinespace scripting documentation
  • HELP
    • Where to find support
    • Tutorial video playlists
      • Platform basics
      • Dashboard
      • Moderator tools
      • Breakroom Games
      • Creator Core
      • Breakroom for Training - Students
      • Breakroom for Training - Instructors
      • Breakroom for Training - Dashboard and Backend
    • Account management
    • System requirements
    • Troubleshooting network ports and firewalls
  • RELEASE NOTES
    • Breakroom SDK
    • Breakroom Viewer
    • Breakroom Dashboard
Powered by GitBook

©2008-2024 Sine Wave Entertainment Ltd. All Rights Reserved.

On this page
  • Overview
  • Creating a new body shape
  • Copying a body shape for use in Unity
  • Applying a body shape to a clothing item in Unity
Export as PDF
  1. ADVANCED TUTORIALS

Creating and copying avatar shapes

Need to create a clothing item that can alter the body shape of those who wear it? Learn how to create, copy, and apply body shapes created in Breakroom to clothing items in Unity.

PreviousUploading your own virtual clothingNextInstalling the Quest System

Last updated 8 months ago

Overview

Body shapes can be created in Breakroom using the . Body shape data can then be copied and added to clothing items in Unity, which will change the body shape of the user when the item is worn.

Within our advanced documentation, you may see different words used to describe the same concept or tool. This is because Breakroom is based on the Sinespace virtual world platform. Please be aware of the following:

  • When you the Breakroom SDK, you may notice that certain tools and menus refer to Sinespace, Sinespace components, or the Sinespace SDK. This is normal and has no effect on performance.

  • When testing and uploading virtual items, you may see documentation, menus, and buttons that refer to Breakroom Worlds as grids.

The instructions provided in this section presume an advanced working knowledge of Breakroom, virtual assets, and third-party 3D software. Please consult our documentation if you need help and virtual objects, or editing the .

Only can upload custom items to Breakroom.

Creating a new body shape

  1. Click the Create New Outfit button located at the bottom of the preview window.

  1. A pop-up will appear, prompting you to select a basic body morphology. Make your choice by clicking either the Masculine or Feminine button.

  2. Enter a name for your new outfit, and click the Save button.

  3. Once your new outfit is set up, click on the Appearance tab. Use the presets available under the Appearance tab and the face and body sliders available under the Details tab to create your desired head and body shape.

  4. When you are happy with your shape, click the Save button.

Masculine and feminine body shape templates differ in how they are set up. Therefore, body shapes that have been created for one gender template will not work when applied to an outfit built on the other gender template.

Copying a body shape for use in Unity

To copy Breakroom body shape data to your computer clipboard, follow these steps.

  1. Click on the Appearance > Details tab.

  2. Click the "Copy your current body shape to clipboard" button located at the top of the Head tab.

Applying a body shape to a clothing item in Unity

To apply the copied Breakroom body shape data to a clothing item in Unity, follow these steps.

  1. Next, make sure the clothing model is selected in the Hierarchy and click the Add Component button. Search for "clothing," and add the Clothing Item Settings component to the model.

  1. Before uploading your clothing item, click the Shapes tab in the Clothing Item Settings component, and paste in the shape details you copied from Breakroom.

The tools under the can be used to create a custom avatar shape. Avatar customization is covered in greater detail in our , but the steps below will serve as a quick-start guide for creating a new outfit and editing your avatar shape.

Open the Outfit window by clicking the Outfit button in the.

Open the Outfit window by clicking the Outfit button in the.

Open Unity and import the desired item of clothing. This can be a clothing item you've created, or you can obtain clothing templates at .

following the linked instructions.

Finally, your clothing item.

Once uploaded, your clothing item will be available for testing on the . When you have tested the item and are happy with how it performs, you can push it to the for your users.

https://sinespace.mod.io/
Prepare your clothing item for upload
preview server
live server
Outfit window
install
installing
positioning
RoomFurniture component
World Owners, World Administrators, and World Developers
bottom toolbar
bottom toolbar
prefab and upload
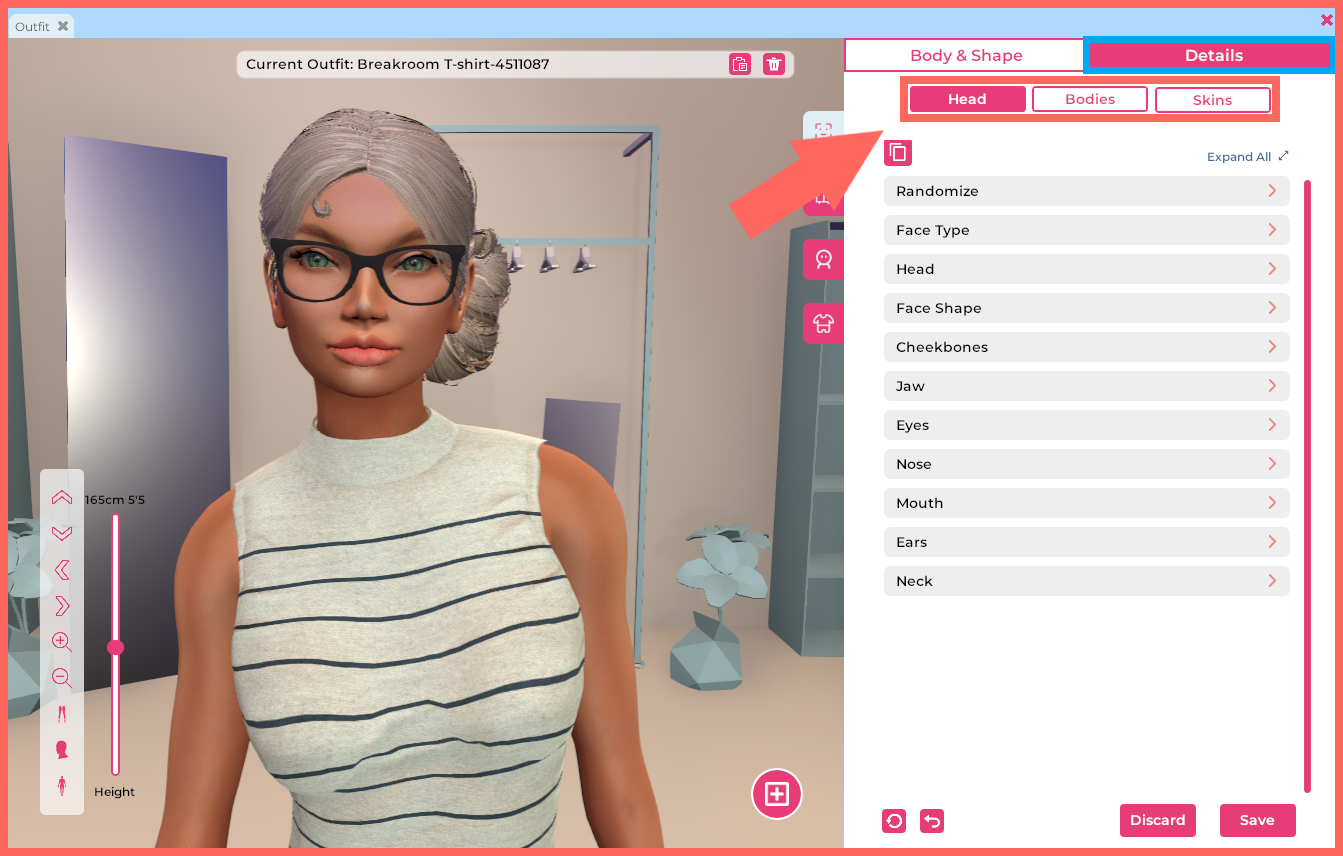
Highlighted: The location of the Details sub-tab.
Pictured: The Create New Outfit button.
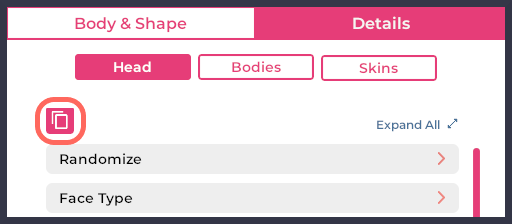
Highlighted: The location of the "Copy your current body shape to clipboard" button.
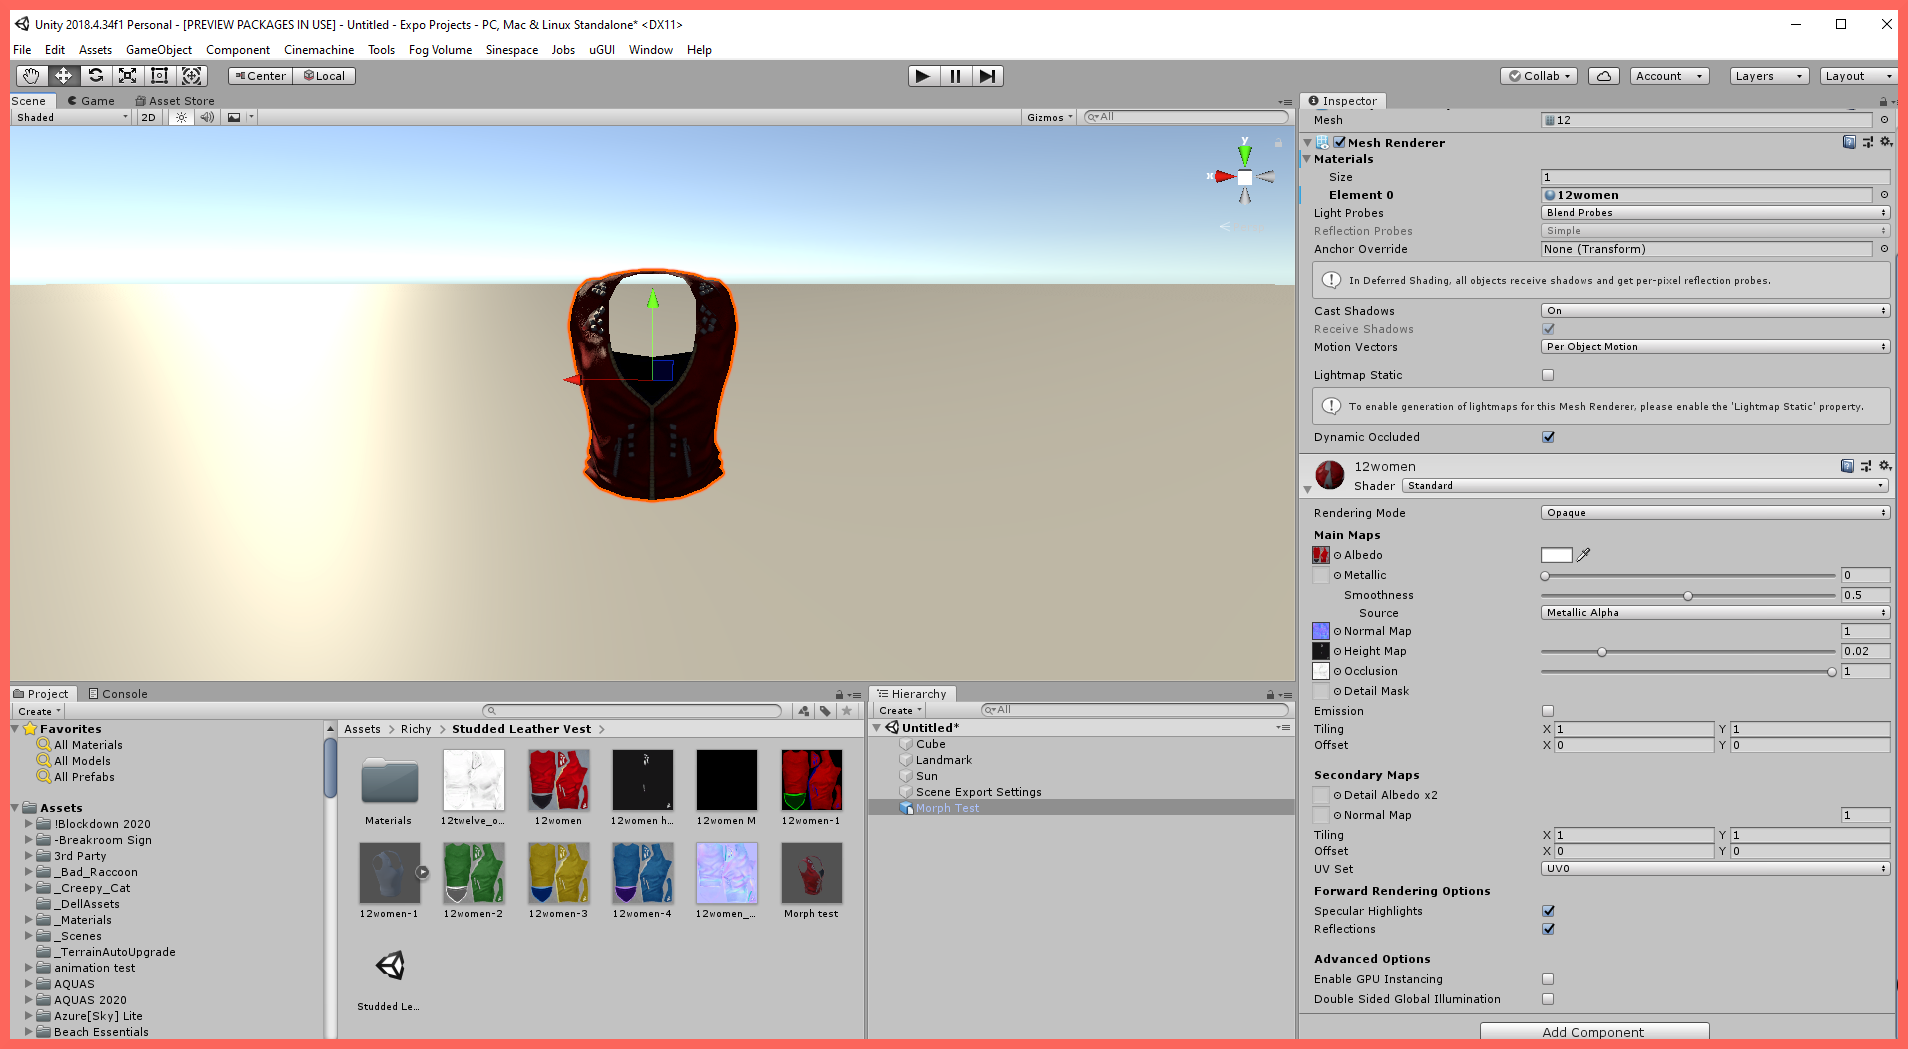
Pictured: A clothing item selected in Unity.
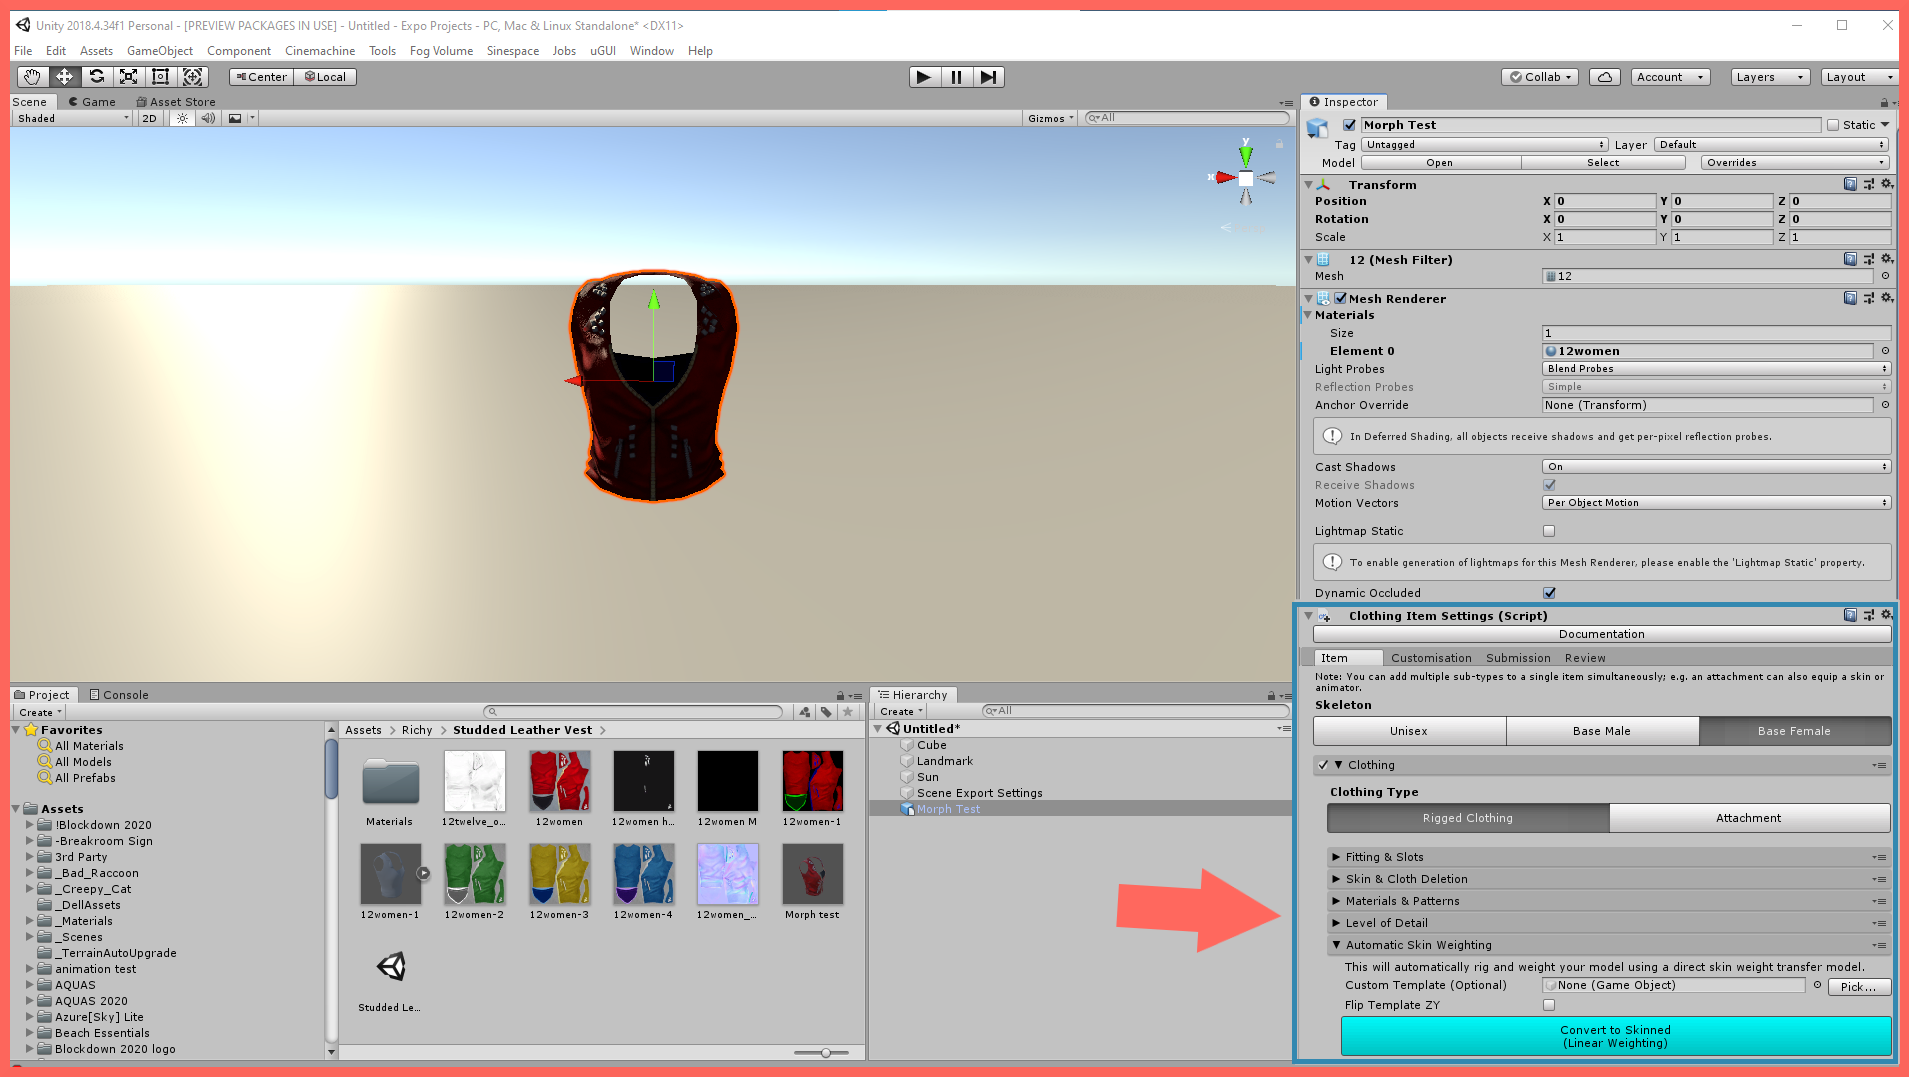
Pictured: The same clothing item, now with the Clothing Item Settings component added.
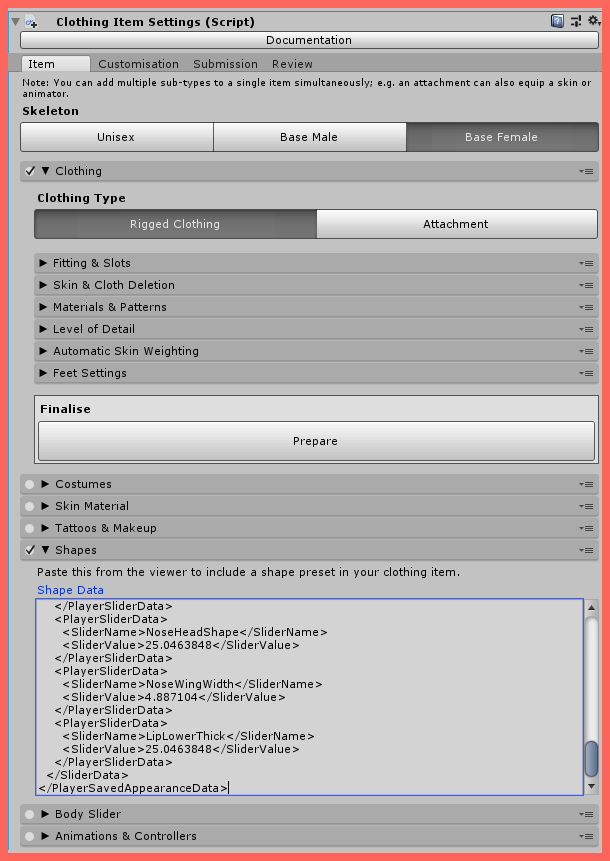
Pictured: Shape data copied into the Clothing Item Settings component in Unity.
Outfit window > Appearance tab
Getting Started section