Breakroom Teleport Portal
Overview
The Breakroom Teleport Portal allows users to fast-travel between different Regions in your Breakroom World. You can use these portals to:
- Call user attention to must-see Regions and activities
- Present users with a limited number of Regions to visit (when you have otherwise disabled open exploration by removing access to the Explore window)
- Make it easier for users to navigate multi-Region events
In your Inventory, you'll see the Breakroom Info Kiosk represented by this icon: ![]()
For help installing the Breakroom Teleport Portal, please review our information on using the Region Editor.
In order for this Toolkit object to work, you must have the Breakroom conference core components installed in the same Region. If you have uploaded a custom Region, you will need to install these components manually prior to setting up this object.
Breakroom Teleport Portal user controls

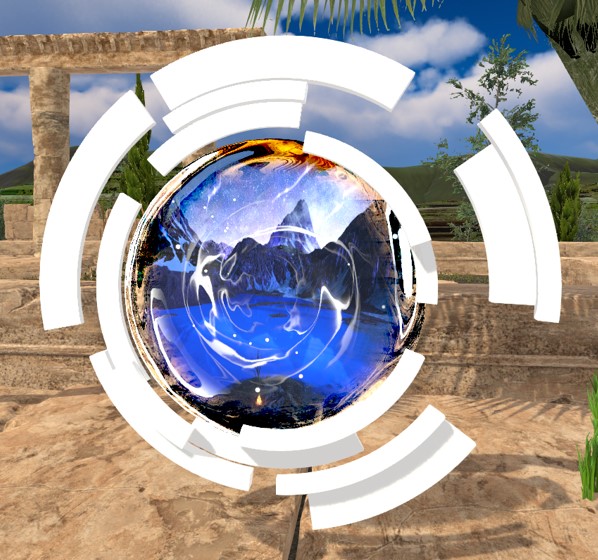
Pictured: The Breakroom Teleport Portal end user controls.
Users can activate any Breakroom Teleport Portal by walking "into" it. When a portal is activated, a pop-up will appear containing a list of accessible Regions, complete with splash images and customized text.
Users can click on the labeled destination tiles to learn more about each Region. To travel to the Region currently highlighted in the main window, users can click the Teleport button.
To dismiss the Breakroom Teleport Portal pop-up, users can click the Cancel button or walk away from the portal.
Setting up the Breakroom Teleport Portal
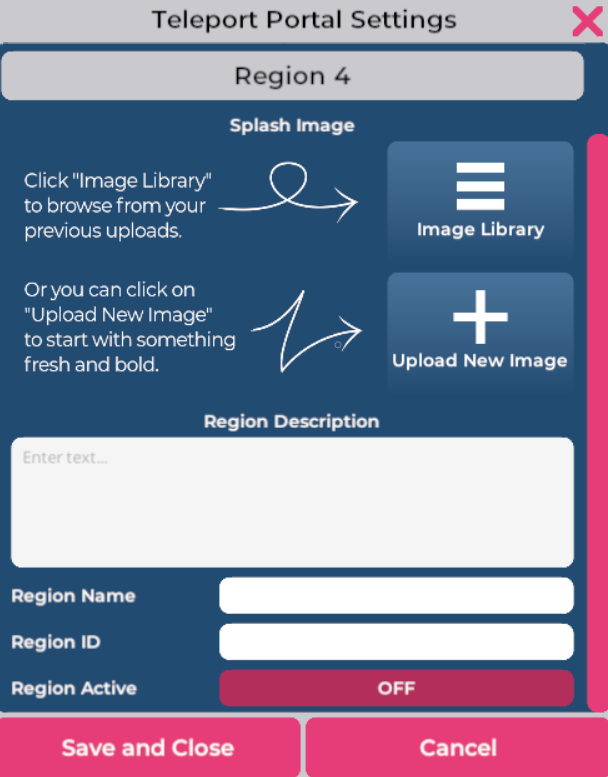
Pictured: The Breakroom Teleport Portal control panel.
The Breakroom Teleport Portal control panel is only accessible to the Object Owner and users with appropriate World- or Region-level permissions. To access it, click on the teleport portal object.
Users can access up to four different destinations through a single teleport portal. To add a new destination to a portal, follow these steps:
- Locate the Breakroom Teleport Portal object you want to edit, and click on it to launch the control panel.
- In the control panel, you'll see four Region destination tabs (labeled Region 1 through Region 4). Click on the Region tab you want to edit, if it is not already expanded.
- First, select a splash image for your destination.
- To choose an image you've already uploaded to Breakroom, click the Image Library button. This will open the image picker. Click on the image you want to use.
- To upload a new splash image from your computer, or click the Upload New Image button. This will open a standard file picker on your computer. Locate the image you want to use, click on it, and then click the Open button.
- Next, enter a description or call to action in the Region Description field. This description will be superimposed on your chosen splash image, so you may want to keep it on the shorter side.
- Enter a name for the Region in the Region Name field.
- To ensure users travel to the correct place, you will need to enter the Region ID for the destination. This can be found on your Breakroom Dashboard.
- On your Dashboard, navigate to the World Customization > Regions tab.
- Locate the Region you want to use. Click the Copy button located in the bottom left corner of the Region tile to copy the displayed Region ID.
- Paste the Region ID into the Region ID field in the Breakroom Teleport Portal control panel.
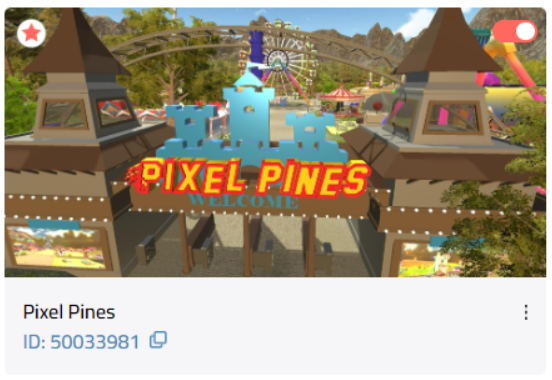
Pictured: A Region tile on the Breakroom Dashboard, with the Region ID displayed.
- Finally, toggle the Region Active button to On.
- Click the Save and Close button.
The Splash Image, Region Description, and Region Name fields are all optional. However, customizing these fields greatly increases the utility of the teleport portal and creates a better user experience.
You can toggle the Region Active button to Off to disable a teleport destination while retaining its data.
Editing the Breakroom Teleport Portal collider zone
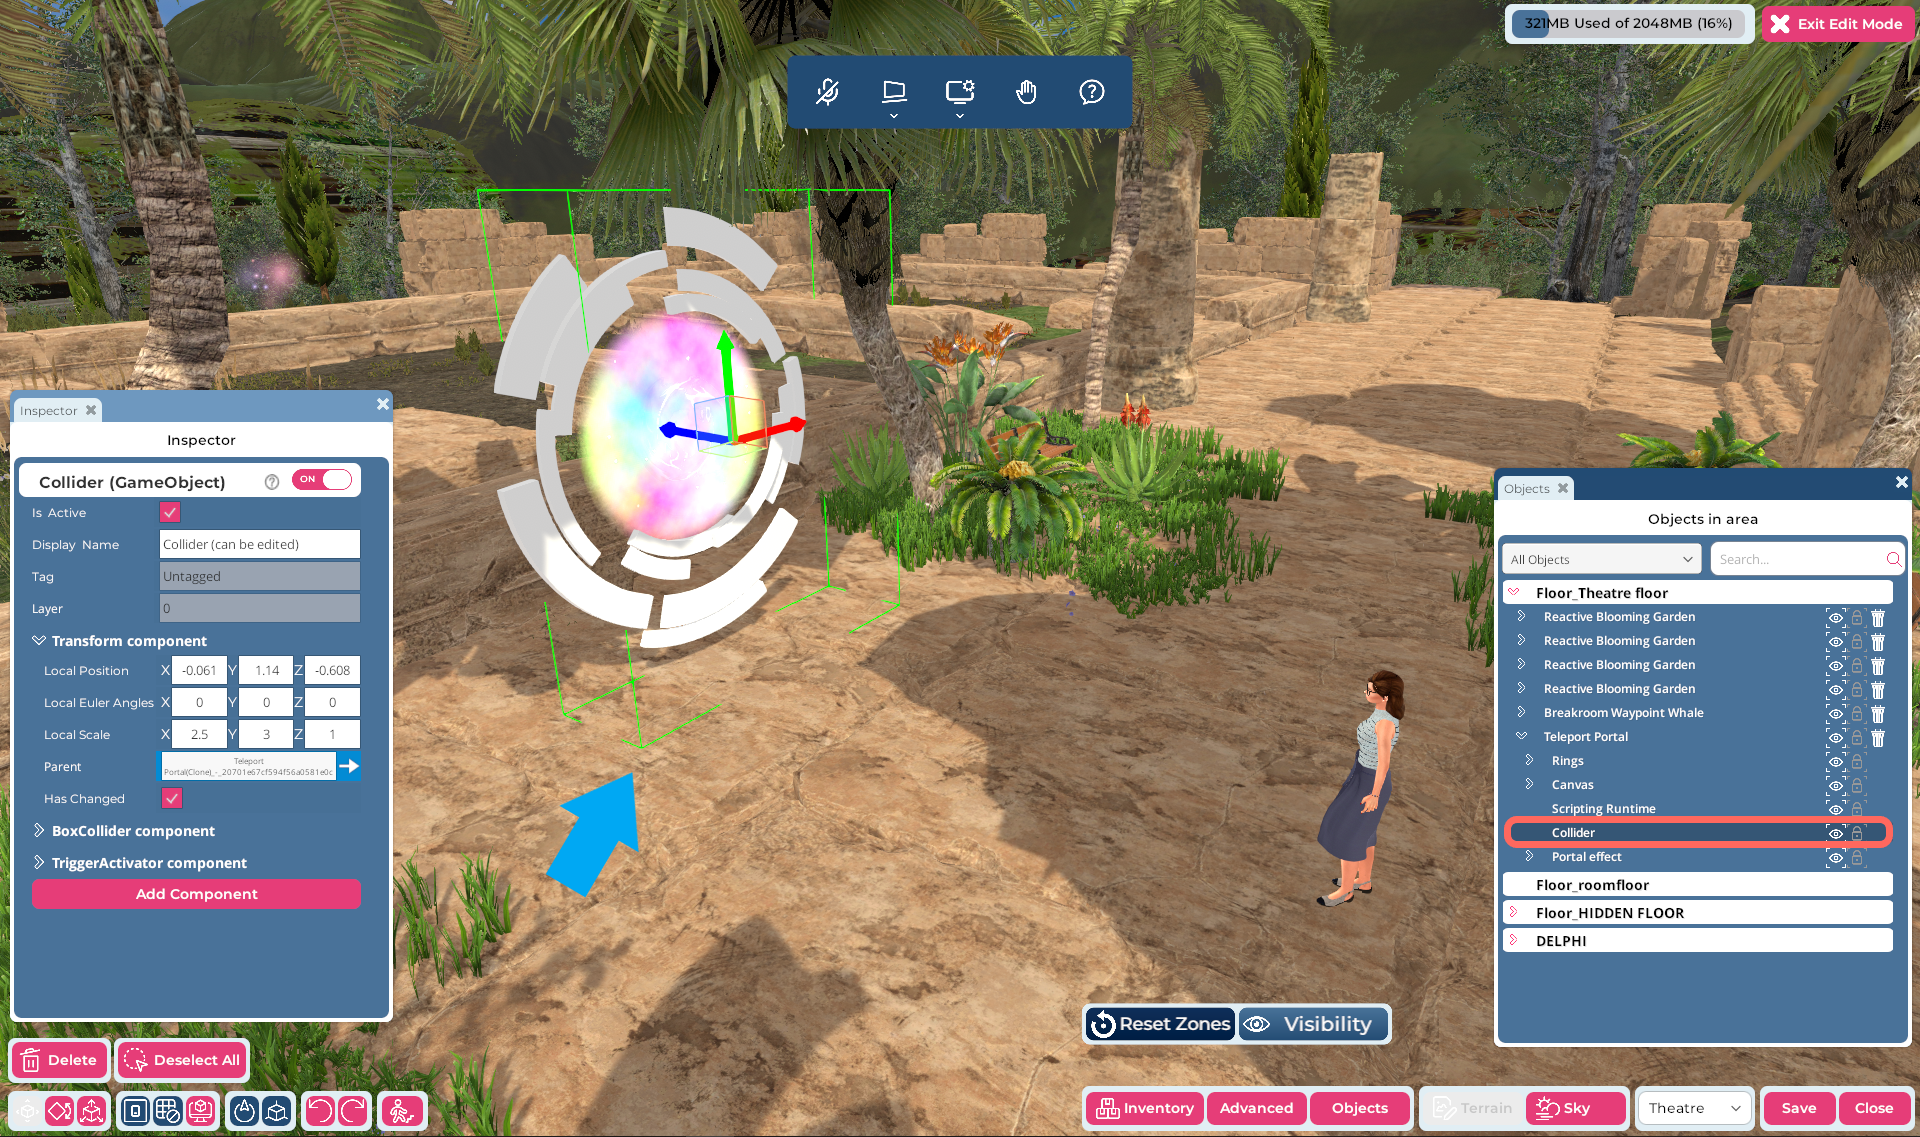
Pictured: The Region Editor, with a Breakroom Teleport Portal object selected. The transparent green box indicates the size and location of the collider zone. In the Objects window, you can see that the collider zone is nested within the Breakroom Teleport Portal object.
The Breakroom Teleport Portal is activated when users enter its collider zone. The size and position of this collider zone can be customized using the Region Editor.
The instructions provided below presume an advanced working knowledge of Breakroom. Please consult our documentation if you need help installing and positioning virtual objects or editing the RoomFurniture component.
To edit the Breakroom Info Kiosk collider zone, follow these steps:
- Open the Region Editor by clicking the Edit Region button in the top toolbar.
- Locate the Breakroom Info Kiosk object you want to edit. Click on it to highlight it in the Objects window.
- In the Objects window, click the > arrow to the left of the Breakroom Teleport Portal object to expand it. Then click on the Collider component.
- Using the Region Editor tools or the Transform component, move, rotate, and resize the collider to meet your specifications.
- When you are satisfied, click the Save button to store your changes.