Installing Breakroom for Training
Overview
The Breakroom for Training system is designed to support online learning through the streamlined management of educational content. World Owners and other stakeholders can create student- or instructor-led courses consisting of structured learning modules, waivers, and quizzes, and integrate these touchpoints into live online instruction.
This section will discuss the creation and management of Breakroom for Training courses on the backend. For more information about interacting with the Breakroom for Training system as a student or administering courses as an Instructor, please see our Getting Started section.
Only World Owners and World Administrators can access the Dashboard.
Installing the Breakroom LMS Core in a Region
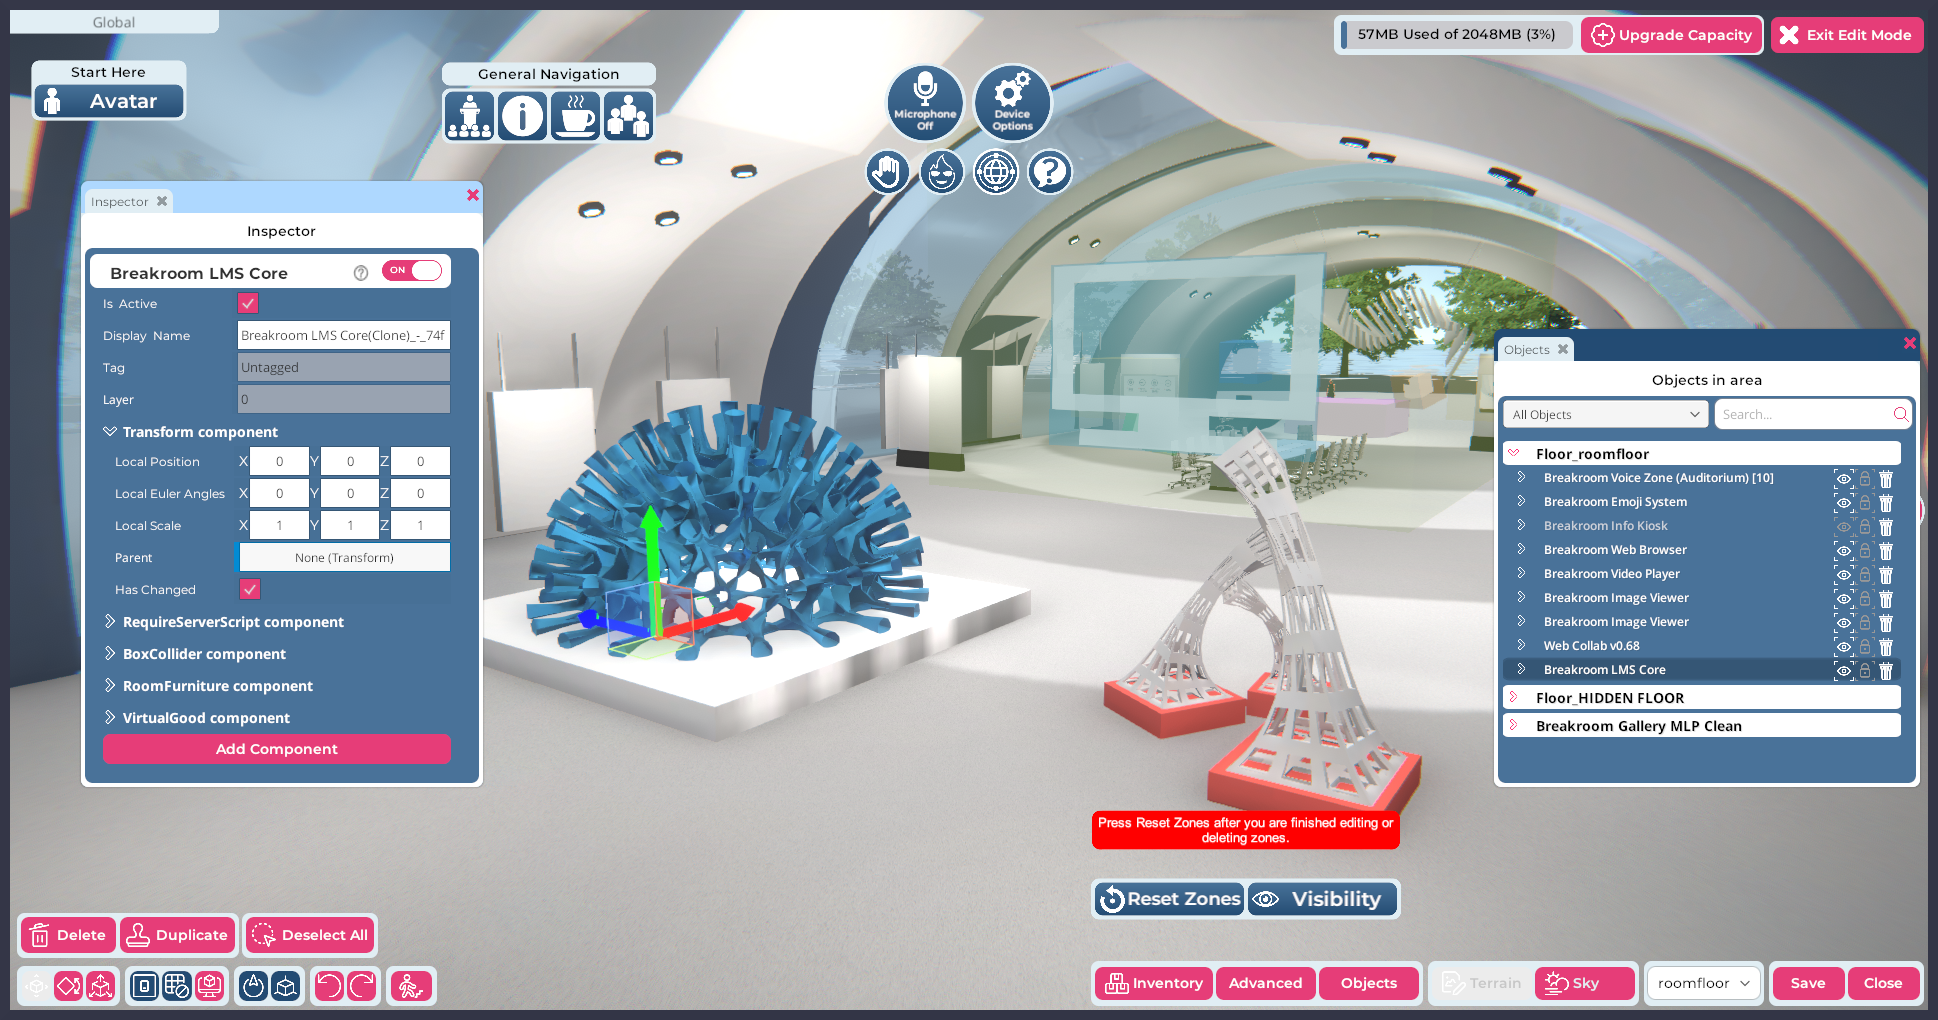
Pictured: The Region Editor, with the Breakroom LMS Core object highlighted in the Objects window.
In order for the Breakroom for Training system to work, you must have the Breakroom conference core components installed in the same Region. If you have uploaded a custom Region, you will need to install these components manually before the LMS can be added.
In order to use the Breakroom for Training system, you'll need to install the Breakroom LMS Core object in one or more Regions. This object can be found in the Breakroom Toolkit.
You can find more information on using the Region Editor in our Creating Custom Experiences section. Quick-start steps are provided below for your convenience.
- Open the Region Editor by clicking the Edit Region button located in the bottom toolbar.
- Click the Inventory button in the bottom right toolbar.
- Search for the Breakroom LMS Core object in your Inventory, and drag the item into your Region.
- The Breakroom LMS Core object can be located anywhere in your Region. For convenience and consistency, we encourage you to locate it at 0,0,0 in your Region by manually editing the Transform component.
- Click the Save button to store your changes, and the Close button to exit the Region Editor.
Once the Breakroom LMS Core object is installed, any visitors to the Region will be able to interact with available course materials as either students or Instructors. You can also elect to autoload a student-led syllabus in any Region.
Additional customization options
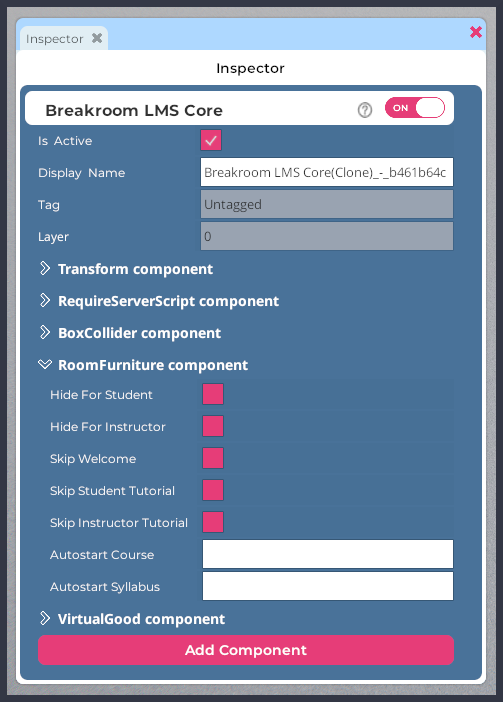
Pictured: The Inspector window for hte Breakroom LMS Core object, with the RoomFurniture component expanded.
There are additional customization options available under the RoomFurniture component attached to the Breakroom LMS Core object. The instructions provided below presume an advanced working knowledge of Breakroom. Please consult our documentation if you need help installing and positioning virtual objects, or editing the RoomFurniture component.
To locate and customize the LMS options, follow these steps.
- Navigate your avatar to the Region containing the Breakroom LMS Core object you want to edit.
- Open the Region Editor by clicking the Edit Region button located in the bottom toolbar.
- Click the Objects Button to launch the Objects window.
- In the Objects window, search for the Breakroom LMS Core object. Click on it in order to highlight it. The Inspector window will launch for that object.
- In the Inspector window, click the > arrow located to the left of the RoomFurniture component.
Here is a quickstart guide to the options contained under the RoomFurniture component.
| RoomFurniture component option | Purpose or effect |
|---|---|
| Hide For Student | If checked, this option hides the LMS widget from all students in the Region. |
| Hide For Instructor | If checked, this option hides the LMS widget from all Instructors in the Region. |
| Skip Welcome | If checked, this option disables the "Welcome to [Region]" pop-up box that appears upon entering the Region. |
| Skip Student Tutorial | If checked, this option disables the mini widget tutorial for students. |
| Skip Instructor Tutorial | If checked, this option disables the mini widget tutorial for Instructors. |
| Autostart Course | This option, combined with the field below, allows you to autorun a student-led syllabus in your Region. |
| Autostart Syllabus | This option, combined with the field above, allows you to autorun a student-led syllabus in your Region. |
Once you're satisfied, click the Save button to store your changes and the Close button to exit the Region Editor.