Crowd management
Overview

Highlighted: The location of the Crowd management button.
The Crowd Management button (highlighted above) gives Moderators the ability to teleport one or more users between different areas in the same Region. Moderators can also control user access to voice chat on a zone-by-zone basis.
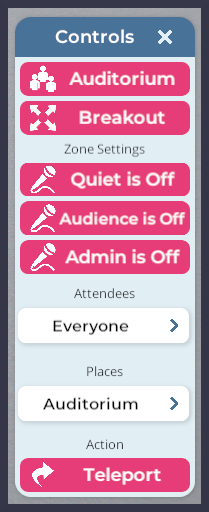
After accessing the moderator tools, click the Crowd Management button in the panel that appears on the right-hand side. This will open the Crowd Management panel. A quick rundown of the UI will be helpful before we discuss specific use cases.
| Button or UI component | Function |
| Auditorium button | All users in the Region will be invited to teleport to the Auditorium. |
| Breakout button | All users in the Region will be teleported to a breakout area. |
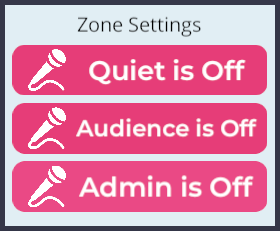
| Quiet is On/Off button | Mutes or unmutes audience voice chat within the current voice zone. |
| Audience is On/Off button | Controls whether audience members have access to presentation tools in the current voice zone. |
| Admin is On/Off button | Controls whether Administrative staff members can override mute settings in the current voice zone. |
| Attendees button | Opens the attendee selection menu. |
| Places button | Opens the places selection menu. |
| Action/Teleport button | Completes your teleportation command, sending everyone (or a single individual) to the location of your choice. |
Teleporting users
Breakroom's moderator tools offer both broad and granular options for Regional crowd management.
The Auditorium button
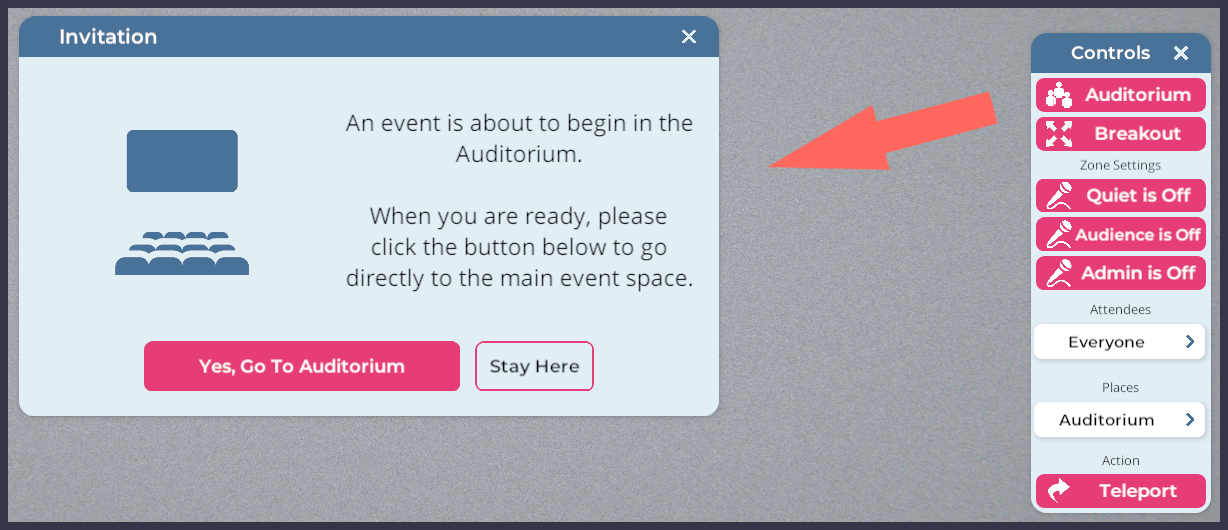
Pictured: The moderator tools > Crowd Management panel, and the Auditorium teleport invitation.
Clicking the Crowd Management > Auditorium button will invite every user in the Region to gather in that Region's designated Auditorium space. Users will then have the option to accept or decline the invitation.
The Breakout button

Clicking the Crowd Management > Breakout button will teleport every user in the Region to a breakout area. Users will be randomly distributed between the Region's active breakout areas, and will not be presented with the option to decline the teleportation order.
Custom teleport options
Using the Crowd Management panel, you can teleport groups or individuals between areas in your Region. Users will not be presented with the option to decline your custom teleportation orders, and will be moved automatically to the area you specify.
Executing a custom teleport is a multi-stage process consisting of selecting attendees, selecting a destination, and then executing the teleport command. To get started, follow these steps.
Selecting attendees
- Navigate your avatar to the Region where you want to move your users.
- Click the Moderator tools/Key button located on the right side of the screen.
- Click the Crowd Management button.
- Click the Attendees button. In the Select User to Teleport panel that appears, select either:
- Everyone
- A single named user
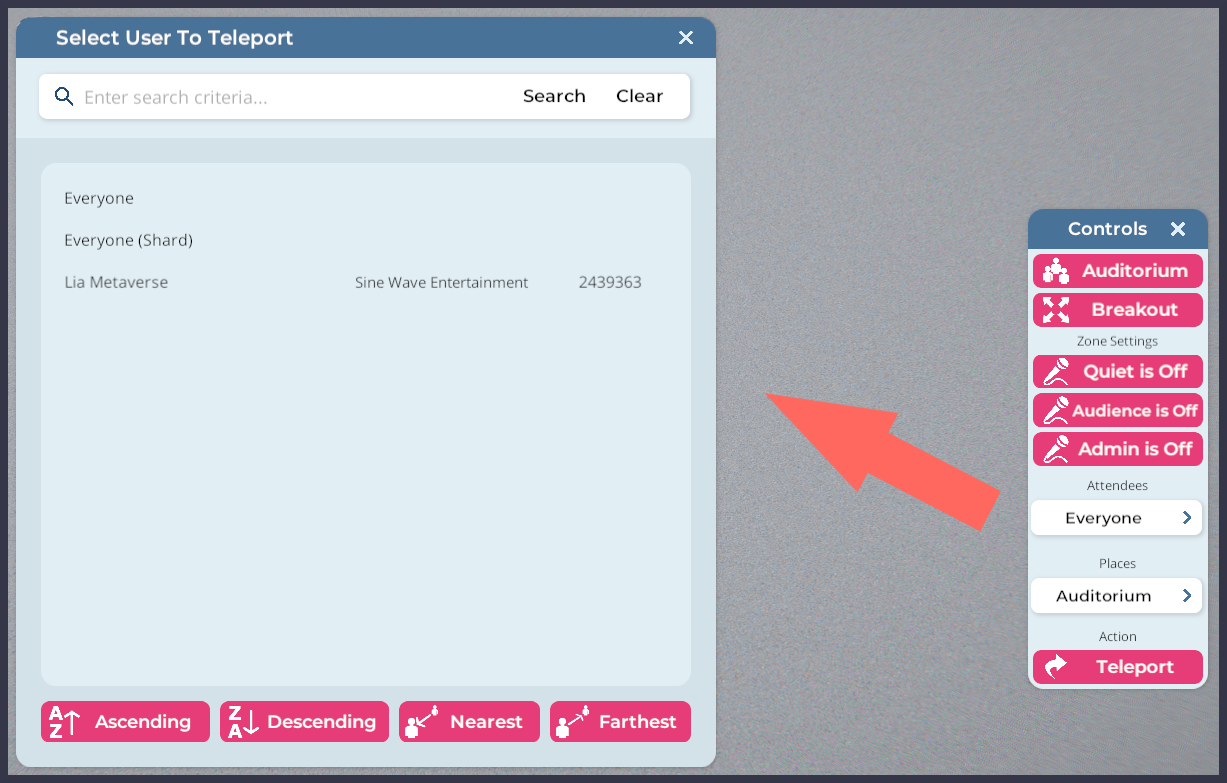
Pictured: The moderator tools > Crowd Management panel, and the Select User to Teleport panel.
Before we move on, it's important to note that the Select User to Teleport panel provides a number of search and sort functions to help you navigate long attendee lists. Here is a brief overview of the UI.
| Button or UI component | Function |
| User search field | Allows you to search for a specific user. |
| AZ↑ Ascending button | Sorts the user menu in alphabetical order. |
| ZA↓ Descending button | Sorts the user menu in reverse alphabetical order. |
| Nearest proximity button | Sorts the user menu by users closest to the Moderator. |
| Farthest proximity button | Sorts the user menu by users farthest away from the Moderator. |
Selecting a destination
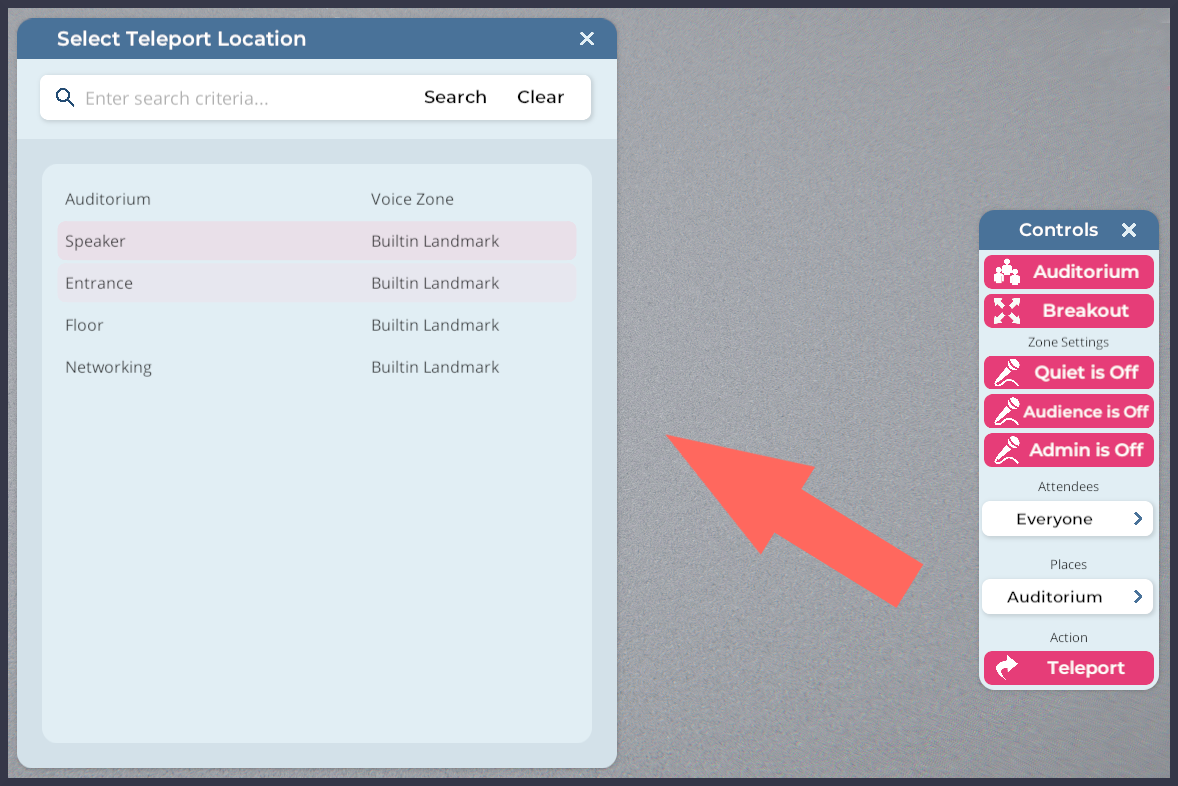
Pictured: The moderator tools > Crowd Management panel, and the Select Teleport Location panel.
After you select who you want to teleport, you'll need to select where you want to send them. To continue building your custom teleport command, follow these steps.
- Click the Places button.
- In the Select Teleport Location panel that appears, click on your teleport destination.
Multi-zone landmarks
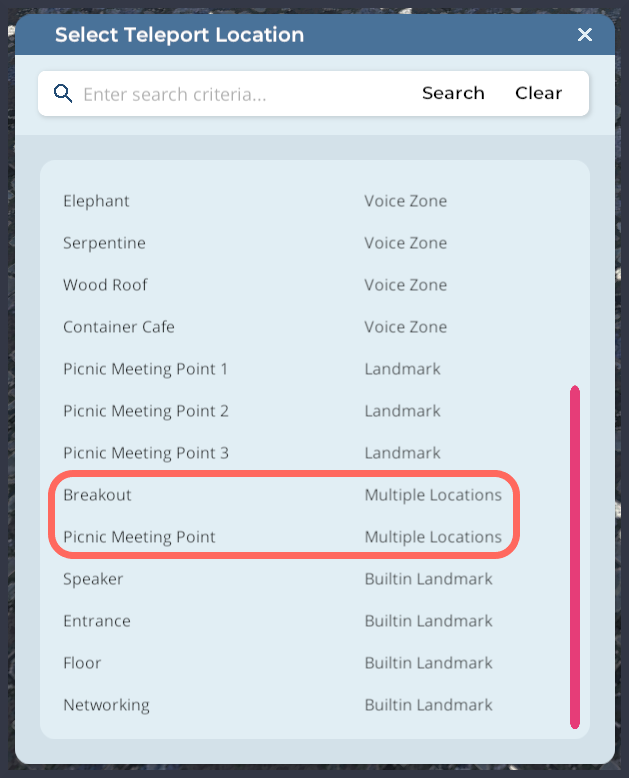
Highlighted: Multi-zone landmark options in the Crowd Management panel.
Teleport targets labeled multiple locations can be employed to teleport a crowd of users, with that crowd then being broken up and distributed randomly between the associated landmarks.
In the highlighted example above, choosing either Breakout or Picnic Meeting Point will randomly distribute the chosen users between all points labeled Breakout or Picnic Meeting Point. These points can be breakout areas, voice zones, or Breakroom Landmark objects.
Finalizing your custom teleport command
After you've selected the users you want to move and their destination, you can finalize your custom teleport command by clicking the Teleport button. If you are teleporting everyone in the Region, click the "Yes, I mean everyone" button in the dialog box that appears.
Controlling access to voice chat and media sharing
Using the Crowd Management panel, Moderators can permit or restrict access to voice chat, webcam streaming, and screen sharing on a zone-by-zone basis.
In detail, these zone settings are:
- Quiet Mode: When turned on, Quiet Mode will mute every user who is not currently seated on a presenter seat. In voice zone types that do not include presenter seats, turning on Quiet Mode will mute all users.
- Audience Mode: When turned on, Audience Mode grants users access to all enabled communication options in that voice zone (e.g., voice chat, webcam, and screen share). Audience Mode overrides Quiet Mode, if Quiet Mode is also turned on.
- Admin Mode: When turned on, Admin Mode permits Moderators to access all enabled communication options in that voice zone (e.g., voice chat, webcam, and screen share). Admin Mode overrides Quiet Mode.
To customize a voice zone's communication settings, follow the steps below.
- Navigate your avatar to the appropriate Region.
- Position your avatar inside the voice zone that you want to customize.
- Click the Moderator tools/Key button located on the right side of the screen.
- Click the Crowd Management button. In the Crowd Management panel that appears, locate the Zone Settings section.
- Click the relevant buttons to customize the voice zone.
- If a button says Quiet/Audience/Admin is On, then that communication setting is currently enabled. Click the button again to disable it.
- If the button says Quiet/Audience/Admin is Off, then that communication setting is currently disabled. Click the button again to enable it.
- Repeat this process for every voice zone you want to customize.
Muting and banning users
For more information about muting and banning users on a Region-wide level, please see our Building New Worlds section.